| HOOD FIX |
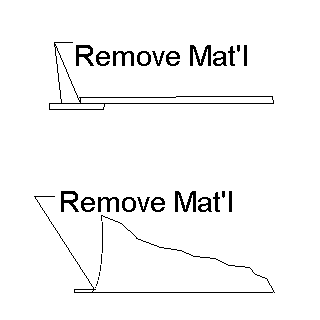
| Okay the first thing that needs to be done is to correct the fit of the hood to the body. There are two problems in all the kits I had. The first was that the hood did not fit centered in the opening, and the second was the hood was twisted so that it would not sit down properly. To correct the first problem was the most tricky. The problem area is near the little tabs at the rear corners of the hood that act as hinges to allow the hood to raise and lower. Refer to the diagram below. Using a triangular hobby file you need to carefully under cut the little fillet of material as indicated and remove some material off the top of each tab. Also you need to remove some material off the rear corners of each backside of the hood to have th correct curve at the back of the hood. 
Once you do this you need to carefully twist the hood to allow it to sit properly on the body with no coaxing. You may need to fiddle with the little areas with the file until you get the hood to fit centered in the opening and sit properly. You are removing very little material here so be careful. When done correctly, the hood will hinge properly and close correctly. |