If you reached this page you are watching a working in progress. You will have to check for the knot instruction back on my other pages for instructions on the knots.
I used 642 yards of cord to make this project, so far. I also
used a 4 inch ring, 1 - 10 inch ring, 2 - 14 inch rings and a 27 inch ring.
Since it's not completed these figures can change as I work on it.
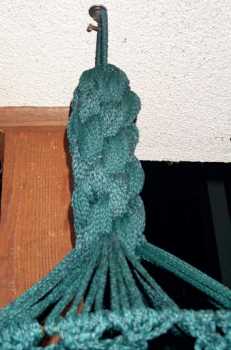
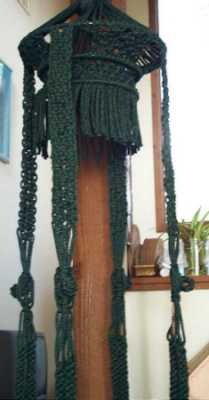
Step 1: Wrap a 4 inch ring with 2 yards of cord and secure with a square knot.
Step 2: Cut 32 cords 6 yards long, divide into 4 groups of 16 each. Butterfly the cords for easier working, and tie 10 crown knots.
Step 3: Skip down 8 inches and double half hitch onto a 14 inch ring there will be room between the groups on the ring you will add more cords to this later.
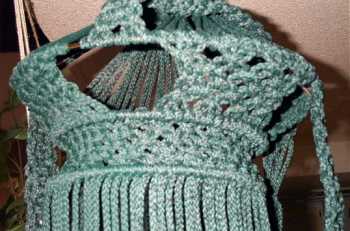
Step 4: With the 4 groups of 16 cords tie 5 rows of alternating square knots. With each group of cords.
Step 5: Double half hitch onto a 10 inch ring.
Step 6: Cut 8 cords 1 yard long. Using a larkshead knot, add 2 cords of 1 yard each between the gaps on the 10 inch ring.
Step 7: Tie 5 rows of alternating square knots.
Step 8: Double half hitch onto 10 inch ring.
Step 9: Trim the cords to 3 or 5 inches below the ring, This is the lamp shade for the lamp that will go in the top of the table.
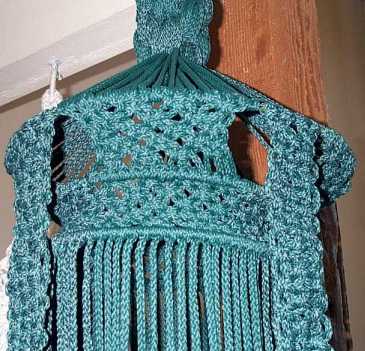
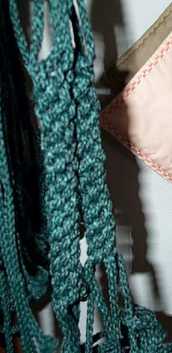
Step 10: Now back up to the 14 inch ring. Cut 16 cords 10 yards long and larkshead them in groups of four cords onto the 14 inch ring. This will make 4 new groups of 8 cords each. Butterfly the cords for easier working.
Step 11: I used a 15 foot piece of lamp wire and start holding it as a filler cord on one side so that I didn't have to feed the wire later. Tie 18 inches of alternating square knots with each group.
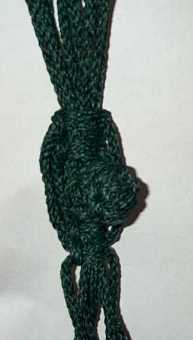
Step 12: Skip down 5 inches and tie 5 square knots, do not put the lamp wire in these knots. Make into a square knot button. And with the knot that secures the square knot button, add the wire in back. Now tie 5 square knots, after making a each Square knot button and securing it, rotate work by 180 degrees and make one square knot with outer cords. Rotate again, back to original position and make one square knot below the securing square knot. Repeat this until you have three square knots at the bottom of your work, making sure the cords go out around the previous ones to form a Lee Medallion. When this is complete there will be about 3 inches between the alternating knots and the Lee Medallion.

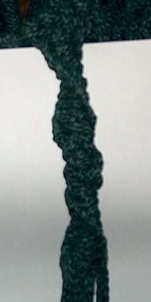
Step 13: Skip down 3 inches and divide each group into two groups of 4 cords and tie 15 inches of crown knots. Be sure to put the lamp wire in the center as a filler cord in the one group, I discovered that I had to add 3 inches to the crown knots covering the wire, they do not give like normal crown knots with the wire inside as filler.

Step 14: Find the two longest cords and use them as the working cords. Tie 5 inches of half knots making each sennet twist opposite direction than that of the other. Don't forget to use the wire as filler in one of these groups of cords.
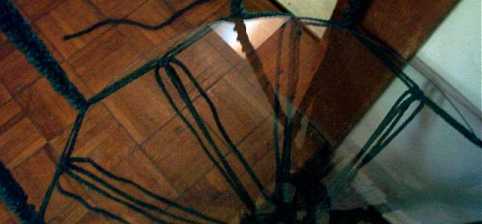
Step 15: Between each half knot sennet skip down and tie a square knot to secure the glass top of the table. It will be different between the sennets of the same section. I measured 6 inches between the sennets of the same section and 14 inches between the sections. This changes with the size of glass I hope to be using a 27 inch piece. When testing for the glass, I discovered that I had to go back and add 3 inches to the crown knots covering the wire, they do not give like normal crown knots. And for it to be level when the glass is in place this needed to be done.
Step 16: Cut 144 cords 2 yards long. Add 48 - 2 yard cords; 6 - 2 yard cords on each side of the square knot and the cords from the half knot sennet, using a lark's head knot. Then, add 96 - 2 yards cords; 12 - 2 yard cords between the sennets and the other square knot, using a lark's head knot.
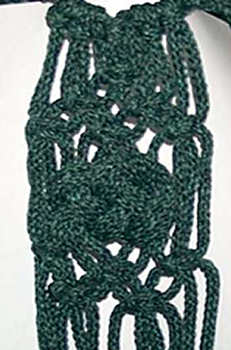
Step 17: Make "panels" with twelve cords, starting at the square knot as the middle of the twelve cords, number the cords left to right. Between each panel of twelve cords there will be 8 cords, that will be done in step 18. With each panel of 12 cords numbered left to right 1 to 12. Make the panel as follows: Tie a square knot with cords 5 - 8, alternate, tie a square knot with cords, 3 - 6 and another with 7 - 10. Alternate the cords, tie a square knot with 1 - 4; 5 - 8; and 9 - 12. Using cords 4,5&6 with cords 7,8&9 tie a flat Josephine knots. Directly below that knots tie a square knot with 1 - 4; 5 - 8; and 9 - 12. Alternate, tie a square knot with cords, 3 - 6 and another with 7 - 10. This will complete one panel.
Step 18: With the cords between each panel, using the longest cords as the working cords, tie 9 half knots to make a sennet, move down about 1/2" and again using the longest cords, and this will change cords, tie a square knot, moving down another 1/2" and using the longest cords, changing working cords again, tie 9 half knots to make another sennet.
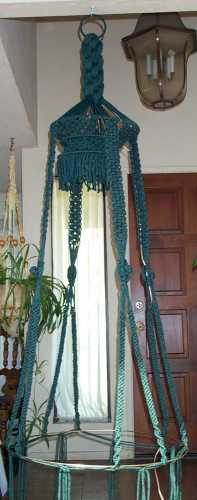
Step 19: Next add the ring to complete the knotting of the project. I used a 27" ring and tied it on with a figure 8 knot.
Step 20: Trim the cords around the ring, how long you trim them will depend on the length wanted for the table. Mine is about 4 1/2" long below the ring.
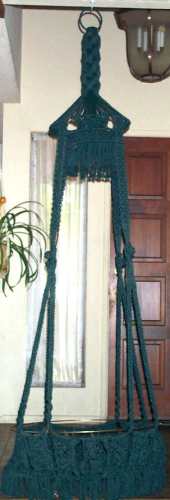
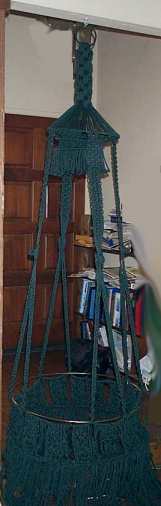
Step 21: Now you will need to put the glass on the table and add the lamp and switch for the lamp. As it hangs now it is 88 inches or 7 foot 4 inches long.
Since this project is not done, changes might be made, and as they are I will correct the instructions, as I go.
Thanks and Good Knotting! tses
Projects for you to make found on our web site.
|
|
|||||
|
|
|||||
|
|
This page copyright © 1997-2003 tses
Last updated 9 /7/2003