
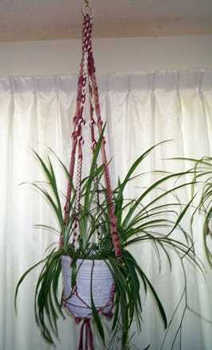
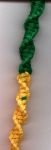
This is a picture of this hanger, which is shades mauve and white cord.
To estimate the yardage of a hanger, allow four times the finished length desired, DOUBLED. For Example finished length equals 56. 4 x finished length DOUBLED equals 12 1/2 yards Total number of cords used 16, so you would cut eight 12 1/2 yard cords. To make a 56" hanger you will need 101 yards of cord.
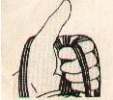
Step 1: Cut a 1 yard cord ( I used the white cord) and start with a 2 1/2 inch ring and wrap it with that cord and tie it tightly when the ends meet, with a square knot . The ends will be hidden in the loop. Which will hold it in place.
Step 2: Cut 8 cords 12.5 yards long, I used two cords each of the color. Fold the 8 cords over ring and Butterfly the 16 cords and fasten each with a rubber band to make working with the long cords easier. Divide the cords into groups of 2 ( I kept the colors together on this knot) and make 5 inches of crown knots. The cords left over from the ring will be in the center and not used in the crown knot, if there is any cords left in the center when crown knots are finished cut off the ends, flush with the bottom of the crown knots.
Step 3: Divide the cords in groups of four. With each group of four cords, using the center 2 cords as filler cords tie 3 1/2 inches of half knots, they twist left or right depending which cord is overlapping. It will automatically twist when the proper number are made.
Step 4: Using the filler cord from last knots to start, move down 1 inches and tie 5 inches of reversing square knots, leaving 1/2 inch space between each knot.
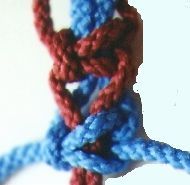
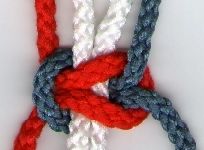
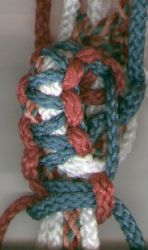
Step 5: Moving down 1 inches, divide cords in 2 groups of 2 cords each, I kept the colors together for these two knots. With each group tie 2 Josephine knots. Leaving 1 1/2 inches between them.
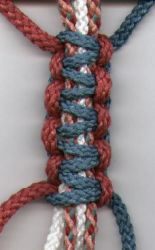
Step 6: Moving down 1 inch, tie a square knot and then, tie 6 inches of lanyard knots, keeping the colors on each side separate.
Step 7: Then moving down 1 1/2 inches, using two working cords, and two filler cords tie a three square knot button.
Step 8: Moving down 1 inch, divide the cords into 2 groups of 2 cords. Tie 5 inches of Alternating double half hitch knots in each group of cords, again I kept the colors together for these.
Step 9: Move down 1 inches and tie 5 inches of reversing square knots, leaving no space between the knots.
Step 10: TO FORM A BASKET: Skip down 4 inches and tie a Josephine knot. Skip down 4 inches and tie a row of square knot buttons. This is where you might have to adjust the distance between your knots, so the pot you are going to use, will fit into the basket you are making for it.
Step 10: Using the 2 longest cords skip 3 inches and tie 3 square knots around all the other cords. Make sure they are snug. Trim tail. You can unbraid and comb it or leave it alone.
Knot instructions:
Alternating Double Half Hitch Knots
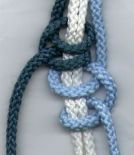
First the left cord goes around the two center cords and back through itself, then around again. Then the right cord goes around the two center cords and back through itself, then goes around again. At left shown loosely tied and at right tightened.
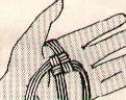
Start with the end of the cord and make a figure eight around the thumb and little finger. Butterfly the cord ends leaving 18" free to work with. Grasp the center of the butterfly and slide off your hand. Place a rubber band or a piece of cord around the center to secure it. A gentle pull will release cord as it is needed. HINT: Start from the work and go to the end, so it will not tangle!

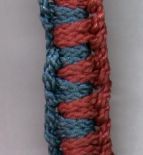
This is also called Chinese Crown Knot. TO MAKE CROWN KNOTS: These are made by holding the cords upside down, and separating the cords into 4 equal groups, numbered counter clockwise. Put one group behind the thumb, this will be group #1. Pick up group #1 and lay over group #2. Drop group #1 as you pick up group # 2. Lay #2 over #3 Drop #2 and pick up #3. Lay over #3 over #4. Drop #3 and pick up #4. Take #4 over the top and put down directly through the hole where your thumb is. Remove your thumb and tighten each group separately.
With each group of four cords using the center 2 cords as filler cords tie half knots, they twist left or right depending which cord is overlapping. It will automatically twist when the proper number are made.


With each group of four cords using the left 2 cords form a loop with the end wrapping around to the back. With other 2 cords go down over the loop and back around and up over and back down and through the top of this cord and through the back. Tighten and shape the knot.

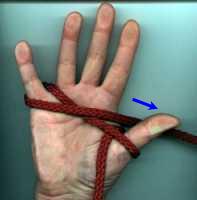
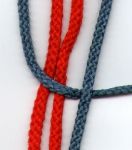
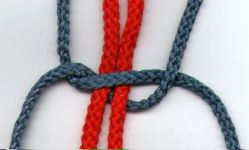
This is also called a Chinese Crown Flat knot. It is similar to the crown knot. Starting with the cord on the left make a loop over your thumb and over the other cords, working clockwise loop each cord over the next, and bring the fourth cord through the hole where your thumb is and remove your thumb. Tighten each cord separately, to form a square.
Using the outer cords as working cords and inner cords as the core cords. Place working cord to the left over core cords and under working cord on right. Place working cords on right under core cords and up through loop in left working cord. Place Left working cord over core cords and under Right working cord. Place Right working cord under core cords and through loop in Left working cord. Tighten cords. Now using inner cords as working cords and outer cords as core cords create reversing square knot.
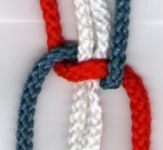
Using the outer cords as working cords and inner cords as the core cords. Place working cord to the left over core cords and under working cord on right. Place working cords on right under core cords and up through loop in left working cord. Place Left working cord over core cords and under Right working cord. Place Right working cord under core cords and through loop in Left working cord. Tighten cords.


Tie three square knots. Take the filler cords and thread them between the center of the filler cords at the top above the first square knot. Pull ends until it forms a ball. Tie a square knot directly under the button to secure it. Shown above is a 5 square knot button.
More Projects for you to make can be found on our web site.
|
|
|||||
|
|
|||||
|
|
This page copyright © 1997-2003 tses
Last updated 9 /7/2003


Good Knotting!!!
