|
|
Drive Power Connectors
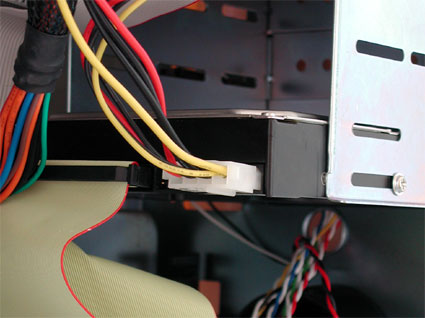
Power supplies are fitted with at least five plugs for delivering power to the drives. If you need more than this, consider buying one or more splitter cables. A splitter cable provides two connectors from a single one. The corners of the plugs and sockets are keyed to ensure correct polarity. Floppy drives have smaller plugs, which are easily recognized among the cables coming from the power supply. Finally, there is the large ATX plug that plugs into the power socket on the motherboard. ATX12 or P6 should be connected where required. The latter provides extra power for power-hungry processors. Front Panel Connections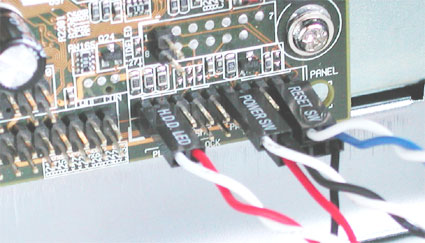 Front panel connections: HDD LED (hard disk light), power (on/ off) switch and RESET switch in the top row. Below: mini speaker. All motherboards group the pins that provide front panel functions at the bottom right of the board. You should find these described in the handbook that came with your motherboard. The abbreviations printed on the board itself are not particularly helpful for beginners, who may find the following short explanation of the abbreviations useful.
Don't worry about polarity. The Reset and On/ Off switch will work no matter how they are connected, but the LEDs will not light up if they are connected in reverse polarity. If you can hear disk activity but the LED does not light, simply reverse the plug. Final CheckCongratulations - you've done it! You have fitted and connected all components. Before you boot your new computer for the first time, recheck everything. It is very easy to overlook something obvious. Consider the following:
Once you have checked all of the above, you can start your PC and install your operating system. |
|