
Pro Football Restoration- Page 3On April 11, I recieved the new playfield and backglass. Following is the process of and pictures of finally getting this machine fully restored.Note: All shots of playfield taken without glass to avoid reflection.
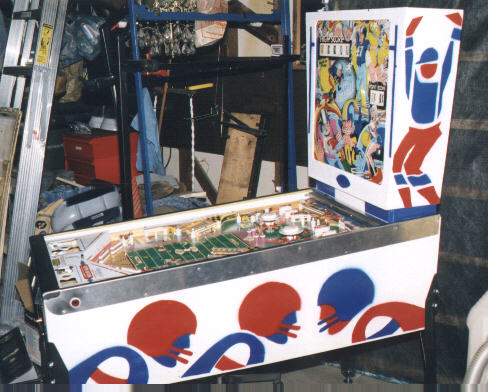
Here is an overall shot of the machine after it was completed. I was very pleased how it turned out after all my work!
|
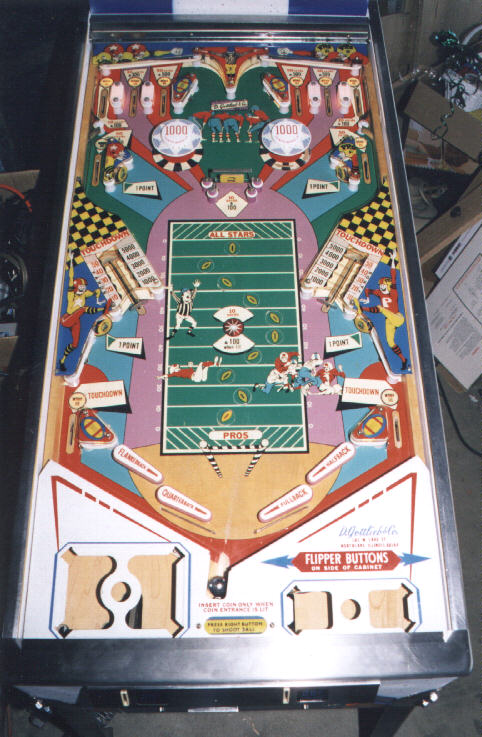 The new Playfield
The first thing I did was pull all the playfield posts and plastics and card holder off and give it a good wipe down and waxing. Then I reassembled the playfield using new plastic posts and ball guides and rubber rings ordered from Pinball Resource.
The new playfield had some coils and switches missing. I had gone through the old playfield and had it restored mechanically (see Pro Football Restoration Pages 1 & 2), so that when I got the new playfield, if needed, I could just transfer over the parts needed. April 11: I transferred over the ball launching mechanism, the 2 ball kickers, located next to the vari-targets, and the 2 vari-targets, and cleaned the switch contacts related to those systems that were not replaced. Also put all new light bulbs on top and underneath the playfield. April 12: Wired in the on/off switch. The switch is supposed to be mounted on the bottom front right of the cabinet, but the hot lead was run over to the left side and hooked to another wire that ran over to the right side. I decided to take this extra wire out. This involved cutting and unwrapping the wire binding twine, taking out the extra wire and feeding the hot lead over to the right side and rebinding the wires together and then saudering and mounting the switch in. Transferred over the pop bumpers, flippers, replaced the white flipper plastics, put the card holder back on and finally, put the plastic light shields on. April 13: Turned the machine on and fired it up. Everything was functional, but some of the roll-through lane switches and yellow bullseye targets need adjusting and cleaning as well as a slight adjustment to the trigger switches on the pop bumpers. April 15: Went to the copy shop and had the reproduction stickers for the flipper labels made. I put these on that night. They are peel and stick. Applied them and trimmed them with an Xacto knife.
Started working on cleaning and adjusting the roll-through lanes and other misc. switches.
|
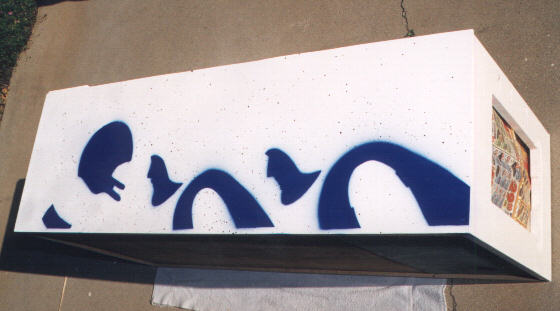 The New Cabinet
April 22: I cut out most of the pieces needed to build the new cabinet: Sides and back & front of body, top, bottom & sides of backbox. I took the machine out to the garage and took all the internals out of the cabinet body and unmounted the front door and other hardware. The front panel was only held on by 2 L brackets, and once I took these off, the front came right off. Once the front was off, I just used a little muscle, and the rest of the cabinet fell apart, it was in such bad shape. Also, earlier this week I ordered a new back door for the head, since I didn't have one. April 26: The body is assembled and a primer coat of paint sprayed on. I ran out of primer, so I cut out and did finishing cuts on the top & bottom & sides to the head and will assemble that tomorrow. Recieved the new back door and put new locks on the front and back doors. At the rate of my progress, I hope to paint the whole cabinet, including artwork, this weekend. April 27- 28: Assembled the head, painted the primer and base coat on the rest of the body and primed the head. April 29: Painted on the base coat, did the black speckling and stenciled the artwork onto one side of the body and one side of the head. April 30: Finished the head and put the internals and backglass back in. May 1: Finished the body and put the internals back in. May 2: The last thing left was to paint and assemble the pedestal- it is mounted to the body and the head sits on it. Finished the pedestal and mounted the head. Plugged everything together and fired up the machine. It is now fully functional in it's new cabinet. Tomorrow I will get a new playfield glass, and that will be the last thing to do.
|
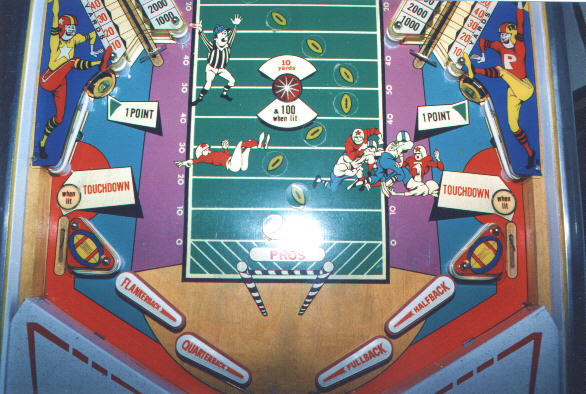 The New Cabinet
I took the machine to the Dixon Pin a Go-Go Show May 19-21. Except for a few minutes down time for a minor adjustment, it plugged it's way through about 100 games over the weekend!
Links to other pages:
|


