spring is for modding..
after having been on order since november 21st, 2006, my mapam side mount plate bracket finally came in at the end of march 2007. on april 14th, 2007, i started installing it to commence the cleanup on the rear fender (i didn't finish until the morning of april 15th - more about that below)
time: 1 hour
tools: all parts of plate bracket (as seen above), 14mm open-ended wrench, 10mm open-ended wrench, blue (semi-permanent) loctite, crescent wrench, large lock washer, about 3' of 16ga wire, an inline mini blade-type fuse holder with weatherproof boot, a 5amp mini blade fuse, crimp-on wire connectors, silicone sealant, zip ties, wire crimping tool
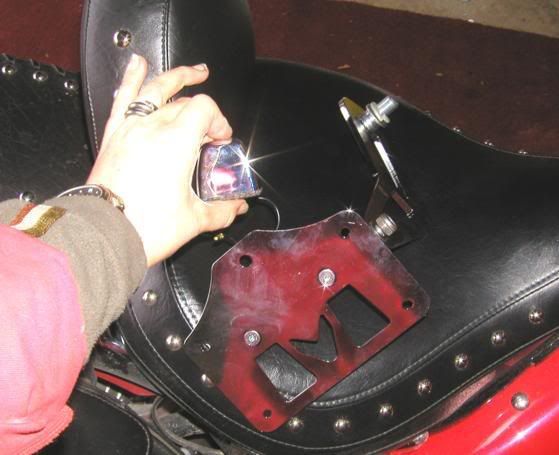
i started by bolting the light unit onto the top of the plate backing. the provided rubber washer goes between the light unit and the plate back, with the supplied flat washer between the bolt head and the plate bracket. ensuring that the wire for the light is pulled through the hollow bolt, tighten down using the 14mm open-ended wrench.
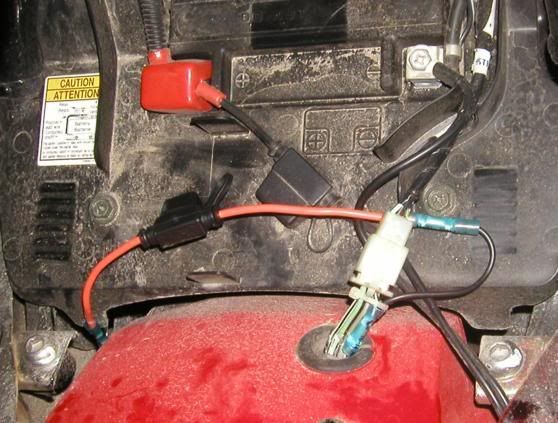
next i wired in my inline fuse holder under the saddle. the photo above shows my first attempt at wiring, where the fuse holder is connected to the bloody ground wire that goes to the taillight assembly. with the help of some volusiariders.com members, i finally put it together that i needed to tap into the brown wire on the bike side of that big white connector to get a 12v constant supply. we live and learn, don't we? but the setup looks essentially the same: brown wire to inline fuse holder, which connects to a piece of 16ga wire that runs down between the battery box and the rear fender rail to the final drive unit, then connects to the single wire on the light. this buggerup was why i didn't get finished until the next morning - i'd already replaced the drive chain on our cb400 and fully installed the bracket, but the light didn't work. i was tired and frustrated, and the temperature outside was dropping like a stone, so i decided i'd get more info and go at it fresh the next day
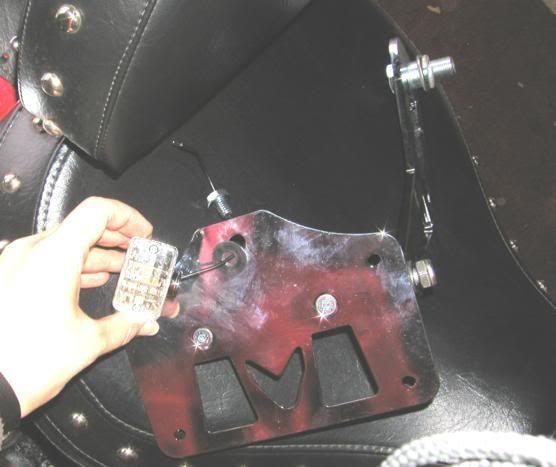
with the wire in place, i removed my saddlebag and used a 10mm open-ended wrench to attach my road krome plate frame and license plate to the plate backing with my faithful old skull krommets, and then used the 14mm open-ended wrench to attach the plate backing to the arm that attaches to the final drive unit. this assumes that the plate has already been removed from the bike.
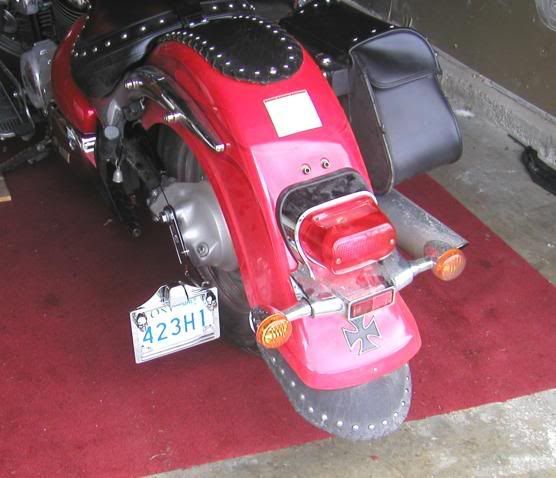
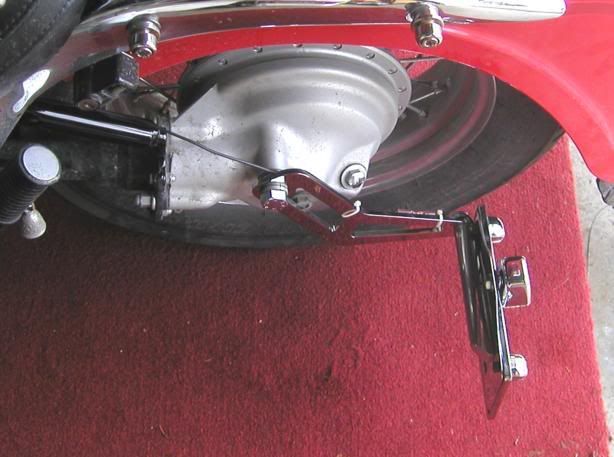
i then mounted the whole bracket to the final drive unit where the big ugly black bolt that held the fake swingarm on goes. because i have removed the fake swingarm, the supplied bolt is slightly longer than i needed, and i couldn't get it tight enough that the bracket wouldn't move. so, i use a large (approx. 3/4" inside diameter) lock washer, which i figured would not only take up the space but also provide some security to prevent the bracket from moving.
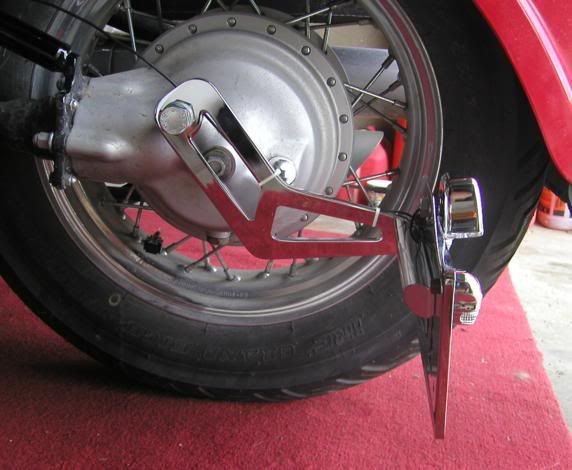
i had to measure carefully to position the arm just right - i need clearance between the light and my saddlebags, as the fender and final drive unit move independently when the suspension is compressed, but also needed more clearance between the ground and the outside bottom corner of the plate frame than there is between the feeler nuts under the floorboards and the ground (to make sure i wouldn't grind off a corner of my plate frame when making a hard left turn). when i had it positioned to my satisfaction, i applied loctite to the threads of the bolt, installed the supplied flat washer against the final drive unit, then put on the supplied spacer, the bracket arm, then the lock washer and bolt. i tightened it down as much as possible - even got tanker to crank on it for extra snugness - with the crescent wrench. i simply don't have any other wrenches that would accomodate the >1" bolt!
with the bracket fully installed, i could now cut my 16ga wire to the correct length to attach to the single wire on the light. i cut off the pre-installed bullet connector and used a tube-type crimp on connector which i had been told was heat shrinkable, but didn't turn out to be. once the connector was crimped on, and i discovered it wouldn't heat shrink, i used a dab of clear silicone sealant at each end to prevent moisture and grime from getting inside. i also zip tied the wiring to the bracket arm in 2 places, then placed another zip tie where the frame meets the final drive unit, and one more under the fender rail. i left some slack in the wire, so that movement of the swingarm won't put tension on it that could snap the wire or break a connection.
then i set to work with a credit card, some wd40 and some goo-gone to remove that damn warning sticker on the rear fender!
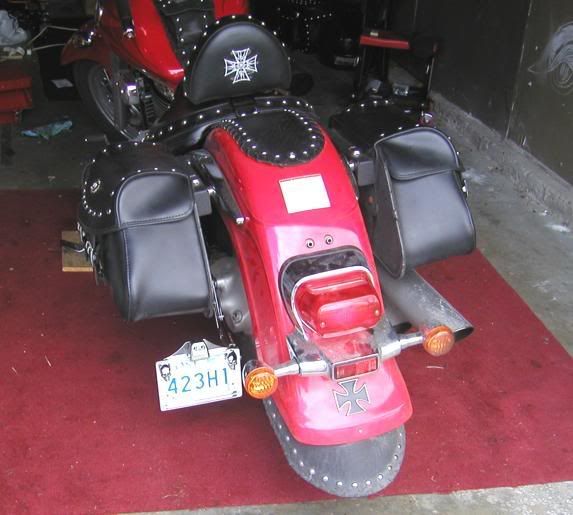
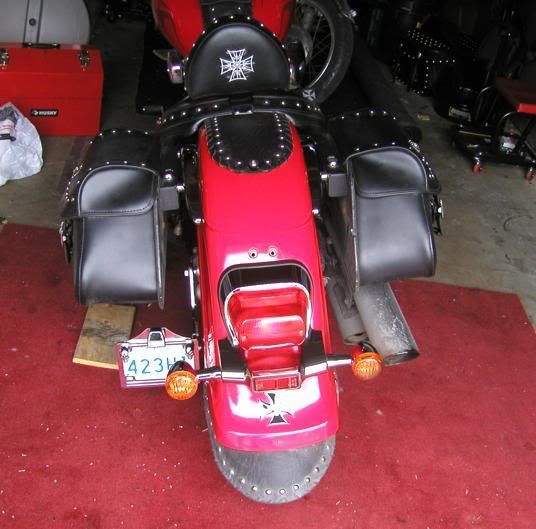
i'm pretty pleased with the results, and have sucessfully test-ridden with the bracket on. the light works (now that i've got it hooked into the right wire ;) with no interruptions, and i haven't grounded out the plate frame yet. i know it looks kinda dumb with the collars for the stock license plate mount still in place, but i will have to remove the rear fender soon anyway to install my iron cross taillight once i get my turn signals, so i'll take them out then.
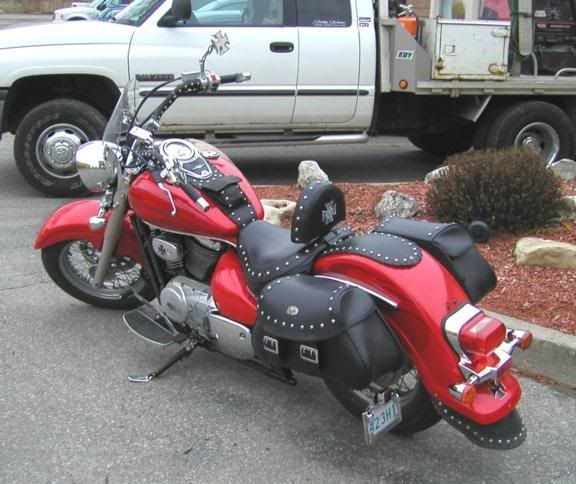
(finally got a photo of the whole bike on april 17th, 2007 - doesn't look too shabby!)
cheers!
-mistress k
go to page 1 - or - go to page 2 - or - go to page 3 - or - go to page 4 - or - go to page 5 - or - go to page 6 - or - go to page 7 - or - go to tanker's mods

