page 4 of mod madness..
on friday, july 7th, 2006 my lowering bones came in from john at john's kits, and i decided to get right after it!

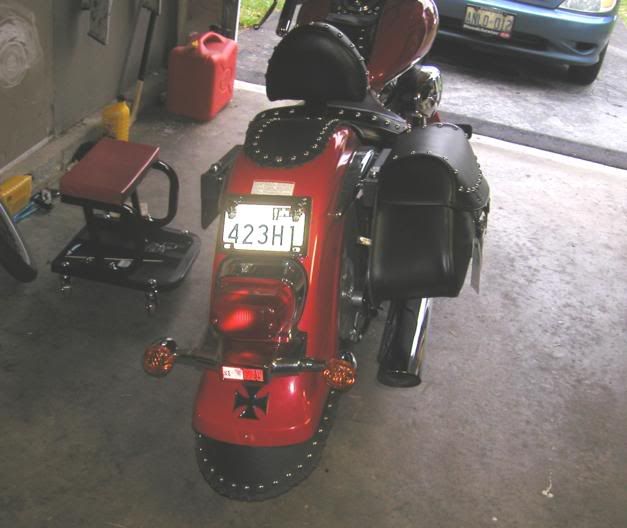
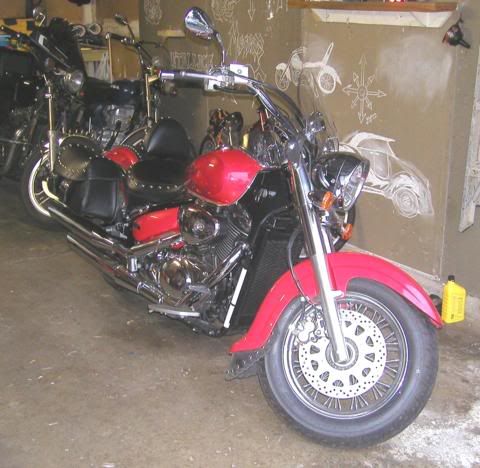
here she is before lowering. looks nice, but i'd like the position of the rear mudflap a little lower, closer to the position of the front one.

so we start pulling pieces off, beginning with the sidecover and tool box.
time: 2 minutes
tools needed: ignition key, phillips screwdriver
instructions: unlock cover using key. once unlocked, pull forward mounting post out (front top corner of cover), then firmly pull down and out at the top rear corner of the cover to release rear mounting post from rubber grommet. set aside cover. unlatch plastic clip at top front of toolbox, then pull outward and up to remove and set aside. remove all contents and set aside. remove lower frame cover at bottom rear of tool box by pulling firmly to get mounting posts out of rubber grommets (one top, one bottom) and set aside. use phillips screwdriver to remove one screw from inside tool box near top front, and one screw at top rear (just above lower frame cover's original position). set parts aside.

then remove the rear chrome case
time: 2 minutes
tools needed: 4mm hex key socket, ratchet, 6" extension bar
instructions: remove top front, bottom front and bottom rear allen bolts using ratchet and extension with 4mm hex key socket. the top rear bolt is fake! no need to touch it!. set case aside.

i also removed the right side cover and lower frame cover
time: 2 minutes
tools needed: 4mm hex key
instructions: remove allen bolt from top of right sidecover by the saddle with 4mm hex key. pull firmly away from the bike to remove mounting posts from rubber grommets (one front, one rear, i think..). set cover aside. then remove allen bolt from lower frame cover in behind pipes using 4mm hex key, and pulling firmly toward the pipes to un-mount posts from rubber grommets. once free, pull frame cover up and out, and set aside. i also removed the rear right side cover, for no good reason other than to see what it took and what was under there.

all nice and exposed on the right side now. just need to remove the strut on the left side that holds the electrical box in place
time: 2 minutes
tools needed: 12mm socket, 10mm socket, ratchet, 6" extension bar
instructions: remove the front bolt, which tends to hide behind some wiring, using the 10mm socket and ratchet. then remove the bottom rear bolt on the strut with the 12mm socket, followed by the top bolt (also 12mm socket). gently pull the electrical box out and set it down - there is no need to disconnect the wiring. sorry, i didn't get a good photo of this until much later!

this is tanker being a total bonehead, and looking like he's been possessed by the spirit of cletus the slack-jawed yokel. he's also going about removing the top bolt from the wrong side!
time: 15 minutes
tools needed: 17mm box wrench, 14mm box wrench, 17mm socket, 14mm socket, ratchet, breaker bar (or piece of pipe that slips over the ratchet handle), flat-headed screwdriver, bike jack, rubber mallet, bamboo skewer of the kebab persuasion
instructions: now we remove the stock bones! the first step is to get the jack under the bike, but don't raise it yet! simply position it under the frame, making sure that you are clear of the swingarm. now put a 14mm box wrench on the left (bolt) side of the top bolt on the stock bone, and if you're lucky enough to have a helper (it will be much easier if you do), have them get the 17mm socket on the right (nut) side of the top bolt and use the breaker bar and ratchet to loosen it off. this will take some doing! you'll notice that our piece of pipe is about 7' long, and even with that kind of torque it took tanker (aka operation brute force) some effort to crack 'er loose.
once you've got it loosened off, it's time to jack the bike up. raise it just until the rear wheel lifts off the ground and you can spin it freely.
now use your flat bladed screwdriver and mallet to "persuade" the top bolt to slide out towards the left side of the bike, being careful not to hit the collar it sits in. now you need to remove the bottom bolt. do the same thing again with the bike still up on the jack (do not lower it back down). to remove the bottom bolt once the nut is off (and due to the position, you'll likely have to use a 17mm box wrench to get the nut fully off), you will have to use the bamboo skewer (or other small item, like a hex key) to push the collar around the bottom bolt towards the right side of the bike. once you've got it out a bit, you can reach around and grab it from the right and pull it back manually. this will allow you to get the bolt out without hitting the frame. trust me - it works!

you can just see the new bone from the right side here
time: 10 minutes
tools needed: 14mm & 17mm box wrenches, 14mm & 17mm sockets, ratchet, loctite, new bones
instructions: to install the new bones, you essentially reverse the removal process for the stock bones. put the bottom bolt in first, then lower the bike on the jack until the new bones line up with the top holes. put the top bolt back in before you start tightening the bottom bolt, or the bones may shift and you'll have a devil of a time getting them lined up again. keeping in mind how hard they were to crack loose, i used blue (medium) loctite on the threads at the nut - don't want my arse end suddenly vibrating apart while riding! tighten everything down, making sure the bolt collars are centred back in the original position, and getting it all as tight as possible.

and here you can see the new bone on the left, with the removed strut and electrical box hanging down at the left of the photo
now we just need to slap all the covers back on (though i took the opportunity to clean each one with lemon pledge before reinstallation - call me anal retentive if you want to, but it was easier to clean them before putting them back on than doing so while they're on the bike), and we're done!

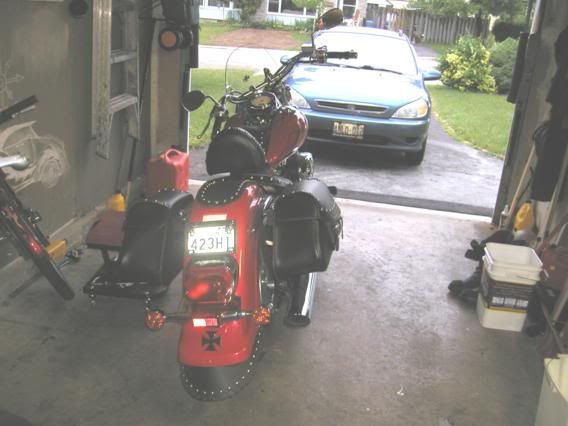
and here she is lowered - looks nice!

here's the direct comparison of the pre- and post- shots - 2" makes quite a difference!

and this photo was taken in port dover on july 9th - 100 mile ride in perfect comfort on my newly lowered ride! you can also see from this photo that i was likely much better off with the 2" bones (for my particular application) than the 2.5" or 3". the clearance is just enough, but she looks nice an low!
well, that's it for the moment...next mod will be easybracket installation with a set of auburn leathers lone star studded bags...can't wait!
i got the bags for my birthday (thanks mum & dad!) on july 17th, and the easy brackets came in from cruiser customizing on july the 20th. since it was raining anyway, i decided to get down to work!
first things first - replacing the fender bolts
time: 10 minutes
tools needed: the instructions say 8mm wrenches. they are wrong! you need a 6mm hex key, a 12mm box wrench, a 13mm box wrench, and a torque wrench capable of measuring 12 foot pounds.
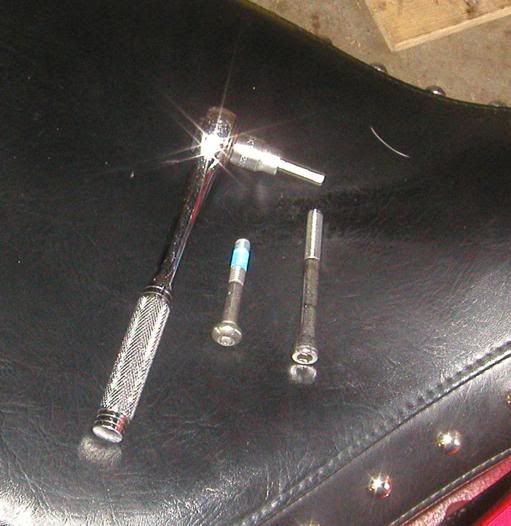
instructions: **REMOVE ONLY ONE FENDER BOLT AT A TIME**. as you can see above, i started with the front right fender bolt. the front fender bolts have nuts on the fender bracket that are welded in place - simply use the 6mm hex key to remove the bolt by threading it out. you will then replace it with the longer bolt supplied with the easy brackets. the photo below shows the size comparison - the left hand bolt is stock, the right hand bolt is supplied. the ratchet is shown for scale.
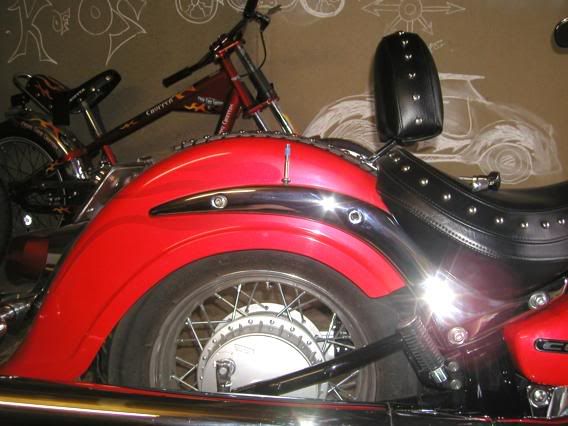
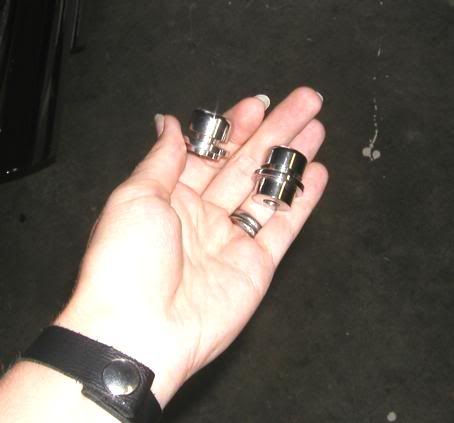
you will need to install the new bolt through the chrome docking post. the shorter post goes at the front of the fender rail (closest to the saddle), and the longer post goes at the rear of the fender rail.
put the new bolt through the appropriate docking post, then through the fender. the front bolts will need to be threaded into the welded nut, just so a bit of thread sticks out inside the fender. now, put the supplied nylock nut on the inside of the front bolt, and use the 13mm box wrench to hold it in place while you use the 6mm hex key or ratchet to tighten the bolt down. note: if you have lowered (mine is dropped 2"), there will be very little space to get your hand between the fender and the tire! this is why i recommend threading the nut on the back of the bolt prior to tightening the bolt down - this means you do not need to try to swing the box wrench in the limited space between the fender and the rear tire.
once you have it all together, torque the bolt down to 12 foot pounds, then repeat the process for the rear bolt on the right side. 2 important notes: do not even loosen more than 1 (one) fender bolt at a time. just trust me. if you do, i am not responsible for you getting pissed off and taking a sledgehammer to your ride (it's not on my list of required tools, right?). also: the rear fender bolts have loose nuts on the inside of the fender, instead of welded nuts like the front bolts. you will need to use a 12mm box wrench to remove these, but a 13mm wrench to install the nylock nuts supplied with the easybrackets.
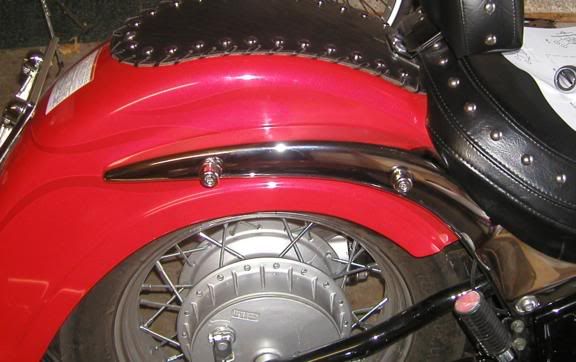
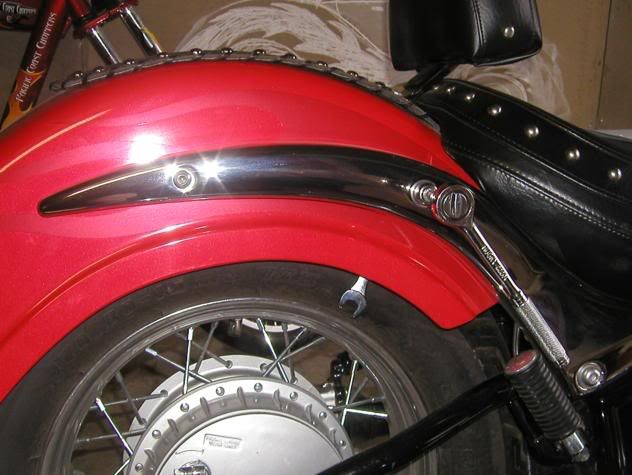
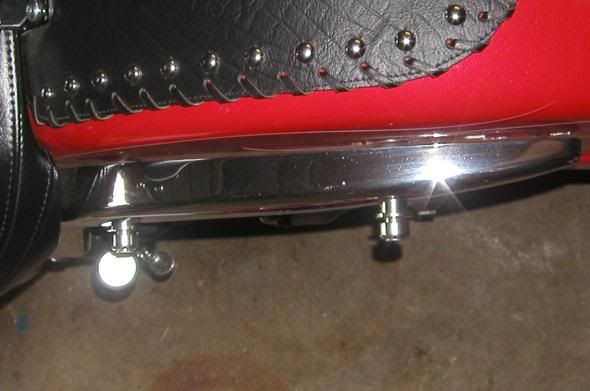
above you see the docking posts on the right side of the bike fully installed.
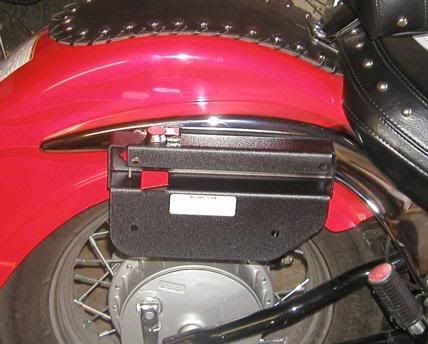
and this is the bracket hanging from the docking posts.
'round about this time, tanker decided to come outside and see how i was coming along. i was just starting on the rear left side docking post.
and this is the view of the left side docking posts, as seen from above. since they're all installed now, it's time to drill some holes in order to get the brackets on the bags!
time: 10 minutes
tools needed: 3/8" drill bit, 3/16" drill bit, power drill, sharpie or other mark-making device.
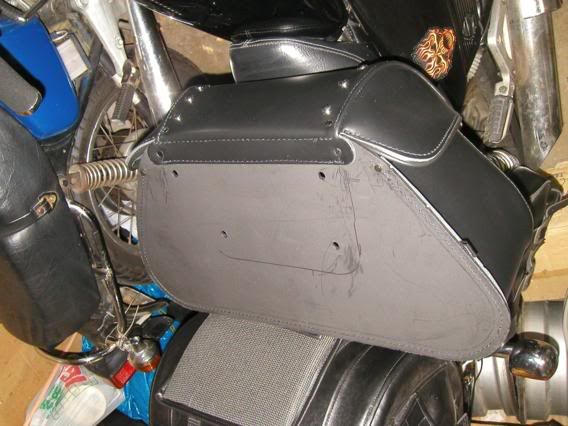
instructions: hang the easybrackets on the docking posts, on the bike. hold the bag against the bracket, adjusting position until you like how they sit note: make sure there is ample material on all sides of the holes that will be required to mount the brackets. adjust position if neccessary. now use your sharpie or other mark-making device to trace the brackets, as best as you can, on the back of the bags. once you're done, lay the bags down, then place the bracket in the outline you've made. use your marker to trace the 4 holes in the bracket onto the back of the bag. now use a 3/16" drill bit and power drill to make a pilot hole, and then drill the hole out to 3/8" to fit the supplied button-head bolts.
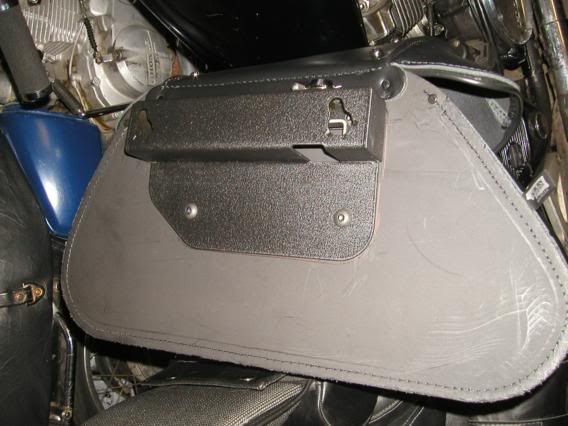
now we need to install the brackets on the bags using the supplied hardware.

time: 15 minutes
tools needed: 5.5mm hex key with T-handle, 14mm socket and ratchet, supplied hardware.
instructions: push the button head bolts through the holes in the easybrackets, then through the bag's back. place a washer on the inside of the bolt, then thread on the nylock nut. use the hex key and the socket to tighten the nuts securely onto the bolts, and you're done! note: it is not possible to reach the hex head on the bolts inside the easybracket top rail with the short end of a standard hex key. since using the long end does not allow you to apply much torque to the bolt, i would recommend purchasing either T-handled hex keys, or a system like the one shown below with a universal T-handle.
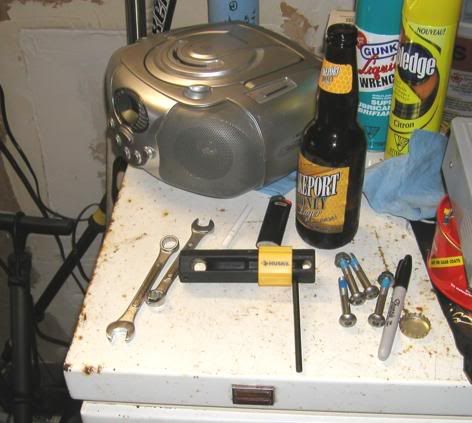
(the above photo also shows other neccessary tools - a stereo playing motorhead, and a bottle of "modding juice")
now simply unlock the tumbler on the top of the easybracket, line up with the posts, and drop the bag onto the docking posts. lock the tumbler and your bag is secure!
some people are concerned that the locking mechanism hits the back of their bags when trying to unlock - this is not an issue! the mechanism only requires 45 degrees of swing to unlock, which is possible with all bags. you may need to wiggle the key a bit, because the lock can be stiff sometimes, but it will come off!
also, i have noticed that sometimes when putting on the left bag, i have to put it on, then lift and re-position in order to get the front of the bracket to drop completely onto the docking post. i don't see it as too much of a problem though, and expect that the brackets will work in a bit.
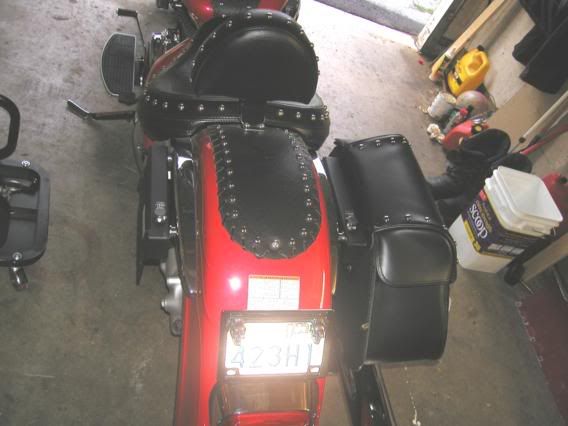
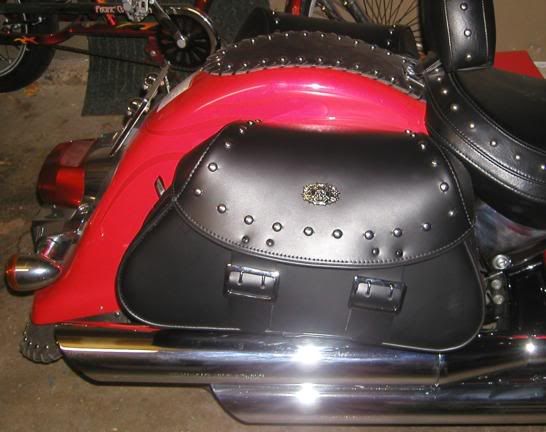
now you see both bags installed - some people are not keen on the wide profile that the easybrackets give the bags, but i believe that the convenience is worth the extremely minimal sacrifice of aesthetics.
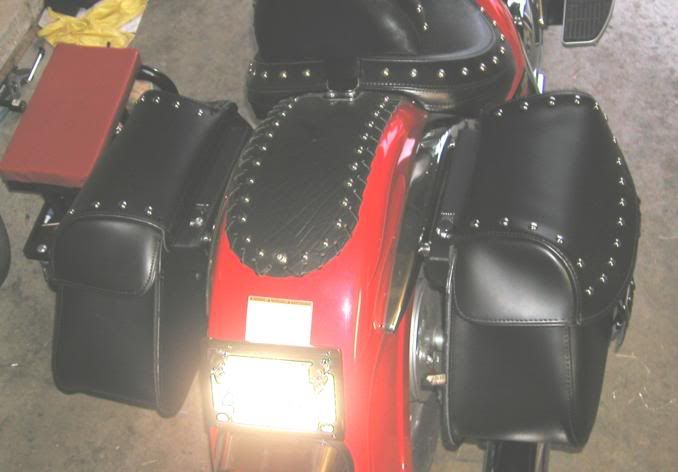
in this view, you can see that it really doesn't look too bad at all..
lookin' pretty sweet!
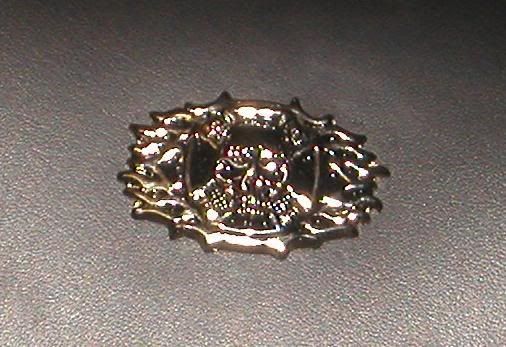
i also installed some chicago screw-backed badges that we picked up from talisman leather in london, ontario on the bag lids:
time: 10 minutes
tools: dental pick, power drill with 3/16" bit, flat bladed screwdriver, blue (medium) loctite
instructions: use the dental pick to stab through the bag from the outside, making sure you get through the plastic stiffener so you know where to drill. once the spot is marked, use the drill to make a hole from the inside to the outside. then put the backing post of the badge through the hole, and thread in the screw once you have coated it with loctite. tighten down and you're done!
we also put some similar badges on tanker's biker's friend bag - see his mods pages for photos.
the bags have been working out great! got totally soaked the day after i installed them, but not even a drop of water got inside. great gear!
then i went and got myself some new levers...check out page 5 for more details..
go back to page 1 - or - back to page 2 - or - go back to page 3 - or - go to page 5 - or - to tanker's mods page

