
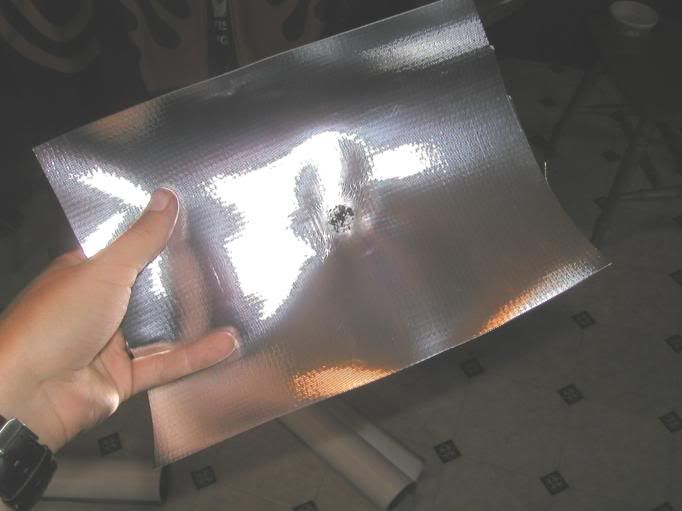
this is the fabric we decided to use to protect the suits - it's called "energy shield", and the little bit of black there is the only result of holding a lit wooden match 2-3" under the fabric for the length of its burn!

and this is the other side. you can see the fabric started to change shape a bit, but is structurally intact. since the burn this piece was subjected to should be far more heat than flapping against the pipes or motor of our bikes will produce, it should keep the rainsuits from melting. **NOTE: i have discredited this method of rainsuit insulation - the energy shield fabric will wear the clearcoat off any paint it touches!!**
time: 1 hour
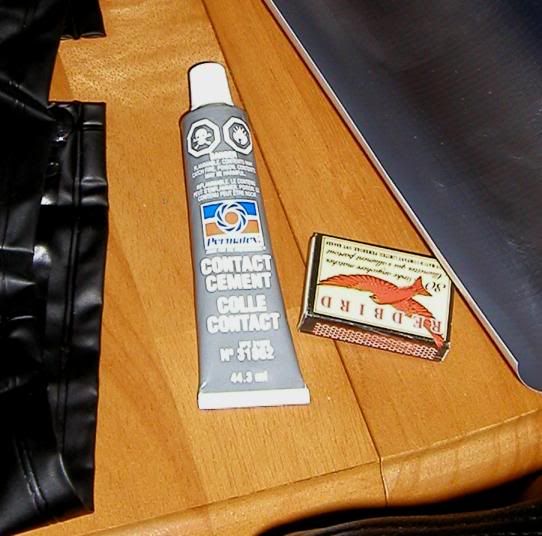
tools needed: good sturdy shears, enough energy shield to cover all desired places, tube of contact cement, roll of duct tape, a friend
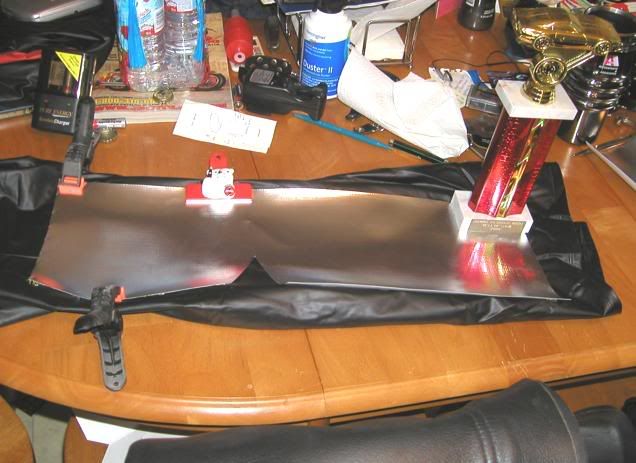
instructions: because i didn't want to stitch the energy shield to the suits (the holes made by the stitches would then beomce places for water to seep in), i had to attach them another way. since our rainsuits (the teknics chicane 1-piece, purchased for approx. $25USD each) are made of polyurethane, i figured that contact cement would attach the non-porous fabrics together. note: this is not recommended if you have a nylon or cordura suit! first, have whoever's rain suit is being done first put it on, and measure out the sections you want to cover with the energy shield. keep in mind that the fabric is somewhat stiff, so any joints (knees in particular) that will be covered will need special attention. carefully cut your fabric to the size and shape desired, and draw an outline of where it should go on the rainsuit while it is still on the person! this will ensure proper placement.
now spread glue on the leg of the rainsuit, keeping within the outline you drew, and trying to get as close to all edges as possible without getting glue all over. notice this piece has a cutout section to allow tanker's knee to bend.
then spread glue on the piece of energy shield as well, again trying to get it as close to the edges as possible to ensure good adhesion. you will need to let both pieces set for about 10 minutes - follow the directions on the adhesive you purchased. this is the tube of contact cement i got at wal-mart for this job for about $3.00CAN.
once the pieces have set per the glue's instructions, carefully position the energy shield over the outline on the rainsuit, and press down firmly

once you have done this, i reccommend that you anchor the piece down for a few minutes with whatever objects you can find. i used clips to press the suit and fabric together, and also just ordinary objects to hold edges down.
i wasn't terribly impressed with the job i did of getting the edges to stick, though the fabric seemed to be quite firmly attached. i worried about the possibility of wind grabbing the leading edge of the fabric and tearing it off of the rainsuit, possibly ripping the suit itself. i decided it wouldn't do to risk it, so came up with a method of securing the
edges..
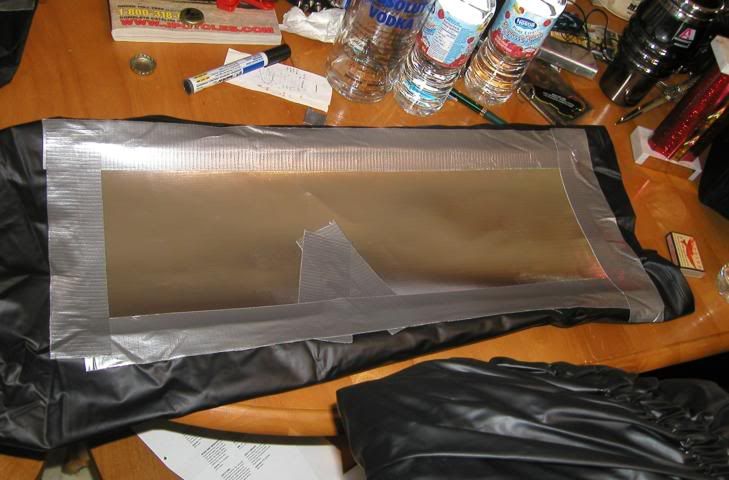
that's right! the handy man's secret weapon - duct tape!
do all the edges just to be sure. if you use this method, you could even repair a rainsuit in which you've already burnt a hole, since the energy shield patches should be completely waterproof!
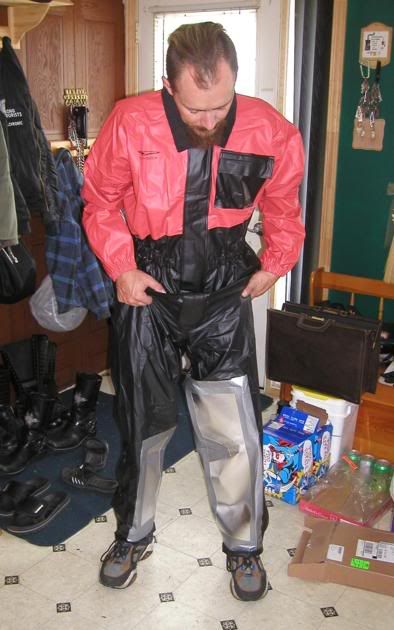
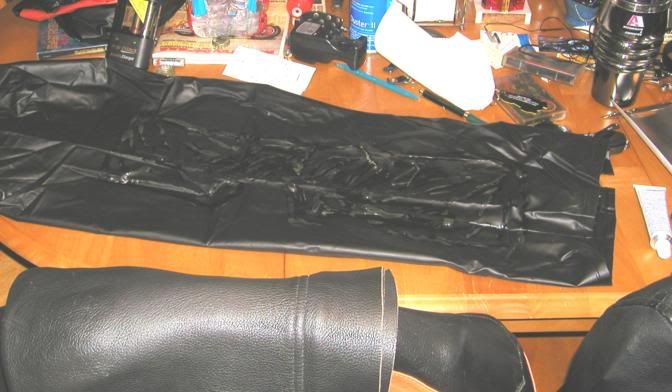
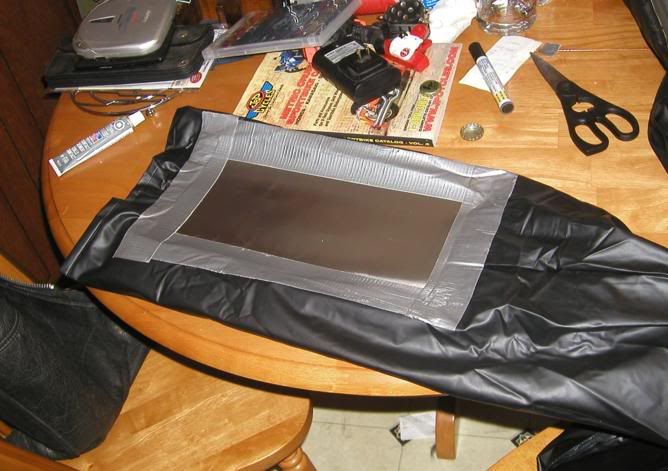
so here you can see tanker's rainsuit is now protected from his pipes and motor
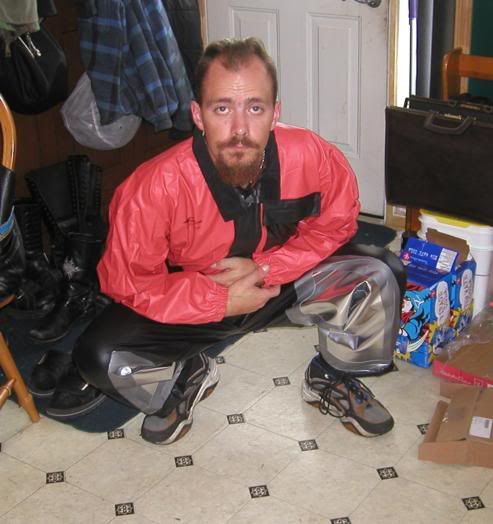
yet he still has full range of mobility. we torture tested these rainsuits through 170km of the tail end of hurricane ernesto, in 50-60km crosswinds and torrential rain, running at speeds up to 100kph. they show absolutely no signs of wear at all, and the energy shield doesn't seem to have been affected at all by spending hours on end sitting against the hot spot on tanker's pipe. the legs feel a little bulky due to the stiffness of the additional fabric, but that's a small price to pay to stay dry on a cold wet day!
we also wanted to be able to use our camcorder to get some video footage of our riding while on holidays, so i ordered a techmount mini handlebar mount for 1" bars in chrome for $75USD from motorcycleradar.com, with which we're really pleased!

time: 5 minutes
tools: the supplied allen keys in the package, the mount itself
instructions: you need to remove the mounting plate in order to get the clamping screws out of the handlebar ring, but then it's entirely straightforward. not sure i even looked at the instructions that were enclosed!
*lol*

since the techmount mini uses only 1/2" of handlebar space to mount, i didn't even have to remove my handlebar wrap!

the design and execution of this product are excellent, and it allows a great deal of flexibility. the mounting platform can be tilted and rotated almost infinitely, giving an excellent range of camera angles, and it can also be used to mount a gps, cellphone, or any other device you choose!
time: 15 minutes
tools needed: scissors, muffler tape, really good glue (i used household goop), a really sharp knife, a good cutting surface and a marker
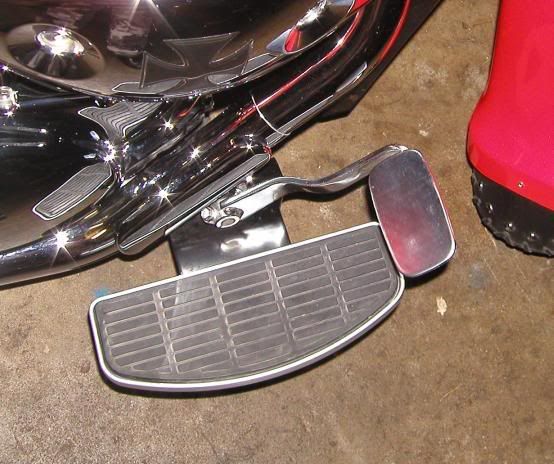
instructions: first pull the rubber boot off the brake pedal as shown above. it's glued on there, so it might take a bit of tugging, but it'll come off by hand.
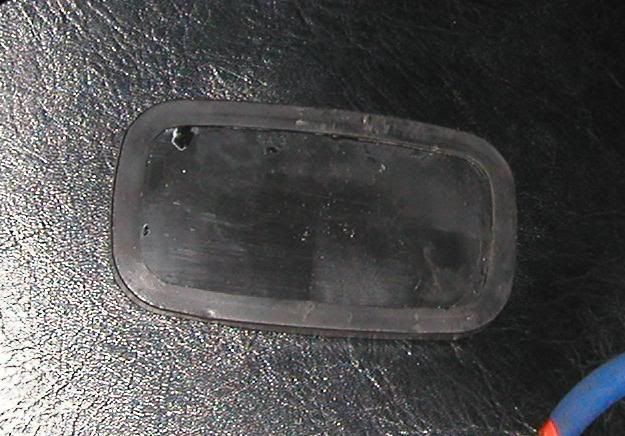
this is the back of the removed boot - you can see the edge wraps around the pedal on all sides.
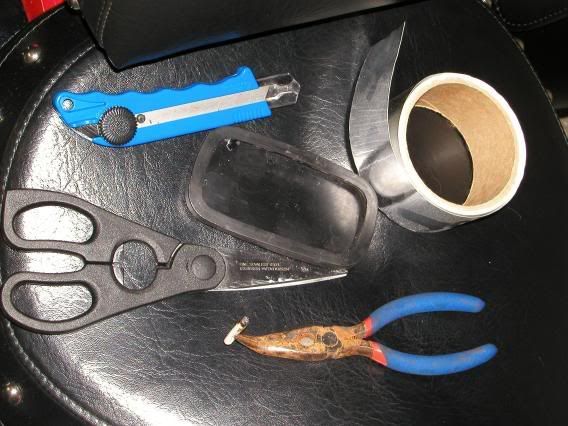
here are all the tools i used, except for the tube of glue. yes, i used ALL of these during this mod, but you can exclude the bottom one if you want ;)
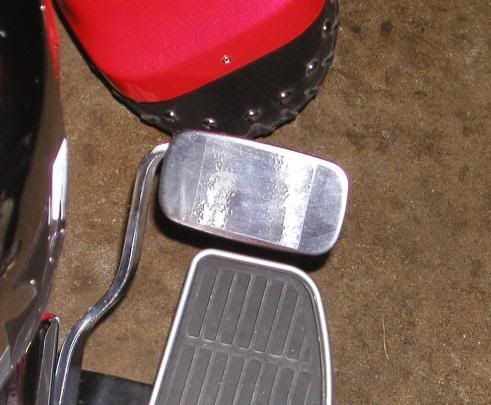
i tried polishing the brake pedal to make it shine, using both metal polish and steel wool. no dice - it still looked pretty dull. so, i used an old el-cheapo trick, and covered the section that will be exposed with muffler tape! it ain't chrome, but it's much shinier than the pedal itself!
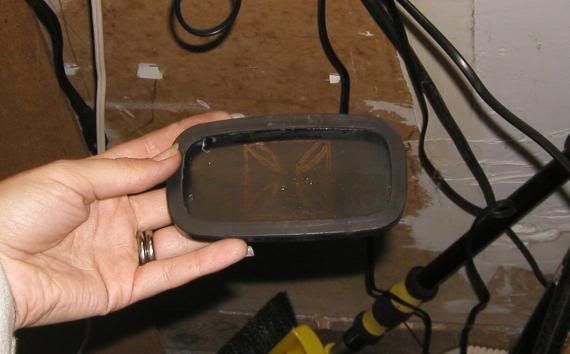
then i drew the outline of the design i wanted on the back of the pedal boot and cut it out with a really sharp exacto knife (box cutter). the raised lines on the front side of the boot are quite thick, so you will need to cut through really deeply in order to get the excess rubber out. also be careful to leave a little bit of rubber still attached for any pieces that are to remain!

once you've cut out your design, spread glue inside the edge flaps of the boot, and on the back of the face so you will get good adhesion to the pedal. also make sure that any small pieces of rubber (like the pieces in the corners of my cross) get glued individually after you have stretched the boot back over the pedal. you don't want to either lose these
pieces, or have your foot slip at a crucial moment! also be sure to let the glue set for several hours before you ride the bike again.
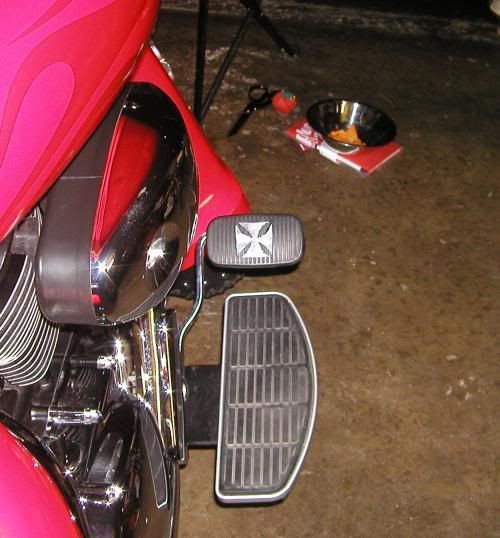
definitely an improvement over that plain black rubber pedal cover!
the next thing i did was customize my swingarm covers...go to page 7 to see how that worked out..
