How to Make Some Useful Things from Practically Nothing

Return to home
Note: I have created a new Sundial Page here.
I left the instructions for making a sundial from your own fingers here, because
it's so useful when you're out hiking, but I've also included it there. I've
moved my other sundials there, and added a couple of new ones, including the
Universal Capuchin sundial.
Return to the top
A Visor from a Folded Bandanna
One day I was hiking above treeline, near the place in the photo.
It was late afternoon and the sun was in my eyes. I had forgotten
to bring a sun hat, but I did have a bandanna in my pocket. Out of
necessity, I figured out how to make it into a visor.
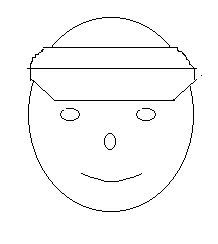
Fold the bandanna in half diagonally, to make a triangle.
Roll the folded edge over a couple of times, as though you were
going to make the bandanna into a headband. Leave most of the
triangle unrolled.

Fold the top layer of the triangle down over the rolled part.
Fold the two corners into the center.
Return the top layer to its previous position, so that the corners
are now tucked inside.
Roll the bottom edge up one more time, to trap the corners so they
won't come loose.
Tie the bandanna around your head, with the rolled part out and
the visor over your face.
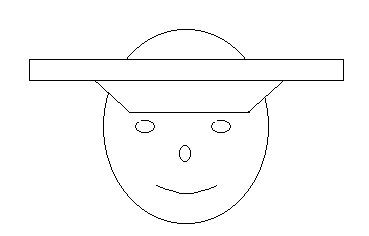
Pull the visor out away from your face. You may have to adjust it
a bit.
You can take the visor off without untying it, fold it up and put it
in your pocket, and later put it back on without having to start
all over. I keep one folded up in my purse. I often use it when
driving into the setting sun.
Return to the top
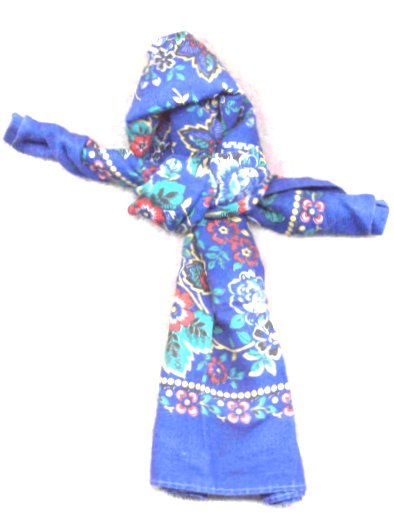
How to Make a Hooded Cloak
A small blanket is much more compact and easy to carry while hiking
than a winter coat. It's also easier to adjust with changing
temperature. If it gets cold, pull the cloak tightly around you.
You may even want to belt it at the waist, making a kind of
overcoat. If it gets warmer, take off the hood and throw the cloak
back over your shoulders. If it gets really warm, you can roll the
blanket up and strap it to your pack, or roll it around a belt and
belt it to your waist like a fanny pack.
A small blanket about 72 by 56 inches (198x142 centimeters) is a
minimum size. Two yards of 60-inch-wide fabric works well for a small cloak.
I also use one 108 by 65 inches (274x165 centimeters)
for a longer cloak. A wool army blanket is perfect, but rather heavy. An acrylic
stadium blanket is warmer, but it's bulkier and almost too small.
You can also use a cotton flannel sheet for a summer cloak. Dark
green or blue would be nice.
Find the middle of the longer edge of the blanket and place it at
the top of your head, with the blanket hanging over your shoulders
and down your back. Pull the edge of the blanket around your face
like a scarf or a shawl. Don't pin it yet: if you were to pin it
together under your chin, the weight of the blanket would pull it
off your head.
Instead, reach back and take a pinch of the blanket from just above
each shoulder, about six inches back from the edge. Pull these
forward, overlap them, and pin them with a broach (a blanket pin or
even a diaper pin will do.) Now the "hood" will stay in place. It
can be adjusted, made tighter or looser, by pulling on the edge of
the blanket. You can also throw it back off your head, and it
looks just like a real hood.
You will find that there are two long corners hanging down by your
heels. If you want to use a blanket big enough to make your cloak
longer than knee-length, the corners may drag on the ground. You
can eliminate the corners by cutting them off. Or if you think you
might want to restore the blanket later to rectangular shape, you
can fold the corners up instead, and sew them in place. A smaller
blanket will clear the ground even if you let the corners hang.
You can use a similar method to make a rain poncho out of a cheap
plastic dropcloth, found in a hardware store by the painting
supplies. Get the thinnest plastic you can find and fold it in
half, using the fold as the edge of the hood. Instead of pinning,
staple the pinches together and reinforce with strapping tape. Make
sure to make the neck opening big enough to slip over your head!
Cut the bottom off to length and there it is. Because there are no
seams, it is completely waterproof, and it's very lightweight.
Update: I've found that by sewing a couple of tie-strings onto the
cloak, it's much easier to put on than it is when I have to pin it.
The blanket still lies flat if needed. I also have done this with
the plastic dropcloth raincoat, attaching the strings with staples
and tape. For the rain poncho, you can make the strings out of scraps
of the dropcloth. For the blanket, make strings out of cloth or ribbon.
Attach them about 16 inches in from the top of the blanket, and 16
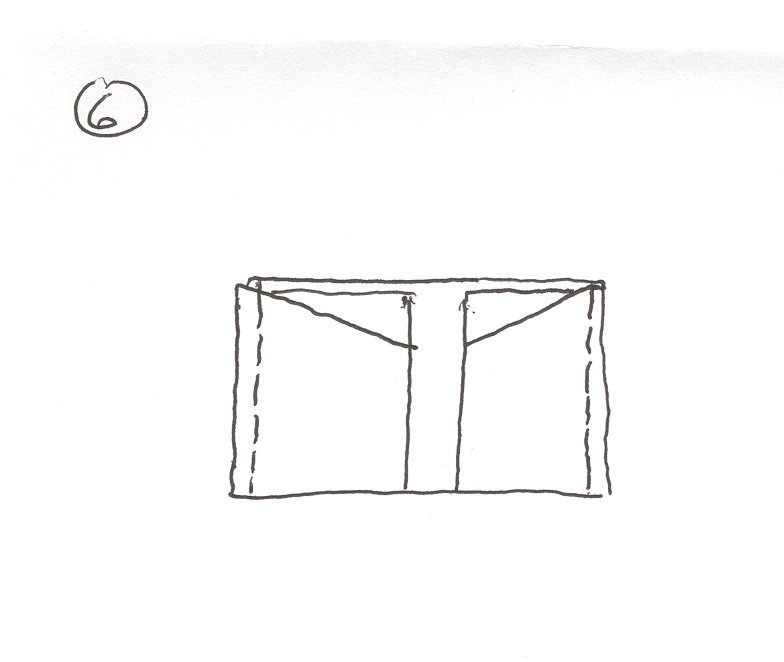
inches apart. Here's a diagram. The X represents the place where you
attach the tie-string. The *** represents the tie-string. The slashes
represent the places where you may want to either cut or fold up the
corners.
-------------------------------------------
|                                         |
|                                         |
|     ********X            X*********     |
|                                         |
|                                         |
|                                         |
|                                         |
|\                                       /|
| \                                     / |
|  \                                   /  |
|   \                                 /   |
|    \                               /    |
-------------------------------------------
Put the cloak over your head with the strings on the outside. Tie
The strings around your neck, and the cloak will be adjusted
correctly. You may want to pin it on first to find the exact
placement of the tie-strings.
Another update:You may prefer to have one long string that goes all the way around the neck and fastens in the back. In this case you may want belt-loops where the Xs are in the diagram above. It would look like this:
-------------------------------------------
|                                         |
|                                         |
|     ********||*****X*****||********     |
|                                         |
|                                         |
|                                         |
|                                         |
|\                                       /|
| \                                     / |
|  \                                   /  |
|   \                                 /   |
|    \                               /    |
-------------------------------------------
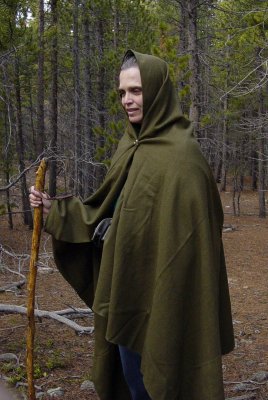
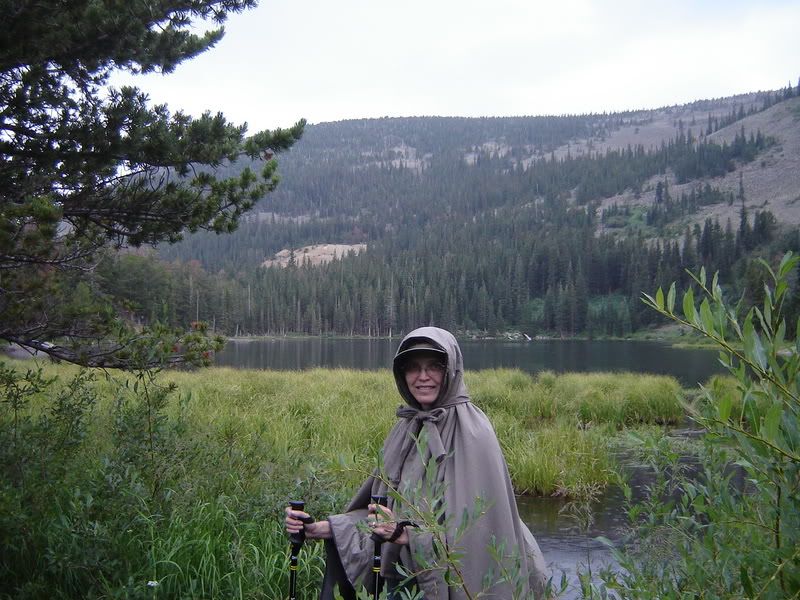
Here's a photo of a cloak made of two layers: the inside is a lightweight fleece blanket. The outside is a layer of water-resistant flexible nylon. Each consists of 2 yards of material (60 inches wide). This is both a coat and a raincoat. The second photo shows it belted at the waist, with the hood thrown back. This cloak actually has two sets of ties, one on the inside for the fleece blanket, and one on the outside for the nylon layer. This makes it reversible. In the third photo I have a cloak rolled up and am carrying it on my back, using the drawstrings to fasten it across my shoulders. I tie a bandana around the roll to keep it from unrolling.


Return to the top
How to Make Emergency Eyeglasses
Suppose you are hiking and have an accident, and lose your glasses.
You can use the idea of a pinhole to make emergency glasses for
any prescription out of your own two hands. The photo shows the hands
as you would hold them up to your face.

Form a tiny hole between the thumb and the palm, and put the two
thumbs on either side of your nose.

I've exaggerated the size of the holes for the photos; you want to
make them pinhole size. Adjust the hands so that the two openings
line up with your two eyes. Because the openings are so small,
you won't be able to see well in low light, but it works great on
a sunny day. These hand glasses can also be used to read fine print
if you are farsighted, but again you will want lots of light.
You can make a simple cardboard version by cutting out a piece of
cardboard in the shape of glasses, and using elastic (I've used
rubber bands) to attach it to your head, or cut out cardboard
earpieces. Poke several pinholes in the cardboard, about 1/10 inch
(2.5 mm) apart. An easy way to do this is to hold the cardboard
up to a bulletin board and use a thumbtack to make the holes.

Aluminum foil makes for cleaner holes, so you may want to cut out
a couple of foil "lenses" and tape them in place. Or you can wrap
foil around a pair of old glasses frames and make pinholes in the
foil. In the photo, I've used a pair of clear safety goggles.

I've read claims on the Internet that pinhole glasses, which are
available commercially, can cure bad eyesight. I don't personally
believe that, but I also don't have any real knowledge. I just
like the idea of being able to see clearly at need.
Return to the top
How to Make Swim Goggles
A correspondent who saw the above description of making emergency
glasses from your hands wrote and reminded me of something we'd both
read about in "Boy's Life" back in the 1960s. If you place the thumbs
beside the eyes instead of between them, you can make an airtight seal
with your hands and trap a bubble of air around your eyes while you swim.
I used this all the time as a child. It gives you as clear a view as
you would get with a face mask. If your "mask" leaks, you can blow
more air into it from your mouth; the bubbles naturally rise into the
hands.
Return to the top
How to Make a "Firecracker"

This toy firecracker is essentially a popgun, or a piston and cylinder.
Remove the bottom of a Pringles can using a can opener. Decorate the
outside of the can with stickers. Tape a short length of black string
to the lid to represent a fuse.
Use a second can, or a length of rolled-up cardboard, to form the piston.
I removed the bottom of the second can, cut it lengthwise, rolled it so
that the end would fit inside a Season Salt lid, and taped it together.
Wrap the Season Salt lid with duct tape until it fits snugly inside the
outer can. Paint the piston with black paint or wrap it with black paper.

Put the pison inside the cylinder, with all but the Season Salt lid poking
out. Put the Pringles lid on the outside can.

Hold the outside can upright against the floor or table. Push down sharply.
The lid should pop off with a bang.
Return to the top
How to Make a Coffee-can "Fireplace" Lantern

This lantern looks like a fireplace or campfire, and is nice for small
houses or apartments that can't have real fireplaces. Start with a
large coffee can. Fill the can with water and put it in your freezer.
When the water is frozen, use a hammer and nail to punch the holes in
one side. (I tried cutting out a fireplace-shaped hole in one side,
but that cuts down the internal reflections a lot and doesn't look
nearly as good.) Don't punch within two inches of the bottom of the
can. Let the ice melt.
Put several candles in the bottom of the can. I filled the bottom of
mine with melted parafin. When the parafin hardened, I drilled holes
for candlewicking, the kind that has a wire core so it doesn't fall over.
Having three or four flames burning at once makes them dance like a wood
fire. The inside of the can reflects and magnifies the flames. They twinkle
and sparkle through the holes in the side.
I usually light my "fireplace" on the kitchen table, where it's easy to see
and safely away from anything flammable.
You could decorate the can, but I left mine the original brick red.
Return to the top
How to Make a Billfold


This billfold has a large pocket for bills and four smaller pockets for
cards and a coin purse. It is made out of a single piece of cloth and
takes about ten minutes to make from start to finish (your first one may
take a little longer.)
My husband and I were frustrated with commercial billfolds because they
didn't have enough room for all the junk we carry (as you can see above.)
I came up with this design. You can make it from heavy nylon, as I did,
or from lightweight denim or some other fabric. Nylon fabric comes in 60"
widths. Half a yard will give you enough fabric for three billfolds.
Begin with a rectangle of cloth 16" by 20". This allows for a half-inch
seam allowance. Fold in half, right sides together, to make a
rectangle 16" by 10".
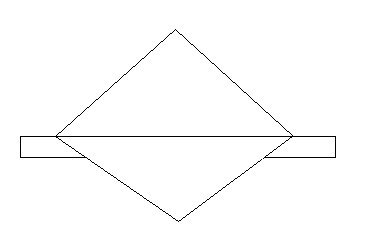
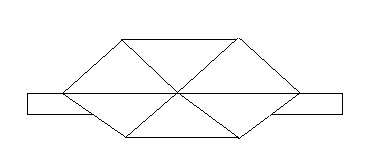
1. Stitch around the three sides, leaving an opening at the top for turning
inside out. Use a half-inch seam allowance. Angle the two top corners as
shown below. Cut off the exra material at the corners, making the same half-
inch seam allowance. (Note: the triangles should measure 1 inch from the
top seam and 3 inches from the side seam. That is: 1.5 inches down from the
top edge of the material, and 3.5 inches in from the side of the material.)

2. Turn inside out. Topstitch along the top edge, as close to the seam
as you can. This will close the opening you left for turning inside out,
and will give the top a nice finish.

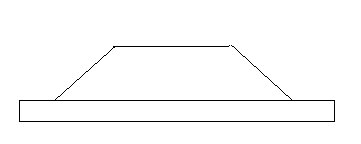
3. Fold the bottom edge up almost to the top, leaving about 1/8" of the
top sticking out beyond it. Topstitch the two ends as close to the ends
as you can.

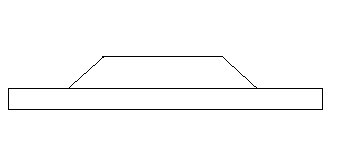
4. Fold the two ends in toward the middle, leaving about half an inch
in the center. Topstitch along the bottom as close to the bottom
as you can.

5. Peel back the outside edges and topstitch along the top of the inside
layer, as close to the top as you can.

6. Put the outside layer back where it belongs and topstitch the
two ends as close to the ends as you can. This completes the billfold.
Return to the top
The Hand Dial: a Universal Ring Dial
The hand dial is a way to use your own two hands as a
universal equatorial ring dial
The universal ring dial is a portable dial that can also be
used as a compass. When it is aligned so that the shadow
of the gnomon falls on the dial, is automatically points
north.
How to make the hand dial
The hand dial uses the forefinger of one hand to form
the gnomon. I will call that finger the gnomon finger. It
uses the forefinger of the other hand to form a quarter of
the ring where the hours are marked. I will call that finger
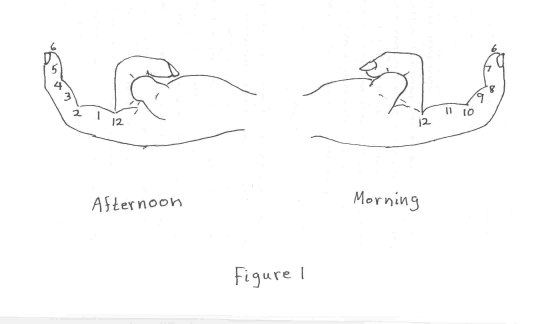
the dial finger, and that hand the dial hand. In the morning
the dial finger will be the right forefinger, and in the
afternoon it will be the left forefinger. The reverse will
be true of the gnomon finger.
Form the dial hand into a fist, palm up, with the thumb
inside. Stretch the first finger out into a hook.
(See figure 1.)
Curve the finger to approximate a quarter circle. The
creases of the finger form the even hour lines, as marked
in figure 1.
The first finger of the other hand forms the gnomon.
Lay it across the knuckles of the dial hand.
(See figure 2.)
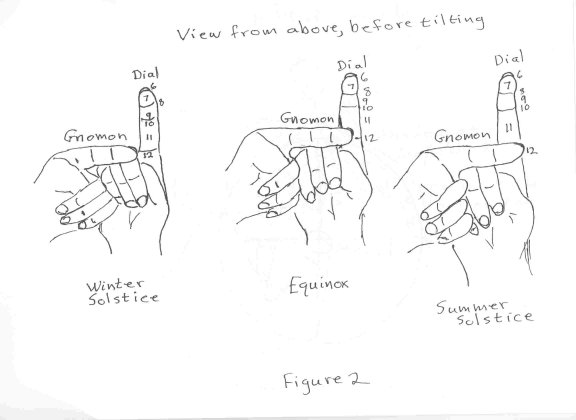
At the summer solstice, the tip of the gnomon finger
should line up with the outside edge of the dial finger.
At the equinox, the tip of the gnomon finger should line up
with the center of the dial finger. At the winter solstice,
the tip of the gnomon finger should line up with the inside
edge of the dial finger. These positions are shown in figure2.
At other times of the year, approximate the position between
the given positions. Adjust the dial finger slightly so that
the gnomon finger passes through the center of the circle.
(See figure 3.)
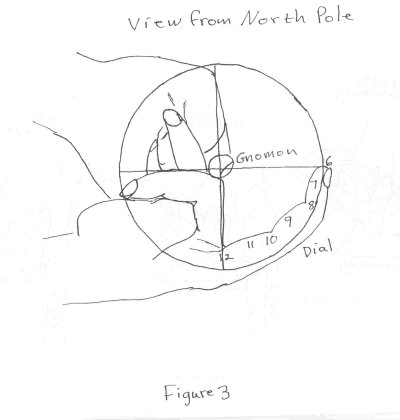
Tilt the hands so that the gnomon finger forms an angle
with the horizontal approximately equal to the latitude.
(See figure 4.)
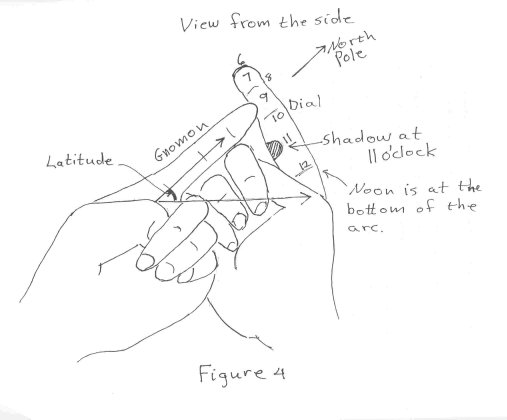
At the middle latitudes, this is a natural
and comfortable position for the two hands. The plane of
the quarter circle of the dial hand will still be perpendicular
to the gnomon. At the equinox, the tips of the two forefinger
should lie on a horizontal line. This won't quite be true
at other times of the year, but the position of the dial hand
should remain the same. The noon mark should lie at the bottom
of the arc.
Turn your body so that the shadow of the tip of the gnomon
finger falls halfway between the two edges of the dial finger.
(See figure 4.)
The gnomon finger will now be pointing
approximately toward the celestial north pole. From the position
of the shadow, read the time, using the numbers given in the
figures.
If you are on daylight savings time, add an hour. If you are east
of the meridian for your time zone, subtract 4 minutes for each
degree east. If you are west of the meridian for your time zone,
add 4 minutes for each degree west. If you're really picky,
you can adjust for the Equation of Time
This dial only gives the hours between 6 am and 6 pm.
If you want to use it in the early morning or late afternoon
in the summer, you can turn the whole thing upside down to
get those hours. It's awkward, and you have to hold your
hands a little above your head, but it can be done. You still
have to make sure that the gnomon finger forms an angle with
the horizontal equal to the latitude. The 12 o'clock mark
now represents midnight and is at the top of the arc. You
also have to switch hands when you turn the dial upside down.
See my Sundial Page for more sundials.
Return to the top
How to find East-West with three shadows of a stick
A correspondent named Thomas Stein sent me an article describing a method for finding and East-West line using the shadow of a stick taken at three separate times. It's a little complicated, and is based on an old Roman surveying technique. A much simpler method is just to mark where the shadow is during the morning sometime, and wait until the shadow is the same length in the afternoon. Connecting the tips of the two shadows gives and East-West line, but of course you have to wait around to see when the afternoon shadow is the same length as the morning shadow. The method in the article only requires the shadow to be measured at three different times. Click here to see the complete article.
Return to the top
A One-page perpetual calendar
This is a single piece of paper that will serve as a calendar for any month provided you know the day of the week that year started on. It's not too hard to memorize the day the current year started on; you can remember one day of the week for a whole year. Calculating nearby years is fairly easy. To find out what day any year in the Christian Era (AD) began, see my calendar page.
I got this idea from a photo in the book "The Story of Time" by Kristen Lippencott. The photo showed an engraving of a simple chart, made in 1635. The chart looked something like this one:
| Jan Oct |
Apr Jul |
Sep Dec |
Jun |
Feb Mar Nov |
Aug |
May |
| 1 |
2 |
3 |
4 |
5 |
6 |
7 |
| 8 |
9 |
10 |
11 |
12 |
13 |
14 |
| 15 |
16 |
17 |
18 |
19 |
20 |
21 |
| 22 |
23 |
24 |
25 |
26 |
27 |
28 |
| 29 |
30 |
31 |
|
|
|
|
Figure 1
There was little explanation, beyond the observation that January and October will start on the same day of the week in any year (which is not actually true for leap year, but I'll deal with that below), and the same for September and December, and so on. After studying the chart for a while, I came up with the following enhanced chart, which I will explain.
(Note: I have updated and simplified this since I first put this chart up. If you read the chart before this note appeared, it is different and easier now.)
| Jan Oct |
Apr Jul |
Sep Dec |
Jun |
Feb Mar Nov |
Aug |
May |
| Sun |
Mon |
Tue |
Wed |
Thu |
Fri |
Sat |
| Mon |
Tue |
Wed |
Thu |
Fri |
Sat |
Sun |
| Tue |
Wed |
Thu |
Fri |
Sat |
Sun |
Mon |
| Wed |
Thu |
Fri |
Sat |
Sun |
Mon |
Tue |
| Thu |
Fri |
Sat |
Sun |
Mon |
Tue |
Wed |
| Fri |
Sat |
Sun |
Mon |
Tue |
Wed |
Thu |
| Sat |
Sun |
Mon |
Tue |
Wed |
Thu |
Fri |
| 1 |
2 |
3 |
4 |
5 |
6 |
7 |
| 8 |
9 |
10 |
11 |
12 |
13 |
14 |
| 15 |
16 |
17 |
18 |
19 |
20 |
21 |
| 22 |
23 |
24 |
25 |
26 |
27 |
28 |
| 29 |
30 |
31 |
|
|
|
|
Figure 2
To understand how this calendar works, consider the following problem. Suppose you want to find what day of the week Valentine's Day falls on in 2008 and that you know 2008 begins on a Tuesday. The day in which the year began is the key to the whole calendar, so remember it. For 2008, the key day is Tuesday. Read across the top row until you come to February, and look down that column until you come to Tuesday. It lies in the row that is indigo (dark blue). Think of the indigo row as being the headings for the calendar that appears at the bottom of the chart. Look at the 14th, and look up to the indigo row to see what day of the week it is. The 14th lies under Thursday in the indigo row, so Valentine's Day is on Thursday in 2008.
Since 2008 is a leap year, you have to adjust slightly for days after February. Suppose you want to know what day of the week Christmas falls in in 2008, and that you know 2008 begins on a Tuesday. Days after February 29th in a leap year come a day after they normally would. So for months after February, you will use the next day, Wednesday, as the key day. Read across the top row until you come to December, and look down that column until you come to Wednesday. It lies in the row that is orange. Think of the orange row as being the headings for the calendar that appears at the bottom of the chart. Look at the 25th. It lies under Thursday on the orange row, so Christmas will fall on Thursday in 2008.
The colored rows aren't really necessary. They didn't appear in the 1635 engraving. If you know what the key day is, and which column is that key day, you can count across the row from there to find the days for the other columns.
I really like the simplicity of Figure 1, and with practice it's reasonably easy to use. If you know what day the year started on, it's all the calendar you need for that year. If you would like to see how to find the starting date for any year, please see a more complete perpetual calendar on my Calendar Page
Return to the top
How to make a bookcover
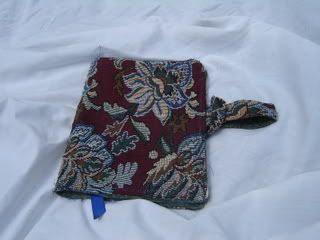

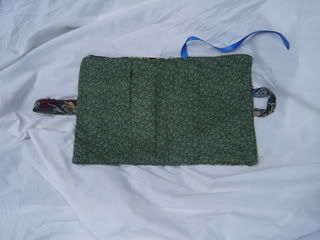
To make the handle, cut one piece of the outside material, 2"x9", and one piece of the lining material 2"x9". Sew the two pieces together, right sides together, leaving the ends open. Turn inside out and top stitch along both long edges. Fold in half to make a folded loop. The lining material is on the inside of the handle.
To make the latch, cut one piece of the outside material 2"x7". Fold in half lengthwise with the right side to the inside. Stitch along the long edge, then turn inside out. Top stitch along both edges. Bend into a U shape as shown in step 3 below. The handle will push through the latch to fasten the book closed. The latch also gives you a place to store your pen.
To make the cover, cut pieces of the outside material, lining material and interfacing the same size as the book cover, with added material for a seam allowance. Cut the lining piece in half crosswise: the two halves will form the pockets. Fold each of the pocket pieces in half with the right sides out. Cut another piece of lining material the same height as the outside piece, but make the length two inches shorter. This will form the lining behind the pockets.

Return to the top
Return to the top
A Rag Doll from a Folded Bandanna
Click here for instructions
Return to the top
A Cat from a Folded Bandanna
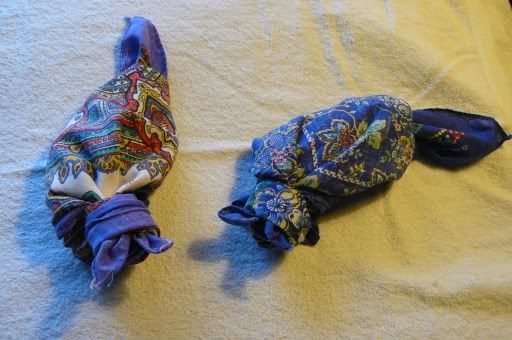
Click here for instructions.
Return to the top
A Horse Puppet from three bandannas
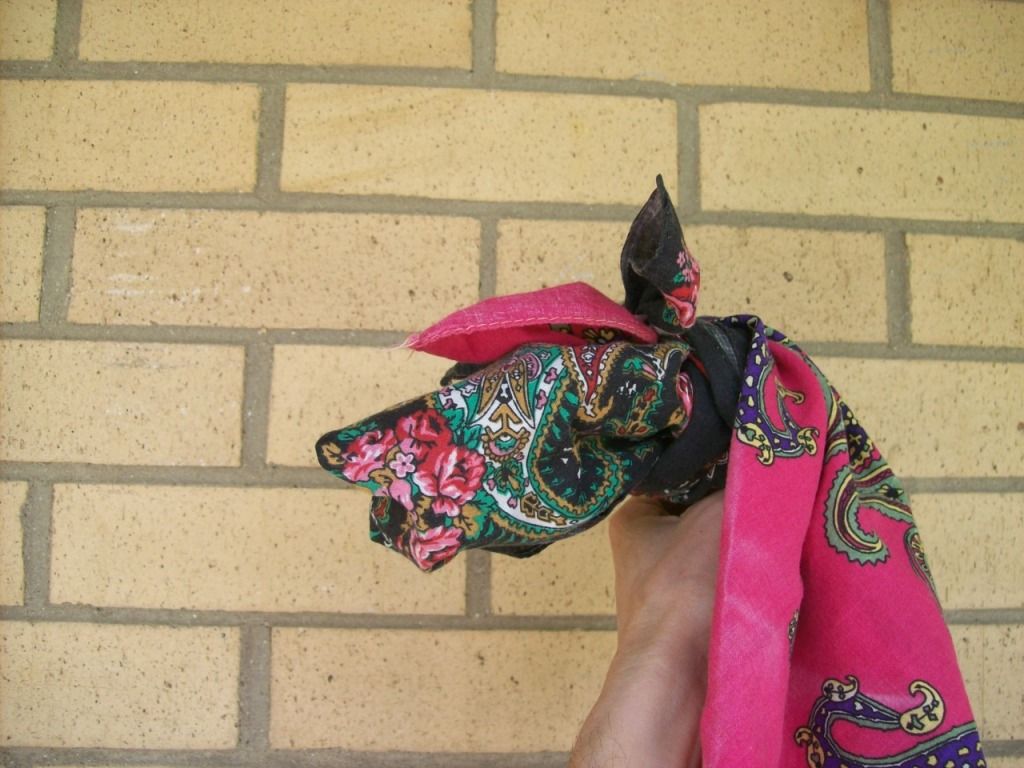
Click here for instructions.
Return to the top
How to fold a note so that it looks like an envelope
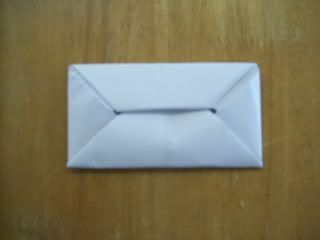
Click here for instructions.
Return to the top
How to fold a traditional Japanese Hina Doll
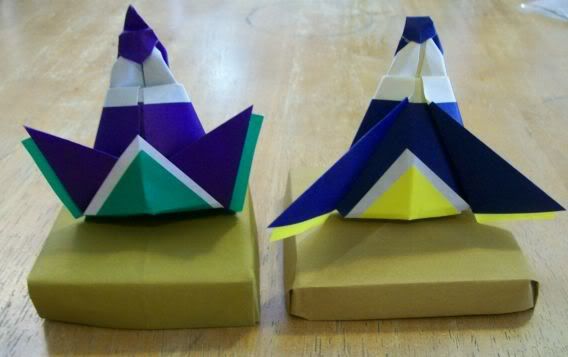
Click here for instructions.
Return to the top
How to use hands or a vase as a crystal ball
 
Click here for instructions.
Return to the top
A Baby Doll from two pillowcases or two handkerchiefs (and two rubber bands)
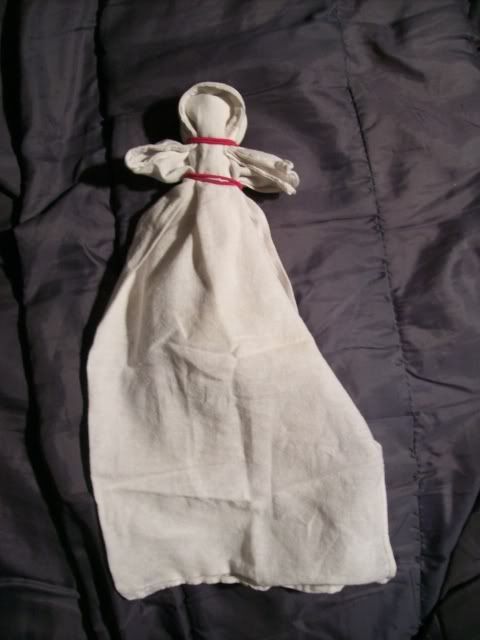
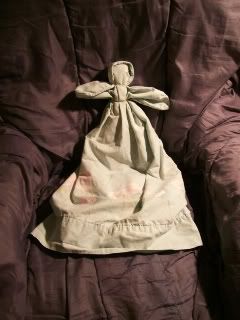
Click here for instructions.
Return to the top
How to sketch a Sri Yantra

This complex design comes from Hinduism. I wanted to learn to draw it, but the only instructions I found on the web looked like something too complicated for me to remember. I wanted something I could doodle from memory. So I figured out a way to make a quick sketch. Here is my page of instructions: link.
Return to the top
An easy-to-make abacus

Click here for instructions.

copyright 2002 by Karen Deal Robinson
Click on the mountaintop to see my other pages.

| 
