
|
Making the Swashplate
|
|||
|
making the main body
making the cyclic control system
an introduction to electronic components building an airborne video system
|
Swashplate is the most sophisticated part of a RC helicopter. It seems to be a simple unit of a factory one. However, it is a whole new thing of making one by yourself. Here is my design based on my own little knowledge about the swashplate. What you need includes:
The rod end set has first been cut into a round shape. It is then inserted into the plastic spacer as shown below:
Make sure that the aluminum ball placed in the rod end can be moved freely. 2 holes were drilled on the plastic spacer in order to house two screws that used to hold the ball linkage.
|
||
|
The back of the swashplate |
In my design, the swashplate is fixed on the main shaft. This is simply done by applying some glue between the aluminum ball and the shaft
|
||
|
|
|||
|
# be careful when applying epoxy to this tiny unit or you would get every part being |
|||
|
glued together.
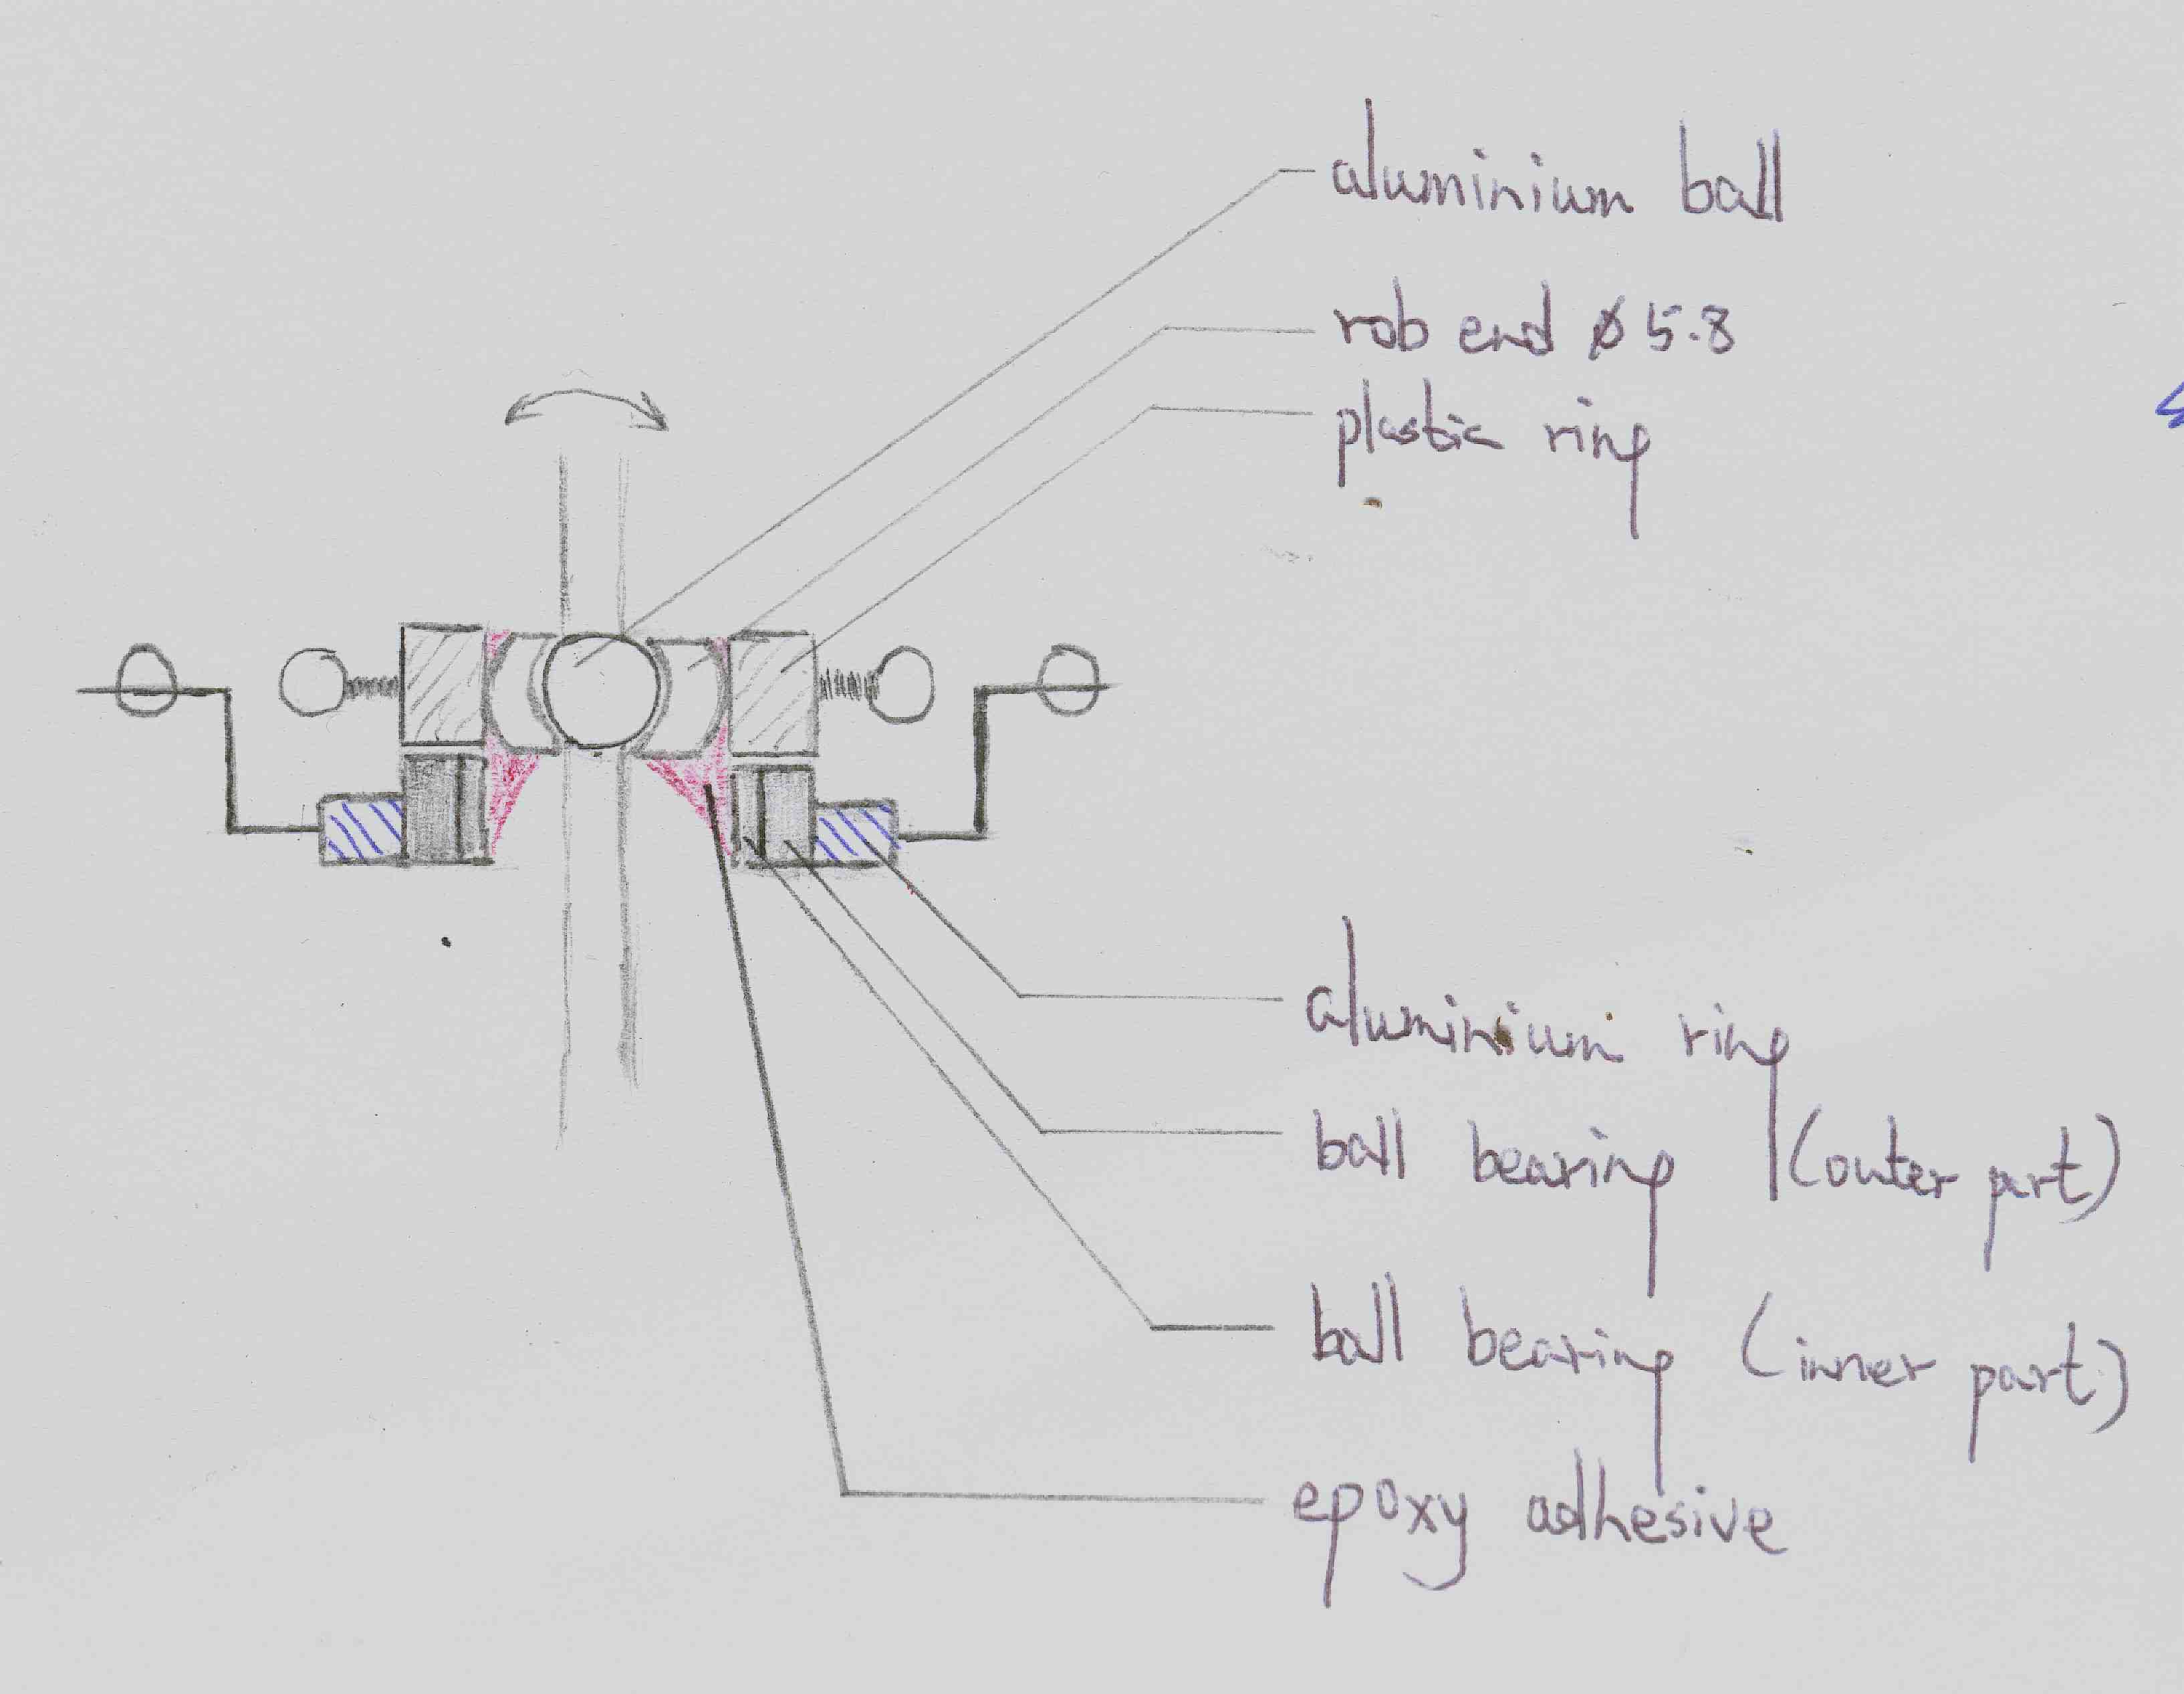
My instructions are too confusing? Here is my draft of the swashplate which might help you. I still find that my design is a little bit too complex. If you have a better design, please let me know!
|
|||
Ben Hui - web master 2002 |
|||


