
|
|
||
|
6. Surfaces and Parts |
||
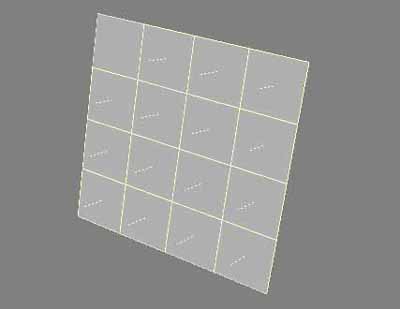 This tutorial will try and shed light on the mysterious annoyances that appear once a person begins naming polygons as surfaces. Every other book, including LightWave's instruction manual, breezes over the 'Change Surface' requester as if it were an easy thing to do. Every tutorial I have ever seen tells you, "Press 'q' to bring up the 'Change Surface' requester, and create a name for the polygons." However, in the real world, if you are in the creative process you will make mistakes. At other times you'll wish to add more polygons to an old surface name; or, you'll wish to rename an old surface name. Another one that would be nice to do is subtract polygons from an old surface name. When you try doing these things, you might find you can't do it at all, or you might find some very strange things occurring. The more you try to modify old surface names, oftentimes the messier and messier things become. In this tutorial I will attempt to show what the 'Change Surface' requester really does and how to select polygons that have been given a surface name. As usual, I will be referring to LightWave version 7.5 in this tutorial. CREATING AN EXPERIMENTAL ARRAY OF 4 X 4 SQUARES First, lets open Modeler and select from the 'File' menu, 'Close All Objects' to clear whatever you might already have loaded. Under the 'Create' tab, select the 'Box' tool (or press SHIFT-X) and drag a box in the 'Back' window to fill the 'Back' window. Press the 'ENTER' key to finish it as a box with no depth. 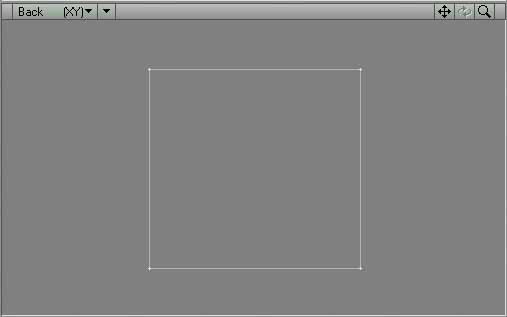 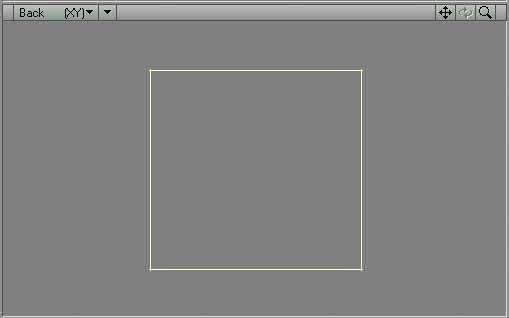 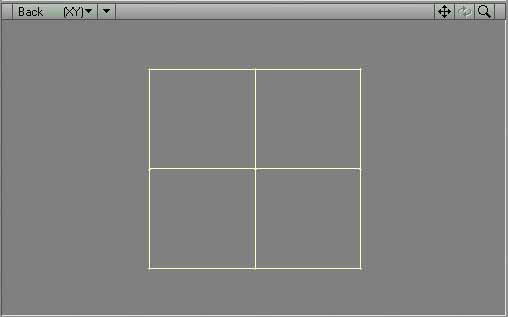 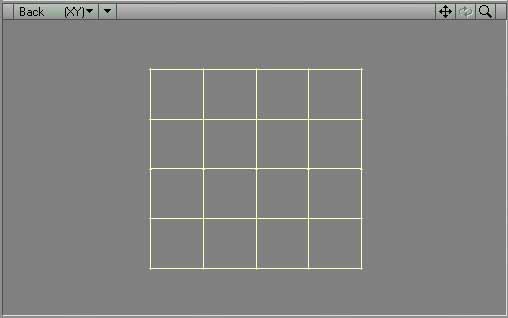  ) select 'Wireframe Shade' from the menu. Choosing this mode will allow you to see the surfaces at the same time as seeing the polygons. You will probably notice no difference in the Perspective Viewport yet. ) select 'Wireframe Shade' from the menu. Choosing this mode will allow you to see the surfaces at the same time as seeing the polygons. You will probably notice no difference in the Perspective Viewport yet. Rotate the rectangle until the gray side is toward you. You can center the rectangle in the viewport by pointing to the center of the rectangle and pressing 'g' to 'go' to the center. You can make it bigger in the viewport by pressing the ('.') key which I remember by it being on the 'Greater Than' key, and smaller by pressing the comma ( ',' ) key which I remember by it being on the 'Less Than' key. 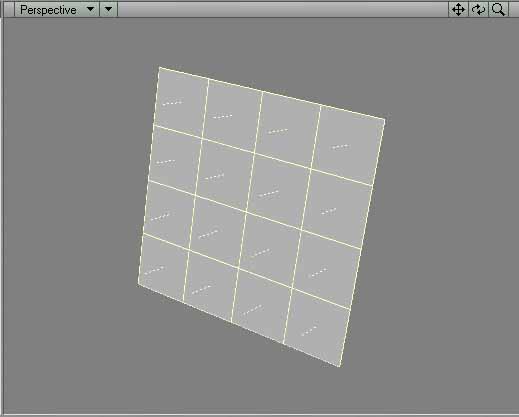  ) and then pressing the '/' key or clicking with your left mouse button in the box to the right of where it says Sel: ) and then pressing the '/' key or clicking with your left mouse button in the box to the right of where it says Sel:  to turn off all of the polygons. to turn off all of the polygons.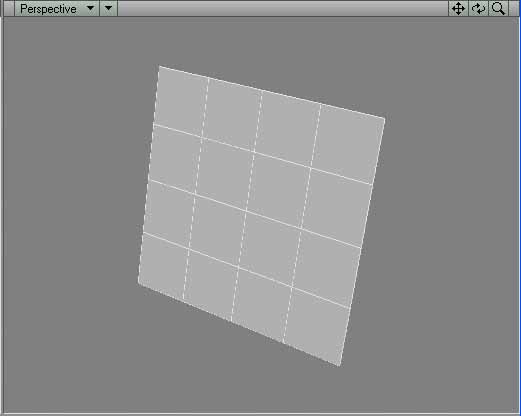 DEFINING SURFACE NAMES Now, we will define some surface names. To select any polygon, when no polygons have yet been selected, you drag your mouse over the edge of polygons you wish to include and they will turn yellow. Select all polygons except for the very upper-left polygon by sweeping your mouse across every polygon edge while holding down the left mouse button. If you let up on the mouse button before you have finished selecting polygons, hold the shift key down as you click with your mouse button and it will again bring you into the 'Select more polygons' mode. If you wish to unselect a polygon (like if you made a mistake and selected the most upper-right polygon), then you let up on the mouse button and when you again click the left mouse button and drag it over the edge of any polygon, they will unhighlight. Afterwards, the following 15 polygons should be selected. 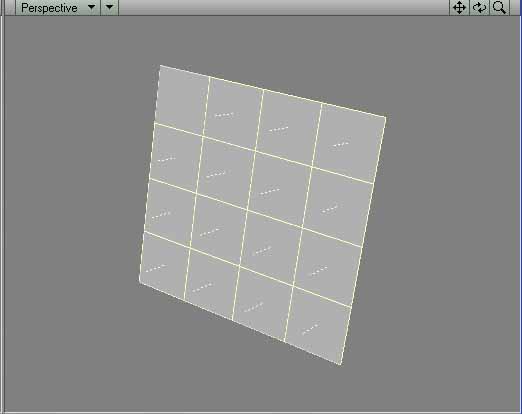 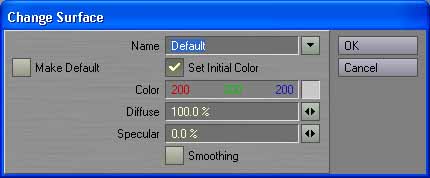 Next, unselect all polygons by again pressing CTRL-H (Or, clicking on Polygons button at lower-left of window ) and then pressing the '/' key or clicking with your left mouse button in the box to the right of where it says Sel: to turn off all of the polygons. The perspective viewport should now have no polygons selected:RE-SELECTING POLYGONS FROM SURFACE NAME We will now learn how to re-select polygons. We will use the Surface Name that you defined in the 'Change Surface' requester. Notice that WE WILL NOT USE THE 'Change Surface' REQUESTER TO SELECT THE POLYGONS. This is important. Many people try and use the 'Change Surface' panel once again, thinking that they should do it there. And, if I had written the program, I certainly wouldn't have hidden the ability to re-select polygons that have been defined as surface names so well, but... I didn't write the program. To select polygons again using the Surface Name to select them, go to the Modeler menu  at the upper left of the screen, and from the Windows menu select 'Statistics Open/Close' (or press the 'w' key on the keyboard). at the upper left of the screen, and from the Windows menu select 'Statistics Open/Close' (or press the 'w' key on the keyboard).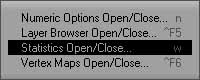   Important - IF YOU ALREADY HAVE POLYGONS SELECTED BEFORE YOU DO THIS, IT WILL INCLUDE ANY POLYGONS WHICH WERE ALREADY HIGHLIT WITH THE ONES IT TURNS ON WHEN YOU CLICK ON THE PLUS SIGN. Therefore, the plus sign means "Turn on the polygons that are defined as this Surface Name including them with the currently selected polygons in the current object." Once more, then, the perspective viewport should look like this: SUBTRACTING POLYGONS FROM OLD SURFACE NAME BY ADDING POLYGONS TO NEW SURFACE NAME Next, we will see an important point. If you create a new Surface Name which includes polygons which are in other Named Surfaces, THOSE SURFACES WILL BE SUBTRACTED FROM THE OLD SURFACE NAMES. Any polygon in your object can only be in one Surface Name definition, and the older instance of that polygon will be removed from the old Surface Name designations. Lets prove this now... Click on the minus sign next to the Surf:LowerSquares to unselect all polygons or do as we've done many times before to unselect all of the currently selected polygons. This time, select the four upper-left polygons. 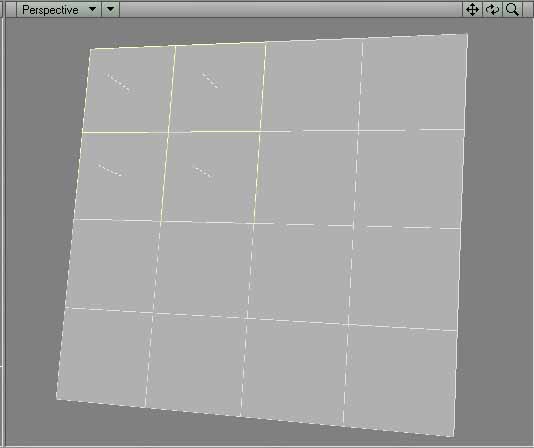 Press 'w' to bring up the Polygon Statistics panel and select 'LowerSquares' from the Surf: dropdown. Click on the plus sign to highlight the polygons that are now defined under this name.  As you'll remember, before all polygons were defined except for the 16th upper-left square. Now, you will see that the upper four polygons are now unselected and only 12 lower-right polygons are selected. As you'll remember, before all polygons were defined except for the 16th upper-left square. Now, you will see that the upper four polygons are now unselected and only 12 lower-right polygons are selected. CREATING NEW SURFACE NAME WHICH REPLACES OLD SURFACE NAME Now, select the five squares that surround the four upper-left squares so that now the upper nine squares are highit. (Hold the SHIFT key down, click with your left mouse button and hold it down, and drag it across those squares. If you highlight any that you don't want to highlight, let up on the left mouse button and click again, dragging the mouse across the edge of the polygon you wish to erase.  Press 'w' to get up the Polygon Statistics panel and look at the dropdown menu again. This time you should only see two names, UpperNine and LowerSquares'. UpperFour should have disappeared from the drop-down menu. This is because all four polygons which had been defined in the UpperFour surface name have all been defined under UpperNine now, so it no longer shows up in the list. And, if you once more select 'LowerSquares' from the drop-down menu and click on the plus sign, you will find that now only the seven squares along the bottom and right-hand rows are selected. 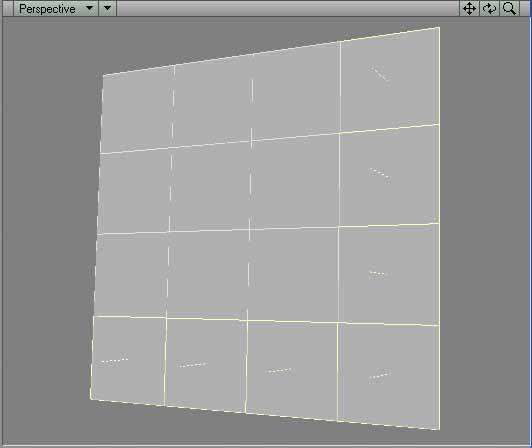 1. Any polygon can be in only one named surface, and if you select some polygon in a new named surface that is included in an old named surface, the polygon in the old named surface will become de-selected and will move to the new named surface. 2. If all polygons that used to be selected in any old named part suddenly get selected in a new surface name, then the old surface name will stop appearing in the Polygon Statistics Surfaces drop-down. ADDING POLYGONS TO AN OLD NAMED SURFACE How about if you want to add polygons to a named surface that you have already created, though? Can that be done? Lets see if there is a way to do that. You should already have all of the squares which are along the bottom and all the squares that are along the right sides selected from the last step. If you don't, select them. Select the rows bordering these selected squares so that the bottom two rows, and right-hand two rows are all selected. De-select all polygons in the manner you have done before. Press 'w' to bring up the Polygon Statistics panel. Select the 'LowerSquares' surface and click on the plus sign. Once more the two right-most and two bottom-most rows should become selected. Click on the minus sign to have those polygons de-select and now select 'UpperNine' from the pulldown menu and click on that plus sign. To prove this... Deselect all polygons again. Now select the polygon that is three from the left in the top row. 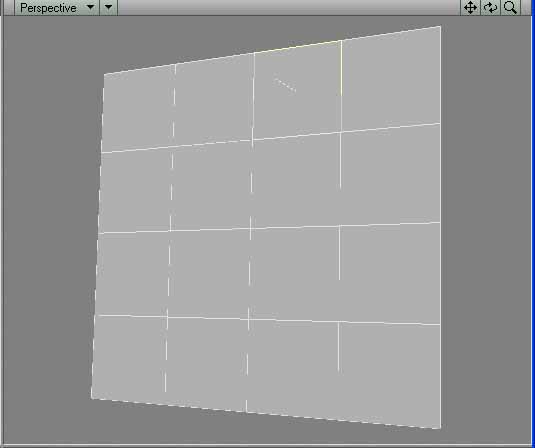 De-select all polygons, press 'w' (you're now getting the hang of this 'press w or q' thing, right?) to bring up the Polygon Statistics panel. Select 'UpperNine' from the Surf: dropdown and click on the plus sign. It will show the four squares that were last defined under the UpperNine name, plus the new polygon you just added. 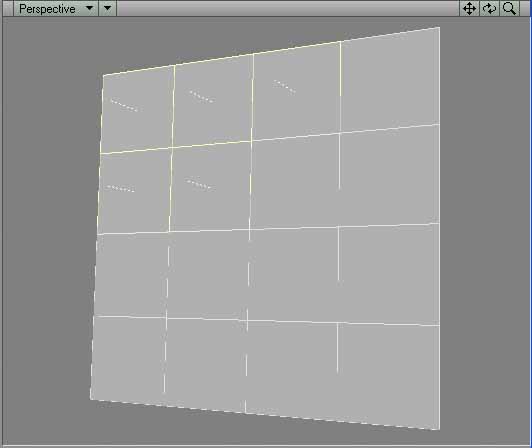 CHOOSING APPROPRIATE SURFACE NAMES Note that it is important when coming up with surface names to name them things which might not become inappropriate over time. Although at first it seemed appropriate to call those polygons 'UpperNine', there are no longer nine polygons. In fact, we might have even modified it over time so that they also weren't upper polygons, either. You have done many changes to your document. I will now be saying things which will destroy what you have done. Save the current object so you can return to this level again. Pick 'Save Object' from the 'File' menu at the upper left of your window or press the 's' key, give it the name 'Polygon Test 1' and click OK. DELETING OLD SURFACE NAMES Well, as with any program, people make mistakes, thus, there is always a need for a delete key in any program. Now, I have to disappoint you. THERE IS NO DELETE KEY to delete old surface names, as of version 7.5 of LightWave 3D. What makes it harder still, besides the methods I just outlined to you where polygons can be subtracted from an old surface definition by adding them to a new surface definition... instead, there also is no easy way of highlighting some polygons and telling LightWave to SUBTRACT those polygons from an old surface name. As I showed you before, you can create a NEW surface name that includes the polygons you wish to subtract, thus subtracting them from the old surface name, but you then are stuck with that new surface name unless you add those polygons to yet another surface name. If you remember right, I just showed you that you can easily ADD polygons to an old surface name. Using these facts, then, you can sort of delete old surface names (as I showed you earlier when the 'UpperFour' surface name was automatically deleted when you created the 'UpperNine' surface name because all polygons that had been in the 'UpperFour' surface name were in the new 'UpperNine' surface name). HOW TO RENAME AN OLD SURFACE NAME TO A DIFFERENT SURFACE NAME In this tutorial, I have dealt with surface names as if they had nothing to do with applying surfaces to polygons. The real purpose for surface names is so the Layout program can add textures and effects to surfaces using the surface names in the Surface Editor. 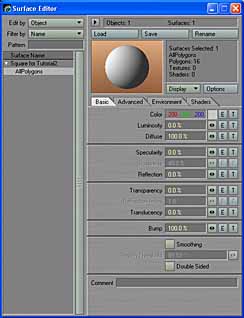 However, a second use for surfaces is as I am implying in this tutorial, which is the use of surface names to re-select polygons that you had formerly selected. However, since the primary reason for surface names is to define surfaces, you shouldn't be surprised to find that the RENAME button which allows you to rename a surface is found in the Surface Editor. To rename an old surface name, click on 'Surface Editor' or press CTRL-F3. Select the surface name from the Surface Name listing at the left of the Surface Editor panel, then click on the 'RENAME' button  at the top of the Surface Editor. Double-click whatever name is in the Name gadget to highlight it, then type a new surface name and click 'OK'. at the top of the Surface Editor. Double-click whatever name is in the Name gadget to highlight it, then type a new surface name and click 'OK'.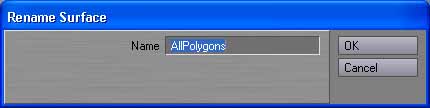 CREATING NEW SURFACE NAME WHEN NO POLYGONS ARE SELECTED If NO polygons are selected when you create a new Surface Name in the 'Change Surface' requester by typing something... the new surface defintiion will include all of the polygons in the object. This is the default. Therefore, if you had no polygons selected, yet you typed in a name into the Name gadget of the 'Change Surface' requester, this would remove any and all surface names that you might have defined before. WARNING!!! At the moment you should have two old surface names, one called 'UpperNine' and the other called 'LowerSquares'. Deselect all polygons. Press 'q' to bring up the 'Change Surface' requester. Double-click in the 'Name' box and type 'AllPolygons' as a new surface name. Click OK (or press ENTER). WHY THE TWO OLD SURFACE NAMES DISAPPEARED Go to 'w', look at the drop-down menu under Surf: and you'll only see one surface name called 'AllPolygons'. The other two surface names have disappeared from the list. If you don't understand why this happened. When you have no polygons selected in LightWave, it automatically implies 'All Polygons selected'. That is always the case in LightWave. So, when you had no polygons selected, but you typed a new name into the 'Change Surface' requester, you were telling it to define a new surface name called AllPolygons. The minute you created a new surface which contained all polygons in your object, the polygons in both of the old surface names were included in the new AllPolygon surface name definition, thus those two names were deleted from the Polygon Statistics Surf: menu. NAMES DISPPEARING FROM POLYGON STATISTICS DROP-DOWN BUT NOT 'CHANGE SURFACE' REQUESTER DROP-DOWN I just showed you that all old surface names dropped out of the Polygon Statistics panel, meaning you could no longer have it re-select those polygons for you again. But, if you now press 'q' and look at THAT dropdown menu, you'll see that there are now three surface names, not just the new 'AllPolygons' surface name that you just created. The two surface names, 'UpperNine' and 'LowerSquares' are ALSO still in that list even though they don't appear in the Polygon Statistics Surf: drop-down menu any more. REMOVING EMPTY OLD SURFACE NAMES FROM THE CHANGE SURFACE' REQUESTER'S DROP-DOWN MENU Save this object as 'Polygon Test 2'. Shut down LightWave 3D's Modeller, then restart it. Load 'Polygon Test 2' back into LightWave and do a 'q' to bring up the 'Change Surface' requester. You will now see that only the 'AllPolygons' surface name remains. So, although straggling surface names might still hang around in the 'Change Surface' requester, the one you can rely upon without exiting the program is the 'Polygon Statistics' panel. LEARNING HOW TO REMOVE AN UNWANTED POLYGON FROM ONE SURFACE NAME AND MOVE IT TO ANOTHER SURFACE NAME Now, possibly for the first time, you will be able to control the movement of polygons from one surface to another. Again load the 'Polygon Test 1' object by doing a File menu, Load Object. First thing you should notice is that the perspective view might be blank. This is because with the 'Smooth Shade' view type, if a single-sided polygon is showing you it's back, you see nothing at all. To see the polygons, you would have to switch to the Wireframe display type or turn the polygons around. Note that even if you had turned the perspective view around before you saved it, it will revert again to being backwards when you load it back in. Just to check that you saved it at the correct moment in time, do a 'w' to bring up the Polygon Statistics panel, select the 'UpperNine' surface name, click on the + sign to highlight those polygons and you should see five upper-left squares highlit: Now, lets say that you wish to only have the four upper squares defined under the surface name called 'UpperNine' (see how the name you pick at the beginning can lock you into bad techniques? Now you can see that it would have been much more understandable if we had named it 'UpperSquares' or 'UpperLeftSquares'. I would recommend that you change that name in a case like that) Look to ensure you understand which square you will need to turn off in order to make that happen. You will find that it is the third square from the left in the top row. However, if you remember right, you can't subtract a polygon from a surface name, you can only add a polygon to a surface name, therefore removing it from another surface name. Secondly, we now know that LightWave does an AND with any polygons you currently have selected when you modify an old surface name, so we have all the tools necessary to remove that nasty fifth polygon from the 'UpperNine' name and again add it to the 'LowerSquares' surface name. Select that polygon and make sure all other polygons are de-selected. This should look familiar... That should have done it. Turn off all polygons again. Press 'w' to bring up the 'Polygon Statistics' panel. Select the 'UpperNine' surface name. Click on plus sign and that polygon should have now been subtracted from the 'UpperNine' surface name. RECAP OF WHAT YOU'VE LEARNED SO FAR 1. You can easily add new polygons to an old surface name. 2. You can create a new surface name by just typing a new name in the 'Change Surface' Name box. 3. A polygon or polygons can be removed from an old surface name by adding it to a new surface name. 4. You can not delete old surface names with some kind of 'Delete' button. 5. You can rename old surface names to new surface names. AND, I'LL ADD A VERY IMPORTANT ONE... 6. If you re-assign all polygons of an old surface name definition, then close the object. When you load the object again, that Surface Name will have disappeared from the 'Change Surface' list. Number 6 is a powerful one, because it means you CAN get rid of old names. You just have to reassign all polygons which had been assigned before under a new designation, close the object, reload the object and the old Surface Name is gone. If you had three surface names and they were all the same color so you wanted to combine them, you could enter 'Select Polygon' mode with CTRL-h, press 'w' to bring up the 'Polygon Statistics' requester. You could click on 'Surf' and select the first of the three surface names, then click on the '+' to the left of the name. Then, do the same with the second surface and those polygons would be added to the selection. Then, do the same for the third surface name and click '+' to add it to the other two selections. After you had done that, you end up with all polygons that were in all three surface names being selected. Then, you could press 'q' to bring up the 'Change Surface' requester, give the combined selections a new Surface Name, color and 'Smoothing' checkmark. Save it as a new object, do a 'File->Close Object', do a 'File->Load Object' and load it back in. Press 'q' to bring up the 'Change Surface' requester and you will find that the three old surface names have disappeared and have been replaced by the newest definition. PARTS Well, then what are parts, then? Parts work much like Surfaces do, but part names do not appear many places in the LayOut program. You create a new part from a surface by going to LightWave's Display tab (proof of the purpose for Parts). Under Groupings, pick 'Surfaces to Parts'. 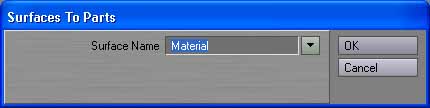 Select the Surface Name you wish to create as a Part name from the 'Surface Name' drop-down menu  . .After creating the part, you can change the part name if you'd like by picking 'Change Part Name' from the Groupings button of the Display Tab area. 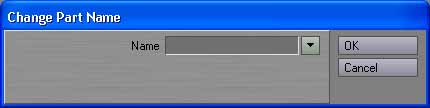 You pick the part name from the 'Name' drop-down menu and then type a new name, and click 'OK'.After defining a part name, you can select the polygons associated with that part name in exactly the same way as you did for Surface Names. You press 'w' to bring up the 'Polygon Statistics' panel. You select that drop-down menu next to where it says 'Parts:' instead of from the drop-down menu where it says 'Surf:'. 
So, except for the difference in where you might find the places where you change a Surface or Part name, and the place where you redefine a surface or part name, there are more similarities than differences between Parts and Surfaces. SKELEGON NAMES AS PARTS You'll be dealing with 'Skelegons' in later tutorials. Skelegons are a way to build a bone structure which resides within an object. Bones used to have to be built separately from an object in the Layout program (and bones still can be done that way), but it can be very handy to keep your bone structure integral with the object, itself. Skelegon names are actually part names. SELECTING PARTS OR SURFACES So, recounting what you learned, one of the reasons you might wish to give a surface name to polygons is you can easily re-select that surface just by using the surface name. In the same manner, a part name can be re-selected. You can reselect either a part or a surface name by entering the 'Polygon Select' mode by pressing CTRL-g, pressing 'w' to bring up the 'Polygon Statistics' panel. At the bottom of the list, just as with surfaces, just below where it says 'Surf:' it says 'Part:'. If you click on the black arrow which points downward (pointed to by the arrows in this illustration), a menu will appear which lists all surface or part names. 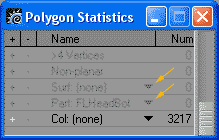
If you have created skelegons, they will be under the part name list. Select a name and the name will appear in the area next to where it says 'Surf:' or 'Part:'. Merely picking the name from the list, though, doesn't select the part or surface. To add that part to whatever is currently selected, click on the '+' sign to the left of where it says 'Surf:' or 'Part:'. 
If no other polygons were currently selected, the part or surface you selected will become selected. Otherwise, it will be added to the current selection. So, surfaces are created by clicking 'q' to bring up the 'Change Surface' requester and parts are created when you create a skelegon or do a 'Surfaces to Parts'. |
||
