
|
|
||
|
13.3 Skelegons - Part 3 |
||
 If you have closed the last version of the arm that we did in the last tutorial do a 'File->Close All Objects' (to make sure that multiple objects aren't accumulating), then do a 'File->Open Object...' and choose arm_03.lwo. And, as usual, it is best to instantaneously do a 'File->Save Object As...' and bump the number to arm_04.lwo. In the last tutorial, I created three skelegons and their associated Weight Map names, but didn't fill them in with any weighting information. To see a weight map, go to the 'Perspective' viewport and from the view type drop-down menu choose 'Weight Shade' 
If I choose the 'ArmShoulder' Weight Map from the Weight Map drop down at the bottom right of the window... 
The arm's polygons are displayed in an army green color, indicating that no polygons are yet associated with that weight map.  Weight values are given to points, not polygons. Thus, I have to press CTRL-g to enter 'Select Points' mode. To define points to be associated with a certain Weight Map, you first select all points that you wish to have the same Weight Value. Turn off subsurface mode by pressing TAB before you work with weight map values. It becomes sluggish when you're working with the Subsurface mode turned on while in the Weightmap view type. I'll start with the first row of points up by the shoulder. It doesn't matter what order I select the points.   
Once I click 'OK', the weights for those points are applied. 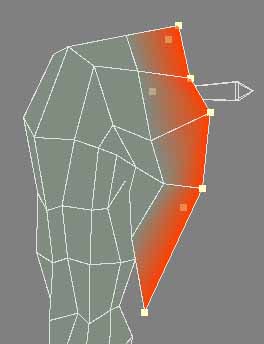 A very light red indicates that the influence of the bone drops off by that percentage at that relative position in the object. I deselect the first row. To select the second row of points, it will be helpful to choose the 'Wireframe' view type in the 'Perspective' viewport. I use ALT and the left mouse button to rotate the row, and when I can see each point, I SHIFT-select the next point until all points in that row have been selected. 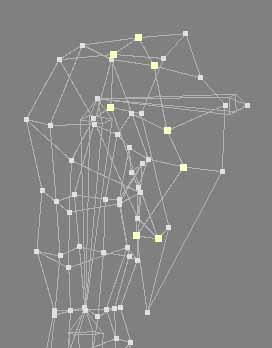  1. When you select '(new)', that doesn't necessarily mean that you've never defined that weight map before.I click 'OK' to have Modeler merge the new point values with the old point values. The old points that I had originally defined will still be the same as they were (unless one of the old points was the same as one of the points I just added). ...and the second row of points will be merged with the Weight Map definitions with a lower 50% value. Since 'Wireframe' is the current view type, nothing seems to have changed. However, when I select 'Weight Shade' from the view type drop-down menu... 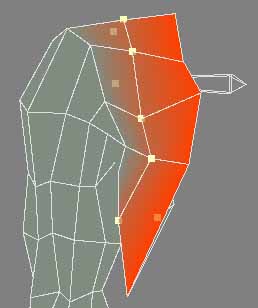  IMPORTANT - Any point may be associated with more than one weight map. To do this, I first choose '(new)' as I've been doing, select 'ArmShoulder' from the 'Create Weight Map' requester, type in 10% as the value. 
I click 'OK'. I switch to 'Weight Shade' view type. You can only see a slight gradation between the third and fourth row of points as it now gradates from 10% to 0%, which is a very small amount of gradation.    
Switching back to the 'Weight Shade' view type... 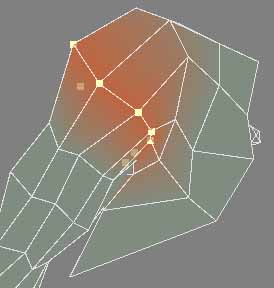  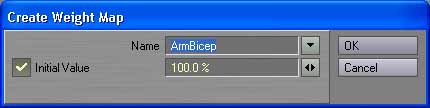
I keep doing this, choosing the 6th row, giving it a value of 75% for the 'ArmBicep' Weight Map and 25% for the ArmForearm Weight Map. I choose the 7th row, giving it a value of 50% for the ArmBicep Weight Map and 50% for the 'ArmForearm' Weight Map. I chose the 8th row, giving it a value of 25% for the ArmBicep Weight Map and 75% for the ArmForearm and so on, tapering the value higher and lower as I go. The Weight value should be strong in the middle of the bone, and drop off to zero on the ends. Here's what the 'ArmBicep' Weight Map looks like when its done... 
So the arm bends, smoothly, always overlap weight maps so the 'ArmForearm' influence extends into the area of 'ArmBicep' influence. IMPORTANT - The biggest problem that people run into is when they don't define a Weight value for a particular point. If no Weight Value is given for a point, it will stay where it is (not being influenced by any bone when bones move). If you ever move a bone, and part of the object stays behind, that point has not yet been given a Weight Map value. Here's the 'ArmForearm' Weight Map: 
You should taper your weight maps in a 20%, 50%, 100%, 60%, 40%, 20% or a 25%, 50%, 75%, 100%, 75%, 50%, 25% manner. The best thing to do is experiment. Over time you'll get good sense of the taper that should be used, and what associated values are most effective. I press 's' to save the object. MODELER, TAPERING ONE BONE INTO ANOTHER When the weight values of two bones overlap, the additive value of each bone should add to 100%. 
MODELER, DETERMINING POINT'S WEIGHT VALUE If at any time you wish to determine a point's weight value, make sure you're in the 'Point Select' mode by pressing CTRL-g, select the point you wish to know the weight value of and press 'i' to bring up the 'Point Info' panel. Click the white arrow to the left of the bone's name the point should be associated with and a menu will unfold showing the point value for that bone. 
|
||
