
|
|
||
|
40.2 Deinonychus Dinosaur 2 - Backdrops to 3D Sculpture |
||
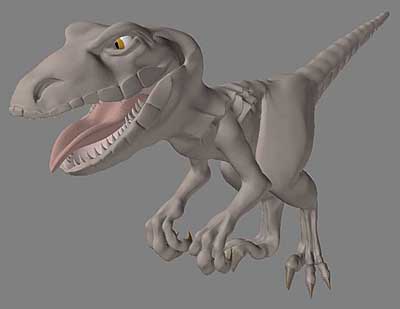 Creating the 3D Dinosaur From Images Since I've led you through the same types of operations before, I'll not be as explicit with every surface this time. Generally, I'll only cover things which I haven't mentioned before. As usual, create a box which has a height/width/depth ratio the same as the height/width/depth pixel ratio of the images you'll be using as backdrops. So, from Modeler's 'Create' tab, 'Object' section I select 'Box'. Then I press 'n' to bring up the Numeric Requester and enter...  Note that I've entered half the height of the box into the Y gadget to raise up the box so the dinosaur will be standing flat on the ground. Next, I select all polygons of the box, press 'd' to bring up the 'Display Options' requester and click on the 'Backdrop' tab, loading the three images into the three viewports as backdrops. 'TL' will be top view, BL' will be Front view, 'BR' will be side view. Click on 'Automatic Size' to size each one to fit the box's dimensions. 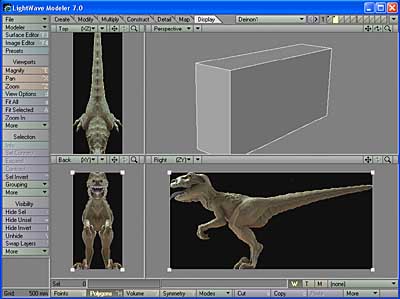 I save that as a preset so I can easily load it in the next time I load the modeler and want to work on Deinon. After you've done that, delete the box and save the file as 'Deinon1.lwo' I Start With the Tail I have to start somewhere, so I decide I'll do the tail first. I draw points using '+', connect them together into polygons by selecting them in groups of four, then press 'p'. I do this in the 'Side View'. 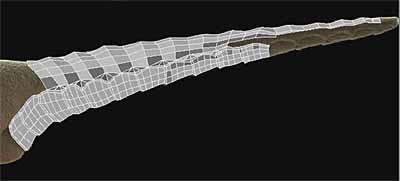 Once it starts to be fleshed out in the side view I switch to the 'Perspective View' and start giving it depth.  I switch between 'Wireframe' and 'Wireframe Shade', turning on and off the 'Subsurfacing Mode' with TAB to see how it's coming.  Doing it in Sections ' When doing such a complex model, it's oftentimes the case that you do it in pieces and then worry about how the sections will join later. 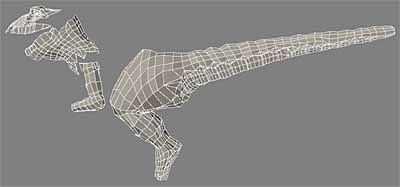 Quite quickly, even when the model is fragmented, the eye starts to be able to discern the animal as being a whole object.  Be Extra-Careful With Hands and Feet I pay particular attention to the details of the feet and hands. The eye will be drawn to those parts. The mind increases reality by checking on details of projecting parts so never leave details such as these poorly done. 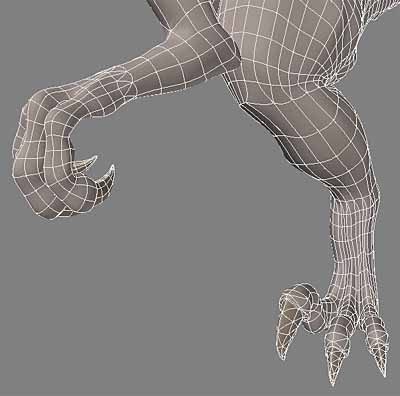 Quite quickly the dinosaur starts to breath. 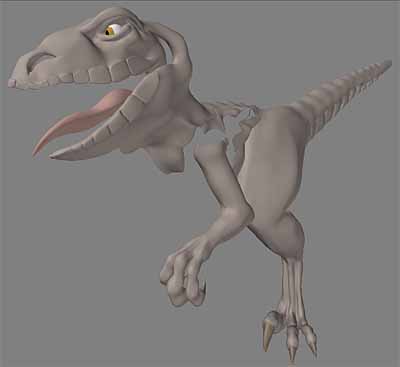 It's oftentimes the case, with intricate objects, that once you get this much done one part of the object will obliterate what you're working on. So, feel free to highlight those polygons, pressing '-' to hide them and '\' to make them reappear. Fixing Improper Subsurfaces Be careful, though, that you don't press TAB while some polygons are hidden as the ones which are hidden will remain in the state they were in before you hid them whereas the visible polygons will toggle between subsurfacing mode. If you ever run into problems, it might look like this:  In that case, highlight either all of the subsurfaces if there are less of them than faces (as is the case in this image)... or highlight all of the faces if they're the ones which are the minority. Once you've got them highlit, press TAB to toggle the mode. If there are way too many faces or subsurfaces, highlight all polygons in the model, press 'i' to bring up the Polygon Information requester, then choose each one in the list which says 'Face' and click on 'Deselect' to deselect them (or the ones called 'SubPatch' if they are the minority).  Once you click 'OK', only the polygons which you didn't deselect will be selected. Therefore, now you can just press TAB to toggle them all to the same state. Also note that you can highlight any polygon and flip it back and forth between being a Face or a Subsurface polygon. The instant you flip a face polygon to be a subsurface polygon, it'll automatically blend in with any neighboring subsurfaced polygons. Doubling the Width of a Polygon Row You'll sometimes find that you've created a polygon row which isn't detailed enough. To split a whole row of polygons down the middle, first hide polygons which aren't important by selecting them and pressing '-'. Enter points mode and make sure no points are currently selected. Enter polygon mode and make sure no polygons are currently selected, then select the row you wish to double.  Select 'Add Points' from the 'Subdivide' section of the 'Construct' tab. Starting at one end of the row of polygons, click with the teeny black crosshairs on the line between each polygon. A point will appear where you clicked it, attached to the closest selected polygon edge. Continue adding points on each polygon edge, one after the other.  ... until all polygons in that row have a new point down the middle. Enter points mode with CTRL-G and highlight each new point, one-after-the-other just as you had created them. 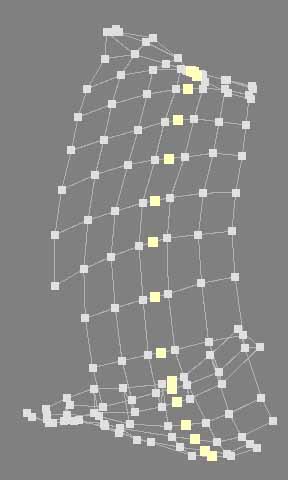 To split the entire row click on 'Split' from the 'Subdivide' section of the 'Construct' tab.  Each old polygon is that row is now two polygons, side-by-side. Finishing the Dinosaur Model I magnify his back, weaving the ripples together. 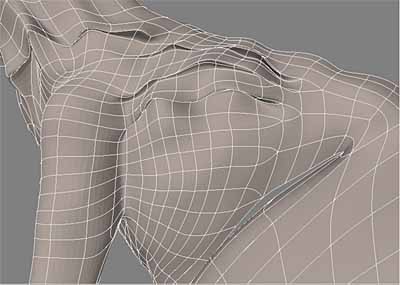 I fashion each tooth, selecting them by selecting one polygon and pressing ']' to select all connected polygons to that tooth. Then I press 't' to move the tooth and nudge each tooth into place.  And, with every 3D model, there comes that time when it's done. I add some surface textures (which won't be able to be seen until I go to the Layout program). 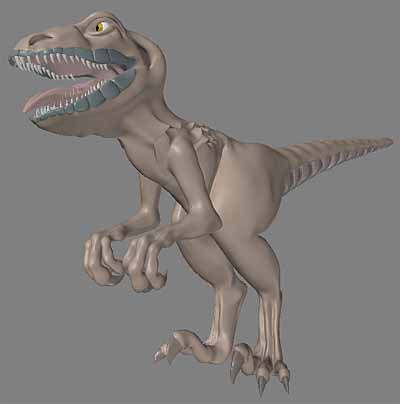 Click for a rotating version of Deinonychus. |
||
