|
|
||
|
39. Plastilina Clay Modeling |
||
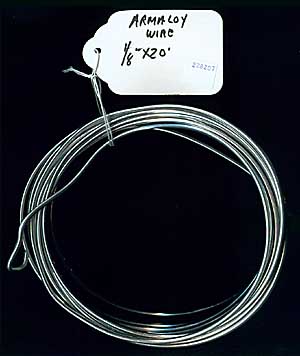
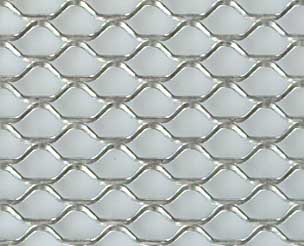
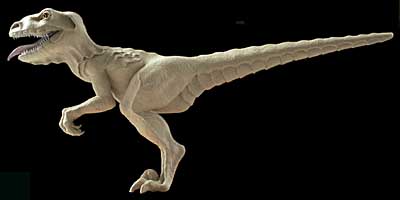 Modeling With Clay When the model that you're building is either non-exisistant, such as a Dinosaur or an alien from another planet or if the intricacy of the model goes beyond your abilities to imagine it in your mind then you'll find that making a physical model out of clay is a necessity. The type of clay that's oftentimes used is called 'Plasticene', 'Plastilina' or Plasticine depending upon the manufacturerer. The clay that I've always found to be the best is an Italian plastic clay called 'Roma Plastilina' which is manufactured by a company called, 'Sculpture House' at 100 Camp Meeting Ave. in Skillman, New Jersey. It comes in four different levels of hardness: 1. No. 1 - Soft For those who prefer an extremely plastic modeling plastilina. Best for large work2. No. 2 - Medium A slightly firmer consistency - the type most generally used by every0one for all average size work. Available in Yellow-Green and Dove-Grey on special order.3. No. 3 - Medium Firm A more consistent degree of firmness. Generally used for smaller models and by those who prefer a firmer modelling plastilina. Available in Grey-Green only.4. No. 4 - Very Hard For small figures, medallions and reliefs. 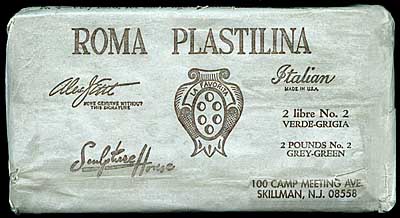 I used No. 2 - Medium, but it's so hot in Phoenix I probably would have done better using No. 3 - Medium Firm on an 8" high x 18" deep x 2.25" wide sculpture. Materials You'll Need. You'll need the following things before you begin modeling with Plastilina. 1. ARMATUREYou'll need to make an internal 'Armature', or frame. This will be what you'll build upon as you shape and build up the plastilina. You'll use the least amount of clay if your armature is very close to the surface. For a small sculpture the armature should be between 1/4" amd 1/2" of the final surface.2. BASE Tools You'll Need. When you enter an Art Supply store, you'll probably not find the right tool for the job you wish to do. Each sculpture's unique, so the tool you'll need will also probably have to be unique. Here are some tools that you'll find at a store for the intention of modeling clay. 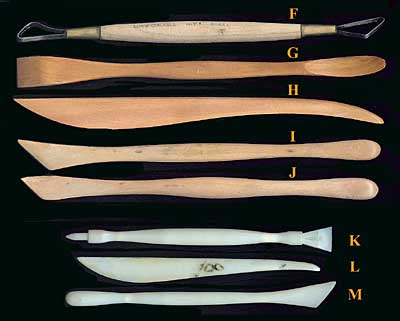 'F' is designed for doing very wet clay such as red clay you'd fire in a kiln. It's basically useless for clay that's as hard as plastilina. 'G' through 'J' are all made of hardwood and are all crudely shaped and too large to use on a sculpture as small as this one will be. 'K' through 'M' are all made of high-temperature plastics. Of these three, I sometimes use 'L'. So, if I'm not going to use any of the available tools, then what CAN I use to create a small sculpture with high detail? I tend to make my own tools using 1/4" Armaloy wire. I use a small anvil to pound the wire flat and round the ends with teeny files to shape them. The home-made tool I enjoy using the most is 'A'. 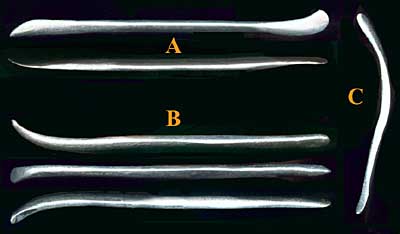 'B' is good for scraping holes or indents on one end and smoothing things with the other, but I don't use it as much as I do 'A'. 'C' is useful for scooping tiny crevaces such as between the toes. "Gee?" you might say, "Those don't look much different than the wooden ones?" The difference is size. The store's 'G' tool is 5/8" wide. My 'A' tool is 3/16" wide. Thus, mine is 1/3 the width of the wooden one. The wooden 'G' tool is 8" long. Mine is 4 1/2" long. The difference when you hold it in your hand is like the difference between using a toothpick to pick your teeth or a screwdriver. Two more tools which weren't made by me that I oftentimes use are:  'D' is a normal paring knife. I like the feel so much, it's half epoxy by now. 'E' is a tool you find in an Art Supply store which has an X-Acto-size rather sharp knife blade on one end and a curved knife on the other. Another tool that'll come in handy if you're sizing things is a caliper. 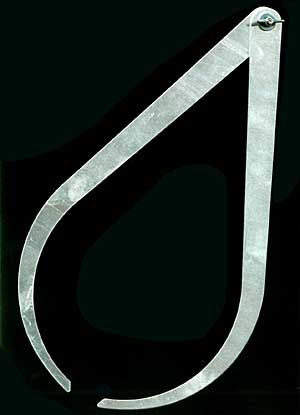 You loosen the wingnut to move it wide or narrow, take your measurement from one object (or a ruler), tighten the wingnut and transfer the width to your sculpture. Creating an Armature First, I decide how large I'll make my sculpture. Since the original Deinonychus was 10 - 11 feet long, I decide that 18" will be a good length to make it (approximately 1/7 the size of the original dinosaur). I first snake two 1/4" Armaloy wires from 1/4" holes I drill in the wood base (at the proper angle), then bend them upward until I reach the hips. I use a 1" square block of hardwood for the body, epoxying it to the legs. I elongate the tail using 1/4" Armaloy at the thick end and the last 3" I use 1/8" which I wrap with wire, epoxying where they join. I cut mesh proper sizes, wrapping with small pieces of galvanized wire as one might use tie-wraps. Afterwards, I wrap the mesh body with winds of galvanized wire, tightly binding it. I create the arms using 1/4" Armaloy and 1/8" for his fingers, then bind and wrap them together utilizing wire and epoxy. I create the head from 1/4" Armaloy for the upper and lower jaw and use mesh for the cranium and lower jaw's 'skin'. When complete, this is what the armature looks like before I start adding clay. 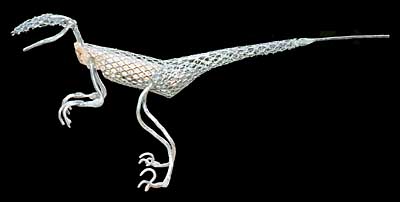 Make sure that your armature is VERY strong. Even with this tiny sculpture, all of the torque will be concentrated on the ankle area. Armaloy will act like a spring, but the mesh and wood structure must be rock-solid when you push it. As for the base, I not only drill holes that continue all the way through the 3/4" wood, but I also use epoxy where the feet will join the base. Modeling the Clay Here are close-ups of each section that I did: Head: 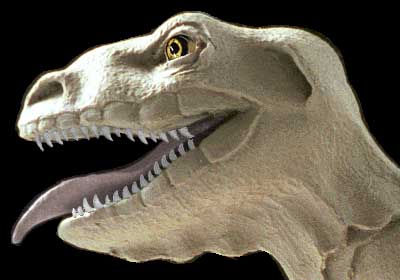 Back: 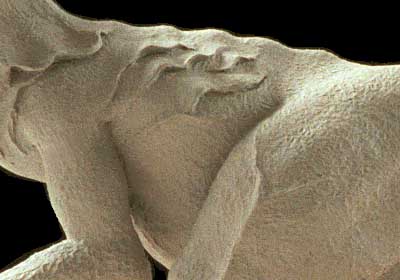 Thigh: 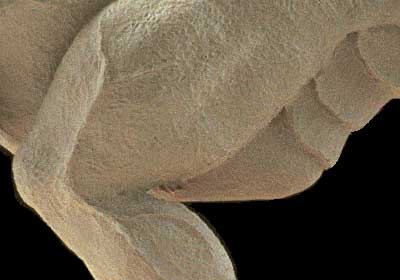 Leg: 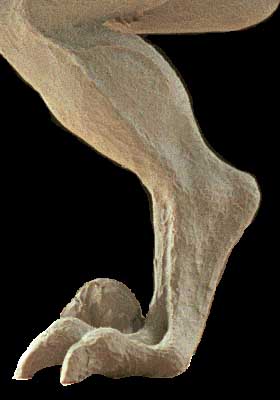 Arm: 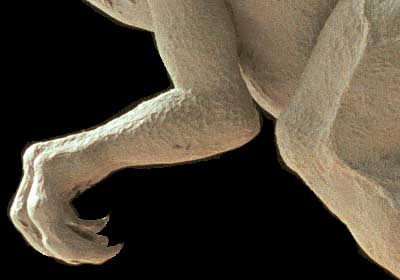 Tail: 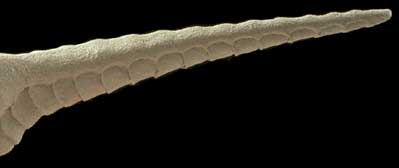 |
||