I pulled the locker out, and pulled the drivers side bearing off to adjusted
the shim pack to .022". This does two thing. First, it moves the ring gear closer
to the pinion, which will lower the backlash. Second, it will improve the fit
of my locker since the first try was so loose. The locker fit better, but still
too loose in the housing. I checked the backlash again, it was still too much
at .019". Again, off with the e bearings, and change-a-roo with the shim sizes.
This is the check spelling here - arduous part! I changed
the shims to .036" on the driver's side and .023" on the passenger's. With this,
backlash measured .006", which is to tight. Passenger side bearing off, shims
changed to .026", backlash measures .007". Passenger side bearing off yet again,
shims to changed to .029" backlash finally good at .009" and the overall locker
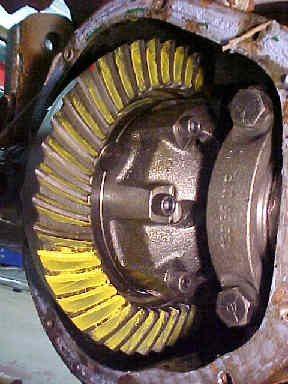
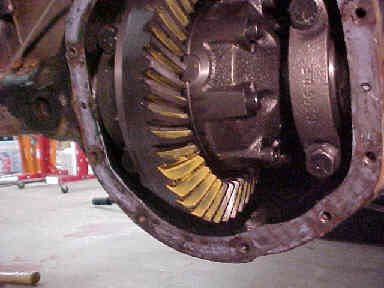
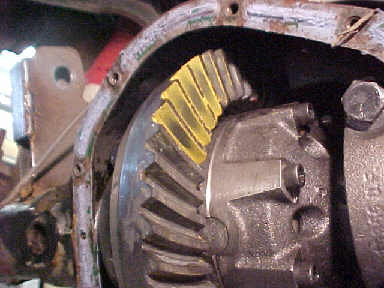
fit was snug. After all this, this was my first chance to check the gear contact
pattern. I opened up the container of gear marking compound that came with the
install kit and brushed an even coat of compound on both sides of four teeth
of the ring gear. Then I spun the ring gear, but the pattern was not so good.
The pinion was too close to the ring gear. This meant I'd have to pull the entire
works apart, remove the inner pinion race, and remove the shims to adjust the
pinion depth.
After disassembling the whole deal again, I put .039" of shims behind the inner pinion bearing's race, and repeated steps 1 thru 100 and checked my gear pattern again.
End Blatant Rant
(1/01/2003 - Steve Philipp sent me any email and suggested
lipstick as a possible alternative for gear marking compound. If you try this,
let me know how it works, and how your wife/girlfriend felt about you using
their lipstick. If you have any other ideas, please let
me know.)
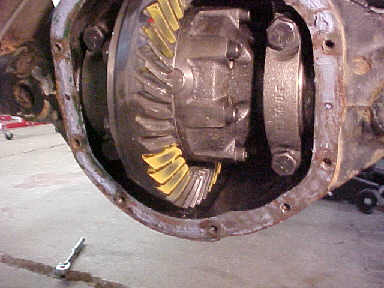
After I finally got some compound I marked the gears and gave them a spin. The pattern was Perfect!
By this time I had to pull off the rear bearings a total of 16 times, but now that the pattern is good, I can go back and get the pinion pre-load set. I pulled the locker and pinion shaft out so I could set the pinion pre-load the right way. Pre-load is controlled by the amount of shims on the pinion shaft that stop the bearing from continuing to slide on the pinion shaft as you tighten the pinion nut. It is probably the easiest thing to set on a ring and pinion install. I had to try a few different shims combinations before I got the right pre-load. Once I got the pre-load shims figured out, I pulled the pinion out again and installed the new pinion oil seal. I then re-assembled the entire rear end, pushed the axle shafts back in, and double checked the gear pattern and backlash. All checked out O. K., so I replaced the differential cover, and filled it with gear lube.
Time to move onto the front axle.
I'm not going to get into great detail here, because most of the work is the same as the rear. The biggest difference is the added labor of pulling off the hubs, rotors, and spindles to get the axle shafts out. Another concern it that the axle tube is full of gunk because the seal is in by the differential, not at the end of the tube like the rear axle is.
After getting the axle shafts out, I had to do a lot of cleaning. The axle tubes where filled with mud and rust, the housing had a layer of goo, and the front axle seal bores were also rusty. Unlike the rear, the front differential does not get used all the time, so the lack of constantly moving gear lube allows rust to get a foothold. I sanded the rust out of the housing, and cleaned the axle tube with a wire brush strapped to a piece of pipe.
Beyond the additional disassembly/assembly and cleaning, there is not much difference in setting up the gears. The only difference is the addition of an oil slinging disc added to the pinion gear. It is there to assist in getting oil up to the pinion bearings. The reason the back doesn't have this is because of the direction the ring gear spins. The housing is designed to get oil into the pinion bearings when it is spinning in the designed direction, but my jeep uses a rear-design differential and just flips it over, so it spins backwards. This is very common, but there are reverse rotation housings, too. With spinning the ring and pinion backward, the coast side of the gear is actually the drive side, and vise versa. The only other thing different compared to the rear axle is the inner axle seals that have to be installed before the gears are installed.
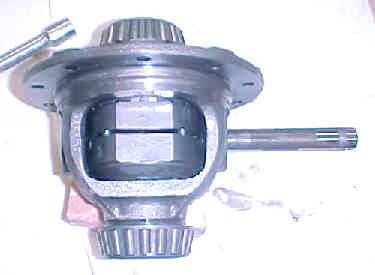
I was transplanting the EZ Locker from the rear differential to the front
so I had to take the locker out of the rear carrier and install it into the
new carrier. It would have been nice if I could have just put the rear carrier
with the locker in the front as one unit, but with the new gear ratio, I had
to buy a new carrier to accommodate them. 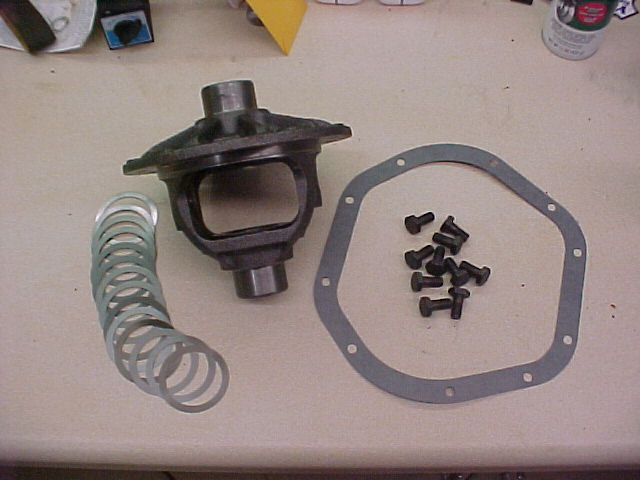
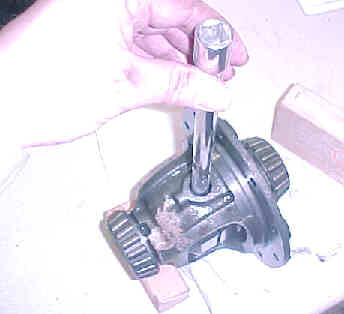
To get the locker out, I first have to remove the drive pin. This pin is retained
in carrier with a steel pin that needs to be punched out. I used a custom tool
I have that is just a long screwdriver with a 3/16" shaft that I cut the tip
off of, so it's flat. I have a 3/16" punch, but it's tapered too much, it doesn't
allow me to push the pin all the way out.