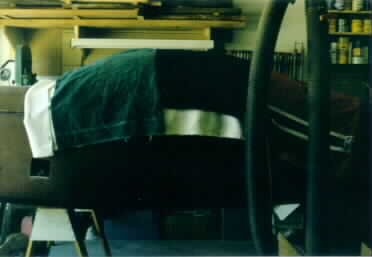
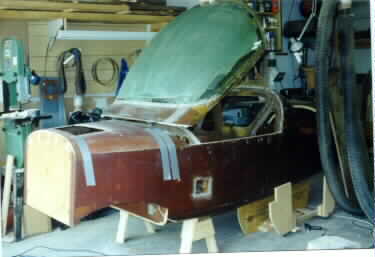
 Here I'm fitting the canopy and forward fuselage cover
in place. This is a long process of "Trim and Fit." It looks as if the canopy
and fuselage cover are fitting well enough to proceed.
Here I'm fitting the canopy and forward fuselage cover
in place. This is a long process of "Trim and Fit." It looks as if the canopy
and fuselage cover are fitting well enough to proceed.
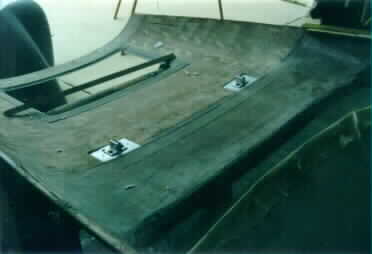
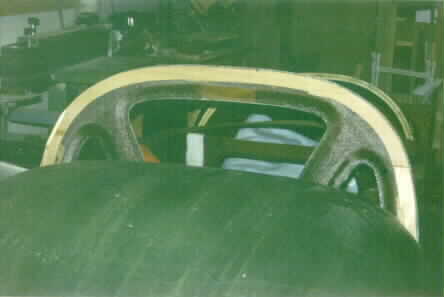 This shows the 1/4" plywood "hoop" the foundation of the
canopy aft structure. The canopy rests on top of this, floxed in place, and will
receive several layers of 10oz and 6oz tape.
This shows the 1/4" plywood "hoop" the foundation of the
canopy aft structure. The canopy rests on top of this, floxed in place, and will
receive several layers of 10oz and 6oz tape.
In this picture, the plywood hoop is hot-glued to the seat back bulkhead, with 1/4" spacers between the plywood hoop and bulkhead. This space will be filled with the glass layers and weatherstrip.
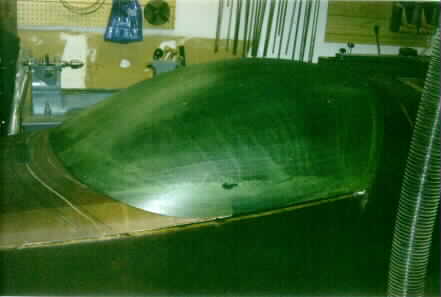
 Here I'm doing the first of many lay-ups on the inside
of the canopy structure. Let me tell you, this airplane was not made to be sat
in backwards!
Here I'm doing the first of many lay-ups on the inside
of the canopy structure. Let me tell you, this airplane was not made to be sat
in backwards!
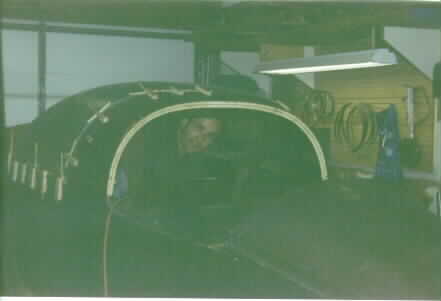
The canopy is held firmly in place by a whole series of plywood fingers that were bondo'd to the fuselage, then shimmed so the canopy was held exactly where I wanted it.
This picture was taken at 11:30 P.M. I was in there till 5:00 A.M! (I removed my respirator for the picture!)
This is a shot of my high tech curing oven. I kept the canopy covered with old blankets and towels, with a 100 watt light bulb inside to keep the temperature around 90 till the next day.
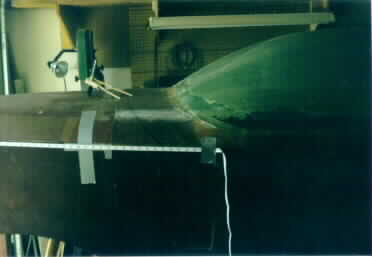
This is the first of several outside layups. I used duct tape on
the fuselage, and masking tape on the canopy to keep the glass from sticking to
the places where it wasn't wanted. I( left a 1/2" lip at the bottom of the
canopy, to overlap the side of the fuselage. Later, this lip will be trimmed to
1/4", and faired to the fuselage side to help weatherproof the cockpit.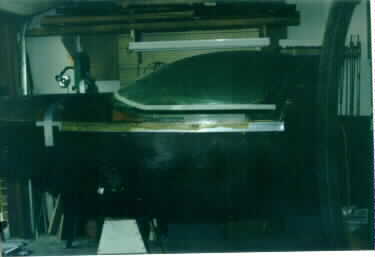
 This
shows the advanced technology measuring device I used to mark the cut line
around the front of the canopy. It actually worked very well. I just placed the
two wings of the fixture on the trim line of the canopy and "walked" the marker
around the front. The result was a perfectly spaced cut line.
This
shows the advanced technology measuring device I used to mark the cut line
around the front of the canopy. It actually worked very well. I just placed the
two wings of the fixture on the trim line of the canopy and "walked" the marker
around the front. The result was a perfectly spaced cut line.
Also, I used a 10 oz. BID tape as the last layer in the layup on the outside and inside of the canopy. This tape is very tightly woven, and both edges are selvaged. Using this method, I didn't have to knife trim against the canopy to get a finished edge.
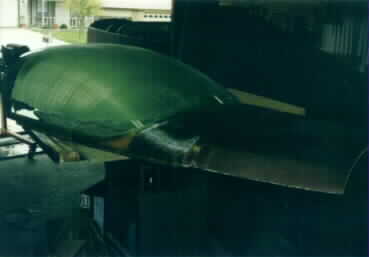 Here I've done all of the external layups to the canopy
and have removed the canopy / fwd fuselage cover as a unit. The next step was to
do the initial layup on the aft edge of the canopy hoop. After this was done, on
to the interior layups.
Here I've done all of the external layups to the canopy
and have removed the canopy / fwd fuselage cover as a unit. The next step was to
do the initial layup on the aft edge of the canopy hoop. After this was done, on
to the interior layups.
 Here's
the aft end of the canopy. Before I started the layup, I actually had a moment
of clarity and re-installed the assembly back onto the fuselage and hot-glued a
wooden support span wise across the hoop. I realized that the hoop would
probably spread if I didn't.
Here's
the aft end of the canopy. Before I started the layup, I actually had a moment
of clarity and re-installed the assembly back onto the fuselage and hot-glued a
wooden support span wise across the hoop. I realized that the hoop would
probably spread if I didn't.
 Okie-Dokie! I'm skipping ahead a little, but I wanted to
keep all the canopy related pics together.
Okie-Dokie! I'm skipping ahead a little, but I wanted to
keep all the canopy related pics together.
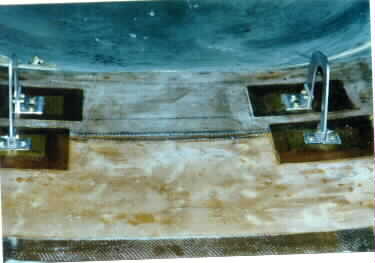
This shows the beginning of the canopy hinge installation. I was VERY concerned with keeping the canopy aligned with the fwd fuselage AND the seat back bulkhead if I cut the canopy free from the fwd fuse cover before I hinged it, so I actually installed the hinges before I cut the canopy free. I drafted the hinges and mount plates, fabricated them, and after marking the location of the fwd bulkhead and the proper location of the fwd hinge mount, set averything in place. I hot-glued a straight edge across the two fwd hinge mounts before I set them in their final resting place. This step ensured that they would remain parall to each other while the flox cured.
 Here's my buddy Mario acting like he's actually working!
(he's a Fireman, so we know better!)
Here's my buddy Mario acting like he's actually working!
(he's a Fireman, so we know better!)
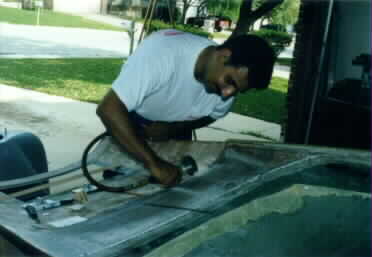
He's cutting one of the fwd hinge mount slots.
This shows the fwd hinge mount plates after the flox cured. Now
that there was a solid reference point, I installed 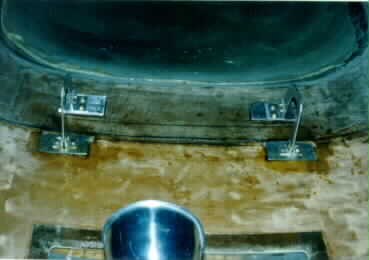 the
rest of the hinge apparatus. This allowed me to mark the exact location the aft
mount plates would be installed.
the
rest of the hinge apparatus. This allowed me to mark the exact location the aft
mount plates would be installed.
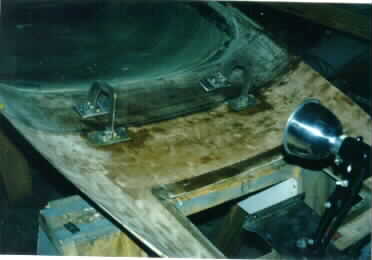 Another view of the previous pic. You can see the
opening for the fwd hatch, with the lip completed.
Another view of the previous pic. You can see the
opening for the fwd hatch, with the lip completed.
This shows the entire hinge mechanism mounted. Everything is very
solid, with no chance of misalignment once the canopy is seperated from the fwd
fuselage cover.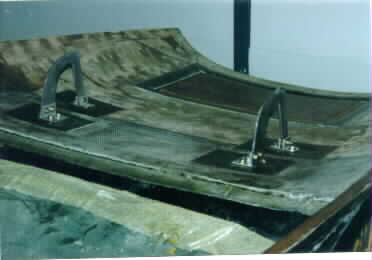
 Here is another view of the canopy hinge before the
canopy is actually cut away from the fwd fuselage cover.
Here is another view of the canopy hinge before the
canopy is actually cut away from the fwd fuselage cover.
 OK, here it is! The canopy actually goes up and down!
All that's left is to lay up the fwd and the aft weather fairings.
OK, here it is! The canopy actually goes up and down!
All that's left is to lay up the fwd and the aft weather fairings.