The Gift, Page 2
Work from * to ** until the spiral measures 6" to 7" depending on the stretch and the size of the wrist and hand of the person who will wear the bracelet. With Nymo "O" or synbond, there is about a 1˝" to 2" stretch.
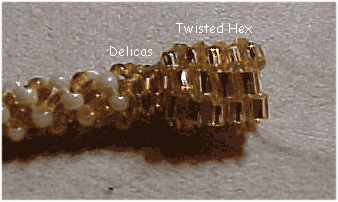
When you have worked the desired amount of spiral netting, place 4 Delicas evenly around the top. I usually do this by going between a contrast and main bead somewhere around the top. Remember to step up after the round. Work about 6 rows of even peyote. This is the beginning of your basic bead. I like to work this basic bead in either twisted hex, 8/0 beads, or Triangle beads. The satin 11/0s are larger than the 11/0 true cuts, so I've also used them as the basic bead in several of the bracelets.
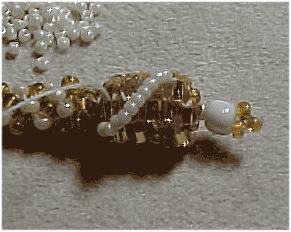
Work until you have 5 Twisted Hex beads in one column and four twisted hex in another down the bead, pairs of alternating columns with five hex beads in one and four in the other.
End with 2 rows of one-drop peyote worked in Delicas. Take the needle through the final four beads a second time, pull tight, and needle down several hex beads. Take the needle to the hollow center of the bead and out through the top hole. Place a small round bead, a focal bead, 3 small beads at the top and come back through the focal and round bead and into the hollow center. Bring your needle out somewhere along the side and needle up and through a hex bead at the top of one column.
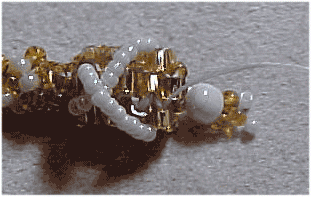
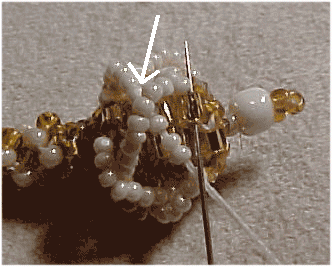
Embellishment: Come out somewhere along the side and needle up and through a hex bead at the top. Place 7 to 10 of the beads you've chosen for the embellishment on your thread and snug up to the top of the column. You want these beads to barely stand out from the basic bead as shown in the illustration. If you're using 15/0s or Charlottes, you may need to place as many as 12 beads on the needle. ***When you're satisfied with the length, take the needle through the bottom hex bead in the next column. (For all embroiderers out there, this is simply a herringbone stitch worked in beads around the basic bead.) Place the same number of beads on the thread and go to the top of the next column, take the beads through from right to left as shown.****
Continue around from *** to ****, going from the bottom of one column to the top of the next. When you reach the bead from which you began, place the strand UNDER the beginning strand and take your needle through the hex bead from right to left.
 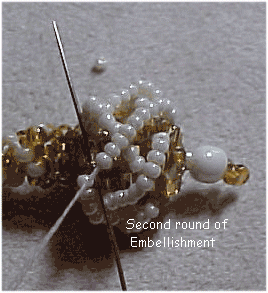
Come out of the bead and needle through the bead at the top of the next column. Repeat around from *** to **** until you return to your starting place. Again, take this last strand under the beginning strand of this second round. It will go over the strands of the previous round. Finish off the thread.
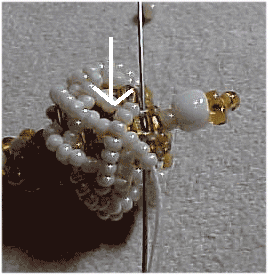
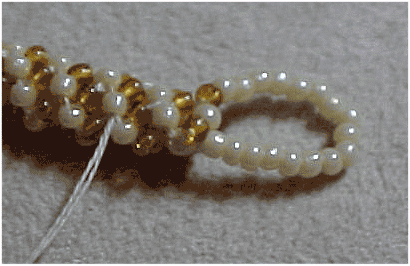
Go to the opposite end of the bracelet and thread your needle with the threads you left when you began. Place enough beads on the needle to measure 1Ľ" to 1˝". Note: If you've used larger beads, you may need to make this a tad larger. Go through a bead at the opposite side of the start and form a loop. Go through the loop again, if possible, and finish off.
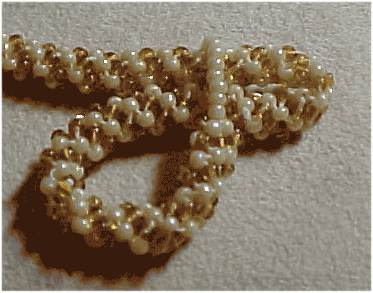
The loop does not fit over the bead. Instead, go down a bit on the bracelet and pull the bracelet through the loop as shown. Carefully, slip the bracelet over your hand. Photos of other bracelets are here

|