The Gift, a pull-on bracelet
Often when I've been looking for one thing I've found another. This bracelet came as a gift to me when I was experimenting with covering threads on a peyote spiral. The bracelet evolved from those first experiments. Since the bracelet came as a gift, that's how I'm sending it out into the world. Happy Holidays!
[August 8, 2006. I've just returned from the Shreveport Bead Retreat where I had a wonderful three days beading with friends. Several of the attendees were taken with lariats I've made using the peyote variation that's detailed here. I've used drop beads as one of the beads in the three-bead set (1 8mm drop, 2 11s, & the 15 "extra" bead), 8/0 hex as one in another lariat, and a teeny drop (I think it's a raindrop seed bead from Shipwreck) in yet another. I picked up several beads to use to demonstrate the technique: 1 megatama drop, 1 11/0 seed, and one 8/0 hex. I used 15/0s as the "extra" beads. It went together very fast. It's about 1/2" or a bit more in diameter. I now have two pieces, each about 9". I've been going through my stash trying to find a nice focal bead that I can use to create a necklace. Looks like I may have to go shopping...
There was discussion as to whether this stitch is the Russian spiral. I don't think it is. The Russian spiral is a three-bead netting stitch. Perhaps this could arguably be called a two-bead Russian spiral. It doesn't matter what you call it. I don't claim to have "invented" it. As I explained back in 1999, it came as a gift when I was looking for a way to cover the thread while doing a peyote spiral--a gift which has kept on giving. I hope others of you are enjoying it as well.]
The Gift comes with some surprises, not least of which is its natural stretch. It's quick to make, takes a relatively small amount of beads, needs no findings, and can be varied to infinity depending upon your choice of beads, colors, placement of colors, embellished bead used for the focal point, and others not yet discovered. I've not seen instructions for this type of spiral, which in no way is meant to imply that such instructions don't exist. I've thought of it as a peyote spiral since that's how it began, but have since come to realize that it's really a type of spiral netting.
Thread: To date, the most important thing I've discovered is that the stretch depends on the thread used. I've gotten the greatest stretch using doubled Nymo "O" from the spool. I used Nymo "D" in one of the bracelets, but I waxed it heavily and lost a great deal of the stretch. I'm going to try one using Thread Heaven on the "D" and see what transpires. I'll keep you informed. I used Synbond singly in one bracelet, which also worked well. Much to my disappointment, my favorite thread, Silamide doubled, doesn't work at all. There's almost no stretch with this thread. I used doubled Nymo "B" from a spool with satisfactory results as well. I hate to start a new thread in the middle of a project, preferring instead to battle a very long thread. I start with 6½ to 7 yards of thread, about 3½ yards long when doubled. If this strikes horror in you, begin with
any length that works for you.
Beads: I've used all sorts of beads from Triangles and True Cuts, tiny 15/0s to large 8/0s, with a lot of 11/0s in between. I like a rounded rather than a cylinder bead, but I use a few Delicas to begin and end the embellished bead. I usually use a simple 6/0 bead at the top of the embellished bead, only because I'm too lazy to drag out anything else.
Needle: The size needle will depend upon the smallest bead you choose to use. This became apparent when I was working on the bracelet shown here. At the last minute, I decided to use Charlottes as the embellishment on the Turk's Knot bead. I had started with a sturdy needle and spent more time picking out beads that would slide down the needle than I did beading the entire bracelet.
|

String 5 beads on your thread, 3 main beads and two contrasting, and bring them down to the end leaving a tail of about 15". Take your needle back through the three main beads and pull tight.
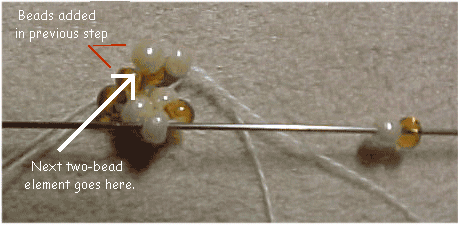
Place a contrasting bead and a main bead on your thread and come through the second of the two main beads as shown. Pull tight. You will always place first the contrasting bead, then the main bead on your needle. Note: I've not tried it the other way, with the contrasting bead first, but it probably won't make any difference. The main thing is to be consistent. I have worked it with a contrasting bead on either side of the main bead which is simply a variation allowing for another color.
*Place a contrasting bead and a main bead on your needle and come through the next main bead with a contrasting bead in front of it.** Pull tight to snug the beads together as shown. Note: In the illustration it appears that the main bead has been placed first since it's ahead of the contrasting bead, but the contrasting bead must go on first to get this alignment when the needle is placed through the bead.

Instructions continue on page 2

|