
Adding Pretty Pictures to Your PageAdding graphics to a page is simple. All
you need to know is one command, and the name of the file
(usually a .gif or .jpg). Let's assume for a moment that
you have named the file in question "mypicture.gif".
To place this image on the page, type | ||||
Alignment & Text BehaviorDepending upon how you align an image on your page, text typed after it will behave differently. Take a look at the following four examples:
| ||||
Height and WidthYou can control how much of a given image is displayed. Suppose you have a picture that is simply too tall. By adding the attributes height="#" and width="#" after the filename, you can add or subtract from the size of the graphic. In this case, the number can be either a number of pixels, or a percentage of the page's width. Most people use the "number of pixels" option, as most drawing programs will happily supply this information, and thus there is less guesswork involved. Sometimes this will modify the size of the picture itself, and in other cases, it will only add a gray area in the excess space when the grapic is enlarged. The same applies to shrinking a picture. Sometimes the image will shrink, and the rest of the time, part of the display will be removed. | ||||
| ||||
Hspace and VspaceThese attributes are used to add empty (invisible) space around the edges of an image. Hspace is horizontal space, and vspace is vertical. The attribute is entered as "hspace="#" or vspace="#" where # is a number of pixels. The effect looks something like this: |
||||
Adding hspace="10" to each tag, <img
src="Purplesquare.jpg" hspace="10">,
generates 10 pixels of empty horizontal space on both
sides of the image: If you want to create blank vertical space, add vspace="10" to each tag, <img src="Redsquare.jpg" vspace="10">,
then ten pixels of vertical space are created:These attributes can also be combined, <img src="Purplesquare.jpg"
hspace="10" vspace="10">, to
create this effect: |
||||
When using these attributes, remember that hspace is
added to both edges of an image, and vspace is added to
both the top and the bottom. Therefore, in the example
above, hspace="20" was added to the image
of each square, so the area between the two is actually
40 pixels."Alt="Some people surf the internet with images turned off. While this makes pages load much faster, it can also cause them to miss the point of your page if they don't know what they are supposed to be seeing. By adding this attribute to the image tag, you can create a small text box that will form whenever a user passes the cursor over the picture (or picture placeholder if images are off.) Move your cursor over the picture below to see and example of this in action.
Using Graphics as LinksTo make a picture into a link, simply put
the link
tags and the image tags together, as follows: Onmouseover & OnmouseoutThis is a nifty little attribute that can be added to an image to make a message appear in the little box at the bottom of most browser windows (the one where "Page Loading" and similar messages appear).
Run your mouse over the image below to see what happens!!  "Onmouseout" has the opposite effect of "Onmouseover". It is typically used to clear the text box of anything created by said attribute. The HTML is virtually identical, save that "ONMOUSEOVER=" sould be replaced with "ONMOUSEOUT". You can make a different message appear in this fashion, or you can clear the box by leaving the area where text would be entered blank; make sure you still include all the punctuation, however. Run your cursor over the image below to clear the box... 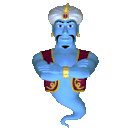 These attributes can also be placed on the same tag to make text disappear as soon as the cursor leaves the affected image(s). Reverse this to create text that is only visible so long as the cursor is NOT over the affected image(s). This attribute can also affect text, click here to see how to do this. Have fun and be creative! One final note: I have recieved several e-mails to the tune of "how do I make my gif's move?" The answer is simple: YOU don't. Some images are animated, and others are not; this is a function of the program that created the .gif, and has nothing to do with HTML. If you want to make your own animated .gif I suggest either GIF Animator by CoffeeCup Software or Image Ready by Adobe. | ||||
