|
Seashell Angel Part 2
by LovlyGypsy

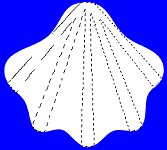
Click the magic wand and click on your black triangles, then on your Layer Palette click the Layer Visibility Toggle button
 beside your triangles layer like this... beside your triangles layer like this...

Your image will look like this...
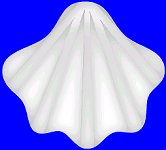
Click on the layer with your white shell and go to SELECTIONS>FLOAT, go to EFFECTS>3D EFFECTS>CUT OUT and use these settings...
Vertical: 1
Horizontal: 1
Opacity: 29
Blur: 30
Shadow Color: Black
With it still selected go to SELECTIONS>INVERT, SELECTIONS>FLOAT, go to EFFECTS>3D EFFECTS>CUT OUT and use the same settings, go to SELECTIONS>SELECT NONE. Your image should look like this...
Click on the layer with your triangles and click the Delete Layer button  and click yes when it asks. I'd save now. Click the Create layer button and name it head. Open the Stained Wood.bmp and shrink it. With black still as your foreground and background color click your preset shapes tool and select Ellipse, check Antialias, line width 5, hold down the Shift key and make her head. Go to EDIT>CUT, EDIT>PASTE> AS NEW IMAGE. Click your Flood Fill tool
 , click on the triangle that's on your foreground color box... , click on the triangle that's on your foreground color box...

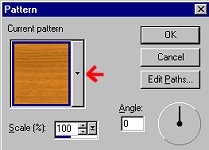
and click the patterns button  , click on the color box and Pattern box will come up click the arrow and select the stained wood... , click on the color box and Pattern box will come up click the arrow and select the stained wood...
Now flood fill the head image, go to EFFECTS>GEOMETRIC EFFECTS>CIRCLE, EDIT>CUT, close the image, click on your angle image and go to EDIT>PASTE> AS NEW SELECTION and place your head like this...

With it still selected go to EFFECTS>3D EFFECTS>CUT OUT and use these settings...
Vertical: 1
Horizontal: 1
Opacity: 61
Blur: 30
Shadow Color: Black
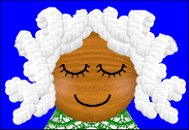
Go to SELECTIONS>SELECT NONE. Click on the layer with your shell on it and click the create layer button, name it decoration, now you can decorate your shell on this layer. After you have decorated your shell click on your head layer, click the create layer button and name this layer face. For her eyes I used the preset shapes tool, ellipse, Antialias checked, line width 2 and with the background color cut off like this...

I made a small ellipse like this...

Then I clicked the Selection tool  , I picked Rectangle, Antialias checked and cut off the top of the ellipse like this... , I picked Rectangle, Antialias checked and cut off the top of the ellipse like this...

I then clicked the draw tool, freehand, width 1, Antialias checked and made her some lashes like this...

Now go to EDIT>COPY, EDIT>PASTE>AS NEW SELECTION and place the eye on the other side like this...

I used the preset shapes again for her mouth, made an ellipse and used the selection tool to cut off the top like this...

Click the create layer button and name the layer cheeks. Click the Airbrush tool, Round, Size 31, hardness 15, Opacity 15, Step 25, Density 15, click the foreground color box and select a light pink I used #F5BFDA and spray her cheeks on like this...

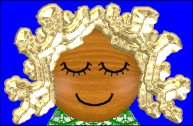
Go to EFFECTS>BLUR>GAUSSIAN BLUR and blur her cheeks by 5. Click the create layer button and name the new layer hair. I used the tube I attached, size 50, step 20, I just made squiggles like this...
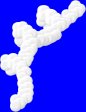
That went on the left side and I copied and pasted and mirrored it and placed it on the other side like this...

I added another layer and named it hair 2 and made another squiggle on the left side just above the other, copied and pasted and mirrored it and placed it on the other side like this...
I added blade pro, shiny gold to my hair and it looks like this...
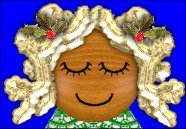
I added a drop shadow to each hair layer by going to EFFECTS>3D EFFECTS>DROP SHADOW and I used these settings...
Vertical: 0
Horizontal: 0
Opacity: 85
Blur: 7.4
You can add another layer and put something in her hair. Mine looks like this...
Save now
On to part 3....
back to page 1
Copyright © 2000-2001 by LovlyGypsy,
all rights reserved
| I, LovlyGypsy,
Give my permission to Ldy
Archrr aka Artists for PSP to place any and all tutorials
that I have made on her site.. this 22nd day of February 2001.
These tutorials were made solely by me and permission is mine to
give. |
|

