IndexThe Unpacked KitRibbon Lining End-Piece Set Guitar Top Top Bracing Guitar Back Back Bracing Attaching the Back Attaching the Top Edge Bindings Fitting the Neck Truss Rod Fingerboard Fretting Fitting the Nut Grain Filling Lacquering Attaching the Neck Attaching the Bridge Saddle and Nut It's Done! |
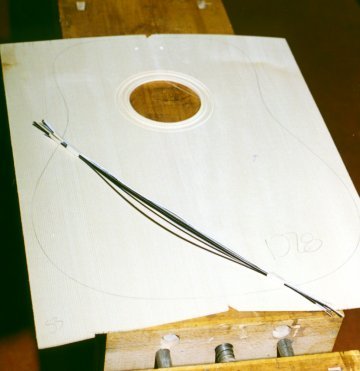
The two book-matched pieces of the Sitka spruce top already come edge-joined together. The first step is to glue in the strips of black and white plastic that form the rosette around the sound hole. Not only do these add a visual accent to the top of the guitar, they also re-enforce the exposed end-grain of the spruce at the top and bottom of the sound hole and helps keep it from splitting due to swelling and shrinking from humidity changes.
Gluing in the pieces was easier than I thought it would be. The trickiest part was getting the Duco cement smeared all over each individual strip and in the groove, and then installed before the cement started setting up. Once most of the strip is in place, you trim off the excess before pressing the last bit into the groove. Only the inner circle needed to be precise, as the tops of the other two circles will be covered by the fingerboard. The finished rosettes are shown on the next page. |
| Previous Page | Return to Home Page | Next Page |