Steps to assembling a computer
Safety Precautions
- Electricity
is good, but static electricity is bad for parts. Remember to always stay
grounded by keeping at least one part of your body in contact with metal.
- If
at first a part doesn’t fit, do not force it because you might break it.
- Don’t
over-tighten screws. You can start stripping them
- Remember
to keep all your manuals. You never know when you may need them
- Keep
all the screws in a safe place. Don’t mix them up.
Now to start
- Make
sure you get all your parts. Check the list and make sure they’re all
compatible
- Take
your computer case apart. It comes with rails, which will be needed. In this
case an Antec case is shown.

- Install
mounting screws in the case for each the motherboard’s screw holes.


- Grab
the Input/Output shield, which comes with most cases and attach it the back
of the system.

- Now
take the motherboard and align the holes of the motherboard with the
mounting screws, and carefully screw the motherboard down.

- Put
the RAM in the RAM slots.

- The
CPU “slot” is called a Mobo. Just push the lever up and drop the CPU
into. Be very careful because it is extremely fragile.

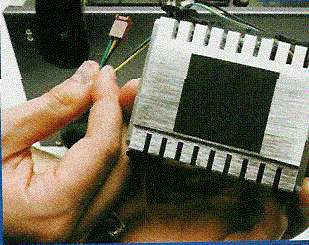
- Now
to install a heat sink (fan). This can be a bit tricky. If you have a boxed
Intel CPU use the thermal compound that is already on it. Flip the heat
sink’s lever into the open position and line up the four corners of the
mobo. Make sure the heat sink’s “teeth” latch on to each of these four
corners
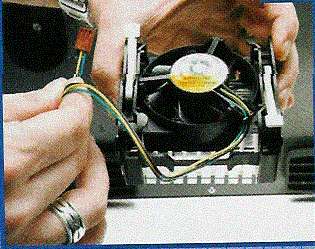
 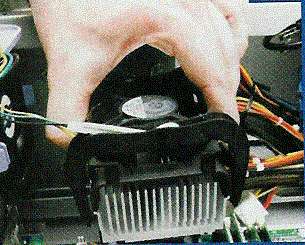

- Once
this is down, throw the two levers into the lock position. Now plug the
fan’s power cable into the three-pronged connector on the motherboard.
It’ll usually say “CPU Fan”.
Now you have your CPU, RAM and
motherboard installed. It’s now time to install your other parts: Your hard
drive, floppy, CD-ROM drives, Video and Sound cards.
- To
start you have to remove the plates that cover the front of each case.
You’ll usually need a screwdriver to take them out. You also have
to remove the bays.


- Now
take your hard drive and floppy drives (this is for the 3 ½” bays) and
slide them in (correctly of course). Then screw it in.


- Once
this is done for both drives, put the bay back into the case.

- Now
this for your other drives. Your CD-ROM for example. But this time attach
rails.

- After
this is done, connect all the cables that come with each part to the
motherboard.

  
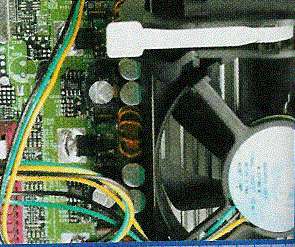
- Now
take their power supply and put it in the back of the case. Attach the power
cables to the motherboard.
 
That is how you assemble a computer. Your finished product should look like
this.

Sources
www.ati.com
www.nvidia.com
www.intel.com
www.gamespot.com
By PK Chan and J Leong
|

