
|
SimsPegasus Beds Tutorial-1 - Page 3 Tutorials home |
|||
| Goal: How to make your own bed template from a Maxis LL heartbed getting a small file size. | |||
| Programs you're gonna need: | |||
|
|||
|
|||
|
|||
| Next tutorial :How to Attach animations to our Heartbed | |||
| Beds with adult animations are one of the most wanted objects so we decided to help you to make | |||
| your own beds in very small file sizes (from 500 to 700k depending on the graphics). | |||
| We made this tutorial with only one mail goal in mind: To help all sims players to make their own love beds. | |||
| C)Back to TMOG in order to discard all the sprites the bed won't use any more. | |||
| 1)Run
Tmog, look for your object, your bed 's
size is sure something like:3567kb right
now, you'll see how it changes in a twinkling of an eye. Clone your object again, give it another name of course lol. I chose bedhearttest2 for my object, is it already cloned? ok, close Tmog, go and see into your Downloads\transmogrified folder, and wow! look at the 2 objects sizes now? was it worth it? this way you can have lots of kinky beds into your downloads folders! ,my new bed size is : 656 kb!!. We 're still having a problem here, we want our animations to show on the duvet and not under it, what do we have to do then? I'm afraid we'll have to go back to Tmog, so run it again please. We need to change all the z buffers and make them much more clearer , the more clear we make it , the more of your sims you will se on the duvet, you follow me? What are zbuffers?, well you see each sprite's got 3 channels, the image as you see then in the object is the RGB channel, then it's got a black and white sprite , the Alpha channel, the third element is a grayscale image and this is the Zbuffer.
|
|||
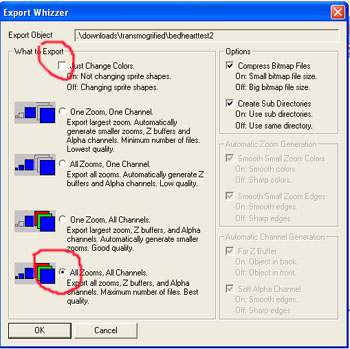
| Tmog 's got different ways of exporting sprites, the normal one , when you are only recoloring an object is the first option of the Export Wizzer, but exporting an object this way wouldn't give us the alpha and z channels to work with. |
 |
||
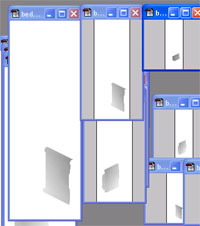
| Example of all the zooms and channels of a sprite |
|
||
| 2-Changing
z buffer in Tmog. Look for your object, click on it and then press the Export Object File button. Uncheck the first option and check the last one like the image shows. This way each sprite will have it's 3 channels and 3 sizes. If we'd checked only the first option here in the Export Wizard we would have only the RGB sprites and only their large sizes. But selecting the last option "All zooms, all channels" will give us , 3 channels for every sprite and 3 zooms (sizes) for every single sprite and channel. |
 |
||
| 3-click on the OK button , you will have to select a folder where to save these sprites we're exporting |
|
||
| 4-Once the
exporting progress is done click on the OK
button. Now you need a good painting program in order to deal with sprites, I use PhotoShop 6.0, so here's where you'll try to use your painting program features on your own unless you also have PhotoShop 6.0, sorry, I can't make tutorials for all the existent painting programs :). Don't close Tmog, we will need it a while later here. |
|||
| D)Using PhotoShop 6.0 to deal with zbuffer sprites. | |||
| We're not going to teach you Photoshop here, but we'll help you using some tools you need in order to follow the tutorial. | |||
| 1-Run your PhotoShop and select File-Open, look in the folder where you 've exported the sprites using Tmog some minutes ago. |
 |
||
| 2-We'll open 1100
folder and see what's inside, wow we found this: All sprites ending in a.bmp are alpha channel sprites All sprites ending in p.bmp are rgb channel sprites All sprites ending in z.bmp are z channel sprites Note: Rgb sprites are indexed when you open them, if you 'd like to change them you' d first convert them to RGB mode. (Image-Mode-RGB) and turn them back into Indexed mode before saving changes, but we won't need to do this here, we will only modify some parts of our z buffers)
|
 |
||
| 3-We need to open
all the sprites ending in "z.bmp" Beds sprites come in 4 views: ne-nw-se and sw, every sprite's got 3 sizes: large, medium and small |
 |
||
| 4-we must open
12 z buffer files, keep it in mind we're
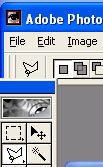
still working with folder 1100's sprites. Folder 1100 contains all the bottom left sprites, we 'll see if we need to lighten some parts up Why to do it? where the zbuffer 's got dark gray areas the object will cover your sim, if these areas are ligther they your sim will cover the object, as simple as that. When our sims goes to bed there are lots of gray areas covering him/her in Maxis love bed and we need to make them lighter to be able to see the animations. Well the SE sprites may need a bit of it, click on your SE large sprite and then turn it into grayscale mode (Image-Mode-Grayscale). We're gonna need Photoshop's select tool (clicked on image here) or magic wand (next to it's right) |
 |
||
| 5-I'm using the selection tool here so Click on this tool and then select what we've marked in red here |
 |
||
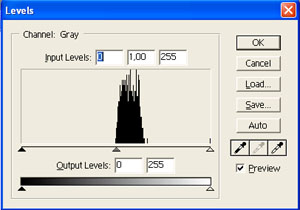
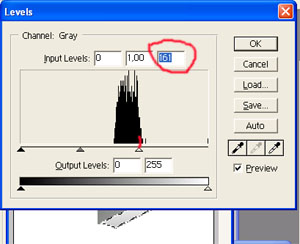
| 6-Press CTRL + L to bring Photoshop 's Level tools |
 |
||
| This is just an
example on how to use the level tools, it doesn't mean you've got to reach
the level shown here, sometimes it must be a bit darker. In our example we move the right tab till we've got input level 161 as shown here |
 |
||
| So far so good! please go to next page... | |||
| Previous Page | Next page | Back to SimsPegasus | |

