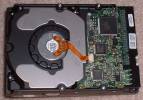
The first step to installing a hard drive is to open the case. You’re going to want to make sure that you can actually install another hard drive. To make sure you can install another IDE hard drive, check to see if there is an available connector on either cable connected to IDE 1, or IDE 2. If all spots on either the end or middle of the connectors are taken, then you cannot install another hard drive. Second, make sure that you have a place to put the hard drive. Most cases come with a 3.5 inch bay. If there isn’t one or enough room, you may need to get side mounts to install the hard drive in the 5.25 inch bay. Now that you know whether or not you can actually install a hard drive, you need to check the other devices hooked up to the IDE cables. If planning on installing a second hard drive, your original drive should already be set to master. In this case, just set the jumpers on the back of your second drive to slave. This will cause the new hard drive to be a storage device while the original hard drive is used to run the operating system. After setting the jumper settings according to your preference, just mount the hard drive in one of the bays. Once it is mounted, hook up the IDE cable and molex power connector to it. If you notice you have no more power connectors, just go to Radio Shack and buy a splitter. Close up your case and pray that it works. I’ve found that sometimes stroking the computer and complimenting it before booting increases my chances of success.