SEOUL
TRAIN'S
HOMEMADE
COLD AIR
INTAKE

Disclaimer: I hold no responsibility for any problem, mechanical, electrical
or otherwise, that could happen to anyone's car as a result of installing
such homemade Cold Air Intake. I hold no responsibility for anyone's vehicle
warranty being voided because of the installation of such homemade Cold Air
Intake. This Cold Air Intake is intended as an experimental project and it
is provided with no warranties whatsoever, expressed or implied. All problems
caused by the installation of such homemade Cold Air Intake is the sole
responsibility of the person installing it on any car.
Now that the legal stuff is out of the way, let the fun begin...
Installing a homemade cold air intake is a breeze... All you need is
the following: one large zip tie, one zip tie anchor (picture below), a 3"
diameter flexible aluminum tube (picture below), a large automotive hose
clamp (large enough to go over the 3"diameter hose), and a few minutes on
your car.
Keep going down to see some pictures of the supplies, or click
HERE to skip to the installation instructions.
Here are pictures of some of the supplies:
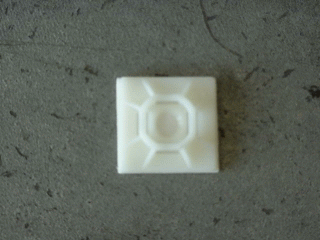
This zip tie anchor has an adhesive backing so you can stick it to a flat
surface. I recommend you clean the surface you're gonna stick it to with
some alcohol, especially if your car is a grease bunny, otherwise the anchor
will just fall out after your cold air intake starts shaking. Click on the
picture for a picture of the packaging, which costs around $2.
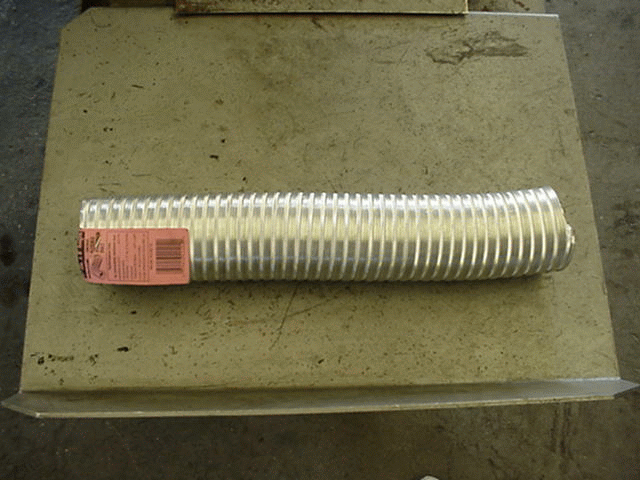
This is half of the aluminum tube after I cut it. I forgot to take a picture
of it before cutting it! Anyway, it has a 3" diameter, it is flexible and
extendable, and it cost me less than $5. Click on the picture for a picture
of the label.
Anchor
The first thing you gotta do when to install the cold air intake is open
the hood (duh) and look at the intake resonator/snorkel. If you don't know
what part I'm talking about, don't attempt this installation. Instead,
click here. Ok, now that the boys are
separated from the men, here's a picture of the engine with the resonator
on (just in case you're still confused):
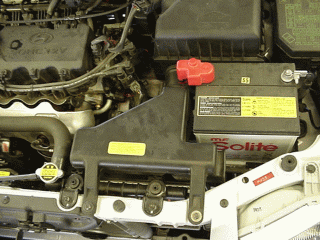
The resonator is the big black piece left of the battery!
Grab a 10mm wrench and remove the two bolts that hold the resonator to the
front crossmember. Now your resonator is free, so slide it forward and up,
removing it from the engine. Don't toss it in the garbage bin! You will need
it later when you wanna take your car to the dealership! Notice the hole
in the airbox where the resonator was attached! That's the hole you will
connect the aluminum hose to.
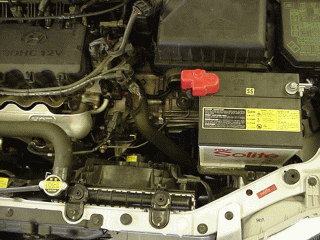
Voila! The resonator is gone!
Now, using your skills, cut the flexible aluminum hose in the middle (not
lengthwise, dummy!). Better, cut it in half. You should have two equal length
hoses now. How clean you cut the hose is up to you. I suggest you bend the
edges outward where you cut it. You don't want any pieces of aluminum flying
into your intake after you're done.
Now that you got the half long hose, slide it into your engine compartment,
first edging it between the radiator and the front crossmember, then flex
it up and around to the left of the battery (right side of the car) and to
the hole in the intake airbox where the resonator went. You now have the
basic shape of your Cold Air Intake. Now, grabbing a zip tie anchor, remove
the piece of paper that covers the adhesive backing, glue it to the cross
member (remember to clean where you're attaching it to), directly where your
aluminum hose will be. Get a long zip tie, loop it THROUGH the zip tie anchor
and start the zip tie (don't go all the way yet, just start maybe 1/2").
Slide the radiator end of your aluminum tube through the zip tie, now tighten
the zip tie just ENOUGH to hold the tube in place, being careful not to crush
it! If you do crush it, you have another aluminum tube just as long waiting
for you...
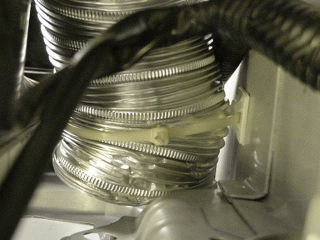
This is what it should look like if you followed the direction on the last
paragraph... The radiator is the black piece on the upper left corner, the
crossmember is the silver piece on the right. You can see the zip tie anchor
where the zip tie goes through, and the zip tie around the tube. Be careful
not to cut that electrical harness with your aluminum tube, the edges are
sharp!
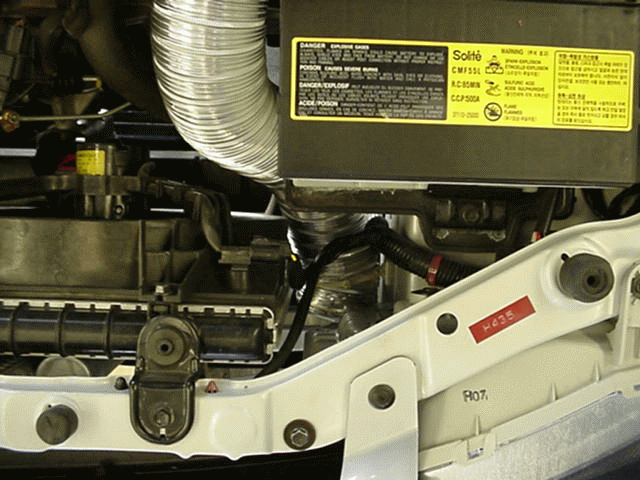
This is what it should look like... from higher up. You can see the battery,
the radiator, the hose, the zip tie, zip tie anchor... well, everything.
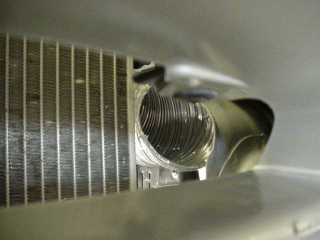
Ok, the hard part is over, you can relax now. You got it attached on the
radiator end, let's take care of the airbox end. Grab that large automotive
clamp and slide it over the airbox end of the hose. Now slide the end of
the hose over the 1/2" lip on the airbox hole (yes, that hole that the resonator
attached to). Using a flattip screwdriver, tighten the clamp till you can't
pull the tube out of the airbox (again, just tight enough, you don't wanna
break anything here). You're done! You're now the proud owner of a
DIY Cold Air Intake for a 2000 Hyundai Accent!

This is what the finished product looks like, when viewed from the top, notice
how the tube attaches to the airbox.
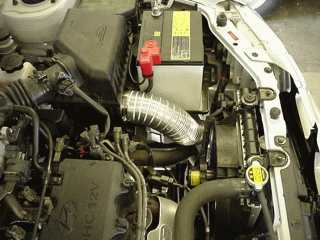
This is what it should look like from the passenger side, unless you bought
your car in England or Australia, where this should be the driver's side
(they're funny like that, they drive on the wrong side of the road, and have
their steering wheels where the glovebox should be!)
Now, go in front of your car (the front should be in the same place even
if you're in England or Australia), and squat, looking through the bumper,
where you hose goes. You should see this:
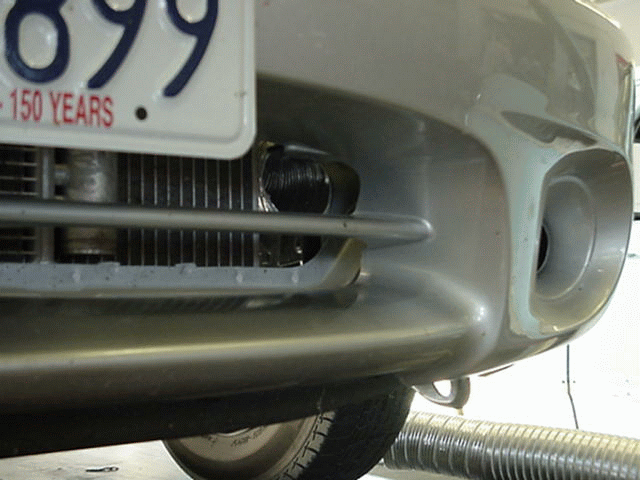
Notice the radiator end of the aluminum tube on the corner of the radiator?
It's not exactly on the airflow, but I bet there's a lot of air going through
that place! Maybe a fiberglass scoop in front of it should help with the
fresh air... hmmmm.... maybe a project for later???
There's your hose again! Right next to the radiator, sucking air from the
front of the car, not from the engine bay!
What's next? I plan on doing a "scientifical" experiment to check if the
homemade Col Air Intake actually works... I will buy three mercury
thermometers, tape one inside the airbox so it can measure the air
temperature as it enters the airbox, one outside the airbox so it can measure
the air temperature under the hood, and one in the front bumper so
it can measure air temperature before entering the engine bay. I will drive
identical circuits, at identical speeds, for an identical amount of time,
trying to do it when the ambient temperature is constant, and check the
thermometers after each drive. I will do it first with the factory resonator
on, then with no resonator or homemade Cold Air Intake on, then with the
homemade Cold Air Intake on. The temperatures will be recorded and
"scientifically analysed" by me (damn I feel like Einstein) and posted
here. The truth will be unveiled!!

You are visitor number
 since August
22, 2000.
since August
22, 2000.
Home -
Mods -
Cold Air Intake
- Pictures
- Hyundai
Links
Automotive Links -
Car Math -
Stoplight GT
- What's New
-
E-mail
me


