|
|
|
|
|
|
|||||||||||||||||||
|
|
|
|
|||||||||||||||||||||
|
|
Salmonfly.Net |
|
|
|
|||||||||||||||||||
|
|
|||||||||||||||||||||||
|
|
Tying the Gray Heron - Charles Dickson Jr |
||||||||||||||||||||||
|
|
|
|
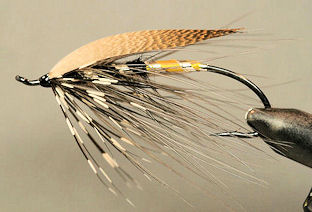
One of the first spey
flies I ever tied was the Gray Heron.
This fly was originally tied as an Atlantic Salmon fly but it
has also gained a reputation for being a good Steelhead fly.
I have used it for both fish with good results.
If I remember correctly, and I think I do, that
first one I tied was quite the pile of crap.
It was close to 40 years ago and I knew little about fly
tying and even less about spey flies.
Since that time I have learned a bit about both subjects so I
thought I would share that knowledge with you.
Please keep in mind that there is more than one way to skin a
cat and more than one way to tie this fly.
This is just the method I use and other tiers may use a
different method that may be just as good or better depending on you
the tier. Let’s start with the materials you will need:
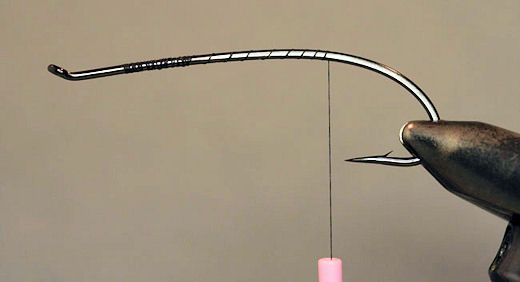
Start some thread on a hook.
I like the Alec Jackson hooks for this type of fly.
They also seem to look good on low water salmon hooks.
Run the thread back and stop just before the
hook point and tie in some flat silver tinsel
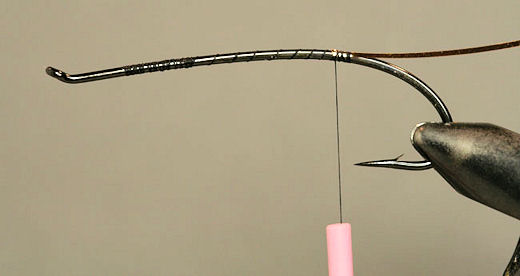
Wrap the tinsel forward to create a small tag,
tie it off and trim the excess. The
original pattern for this fly does not call for a tag but I like the
way it looks so I add one anyway.
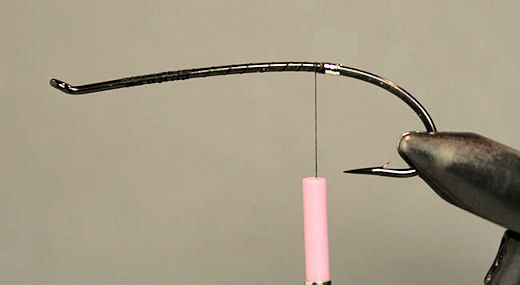
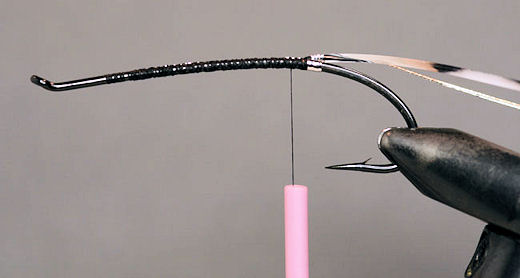
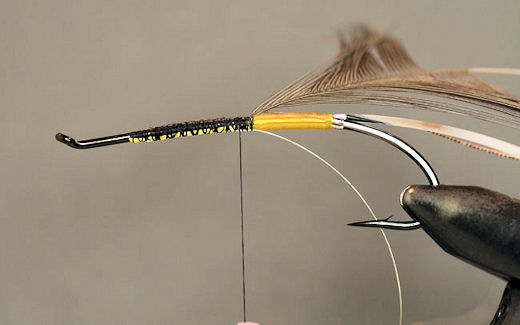
Next tie in the rib material.
This fly calls for a multi part rib made up of flat silver
tinsel and a piece of oval silver tinsel.
I like to run the material the entire length of the hook when
I tie it in to avoid lumps.
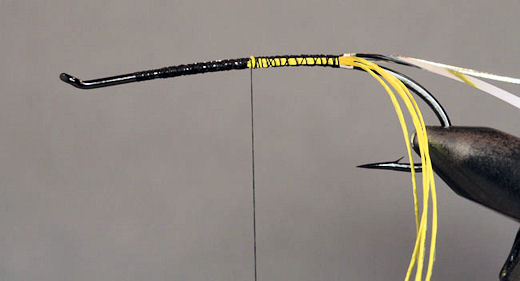
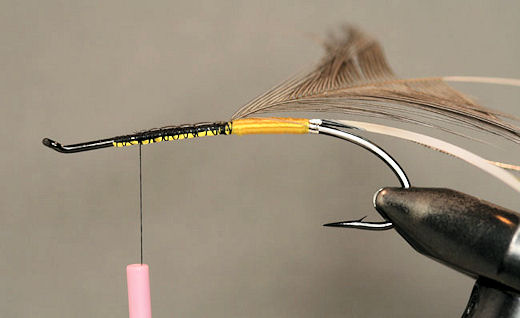
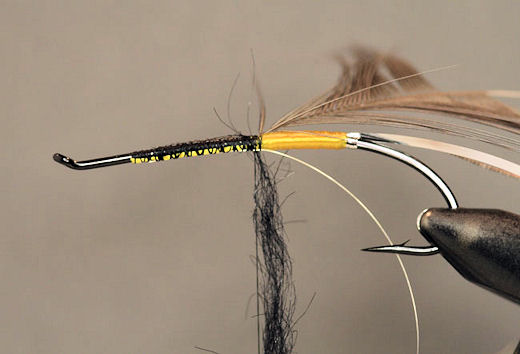
Next tie in some yellow floss for the rear half
of the body.
Next wrap the floss about third of the way up
the hook shank and tie it off.
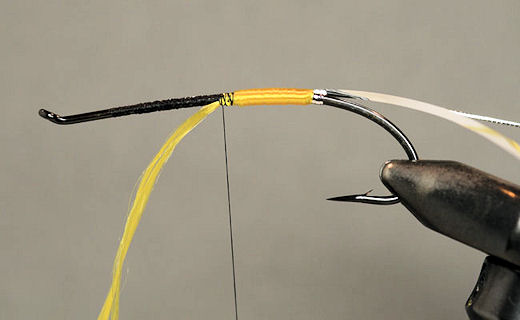
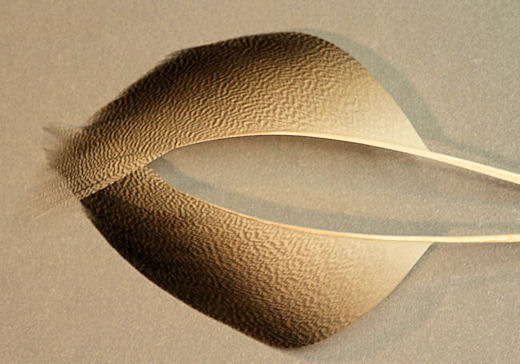
Next select a hackle for the body.
The original pattern calls for a heron hackle.
However, these are illegal in the US and many other places, so
in this case I am using a blue eared pheasant feather as a
substitute.
Ring neck rump feathers also make very good spey hackles if
you can find big ones.
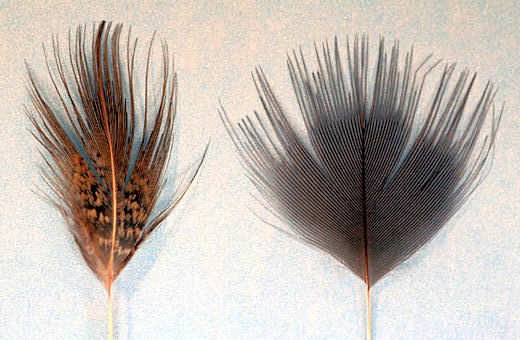
The feather on the right is a blue eared pheasant feather, the one
on the left is a ring neck rump feather.
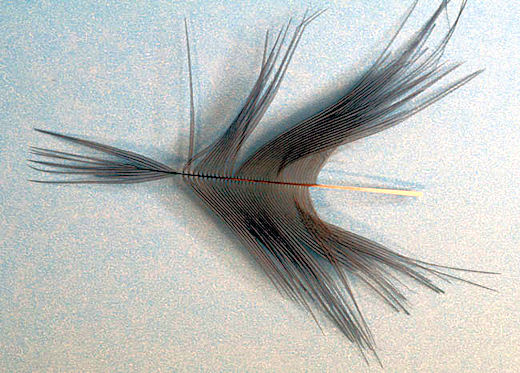
Stroke the fibers of the feather back and tie
it in by the tip. And clip off the excess.
I also like to tie in a piece of fine silver
wire at this point to use as a counter rib to reinforce the hackle.
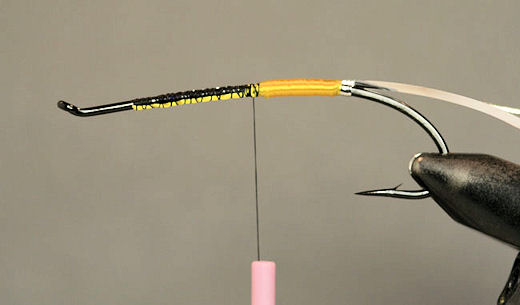
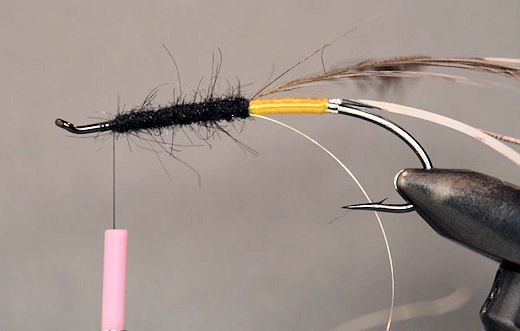
Spin some black dubbing on the thread for the
front part of the body, Wrap it forward.
Leave enough room for the throat and head of the fly.
When dressing this part of the body, take care to dress it as
sparse as possible. If
the body is dressed to heavy it will make the wing stick up and ruin
the sleek look of the fly.
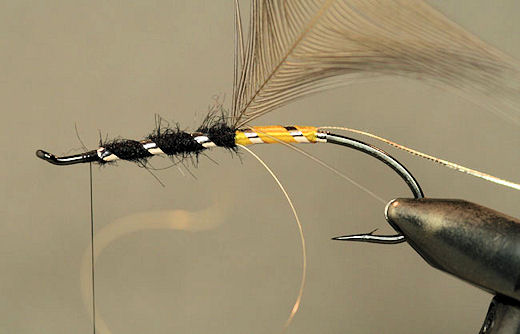
Next wrap the flat silver tinsel
forward
followed by the oval silver tinsel, tie them off and trim the
excess.
Next grab the body hackle by the stem and hold
it straight up. Stroke
the fibers in the direction of the back of the hook and pinch them
so they stay that way.
Now wrap the hackle towards the front of the
hook keeping it between the rib, tie it off and clip off the excess
stem.
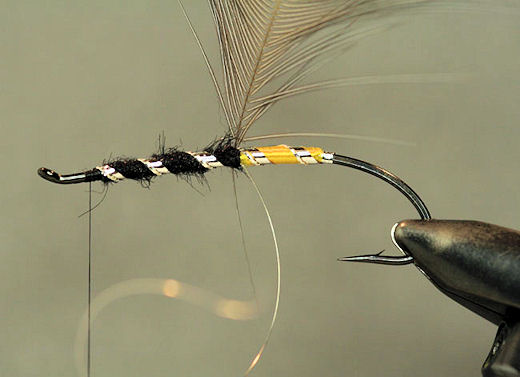
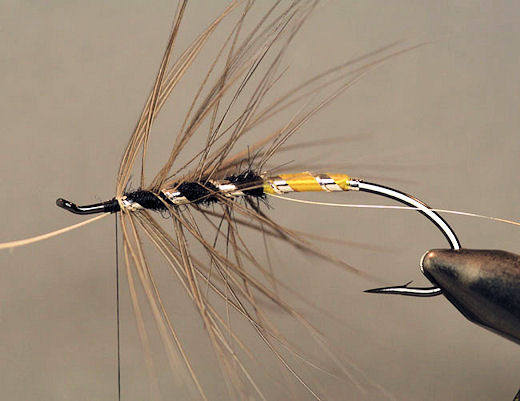
Next wrap the oval silver wire forward in the
opposite direction of the rib and body hackle.
I usually use a dubbing needle when wrapping it through the
hackle so I don’t trap any hackle fibers.
This rib will protect the hackle from breaking while you are
fishing with the fly.
Tie it off and trim the excess.
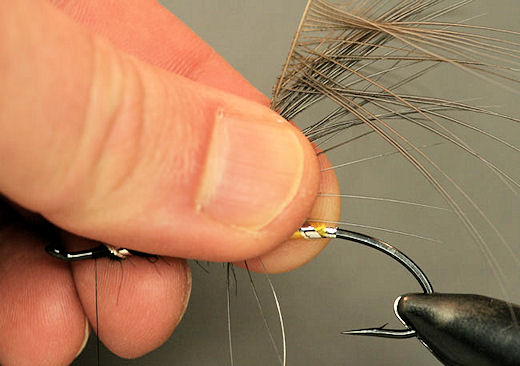
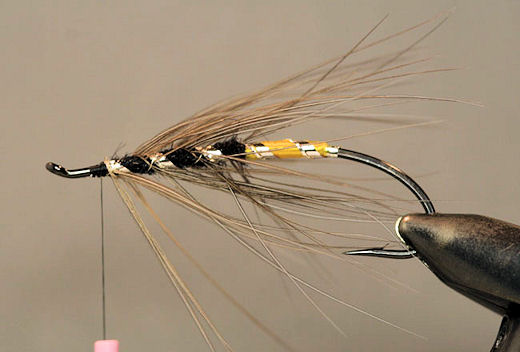
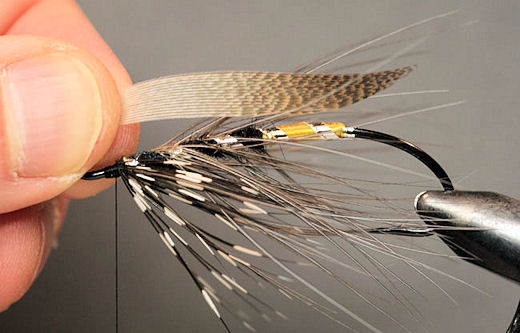
Select a Gallina feather for the throat and tie
it in by the tip the same way you did with the body hackle.
Next grab the feather by the stem and hold it
straight up. Stroke the
fibers in the direction of the back of the hook and pinch them so
they stay that way the same way you did with the body hackle. Wrap the hackle, tie it off and trim the excess.
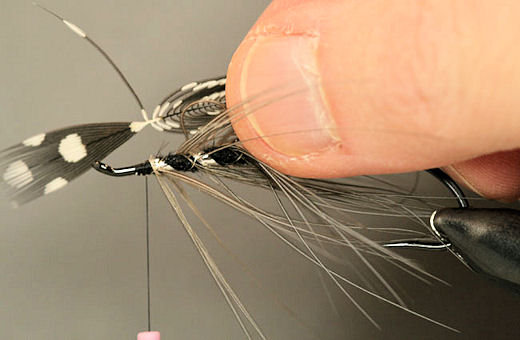
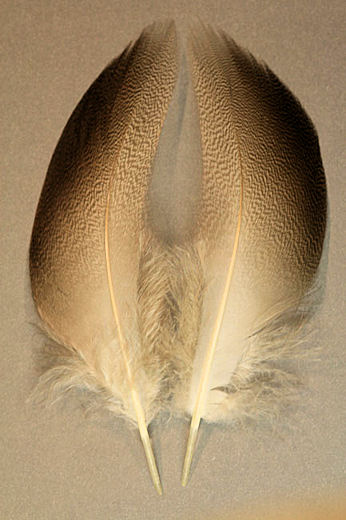
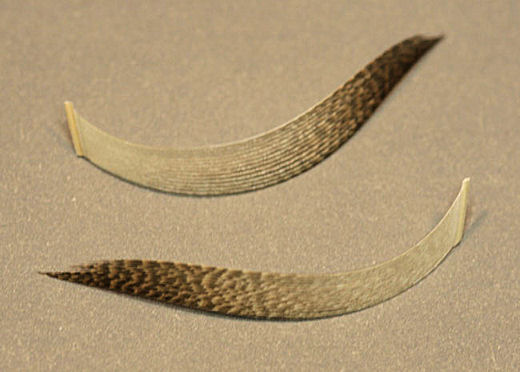
Next select two matching brown mallard flank
feathers. The fiber
length on these feathers should longer than the body of the fly but
not longer than the hook.
Strip off all the excess and useless portions
of the feather, all of the short side of the feather and the fluff
at the bottom.
Note: Keep
in mind that you will not be using all of the feather for spey fly
wings. These feathers
have a “sweet spot” that is better for making wings than the rest of
the feather. This is the
portion of the feather with the white base and the dark tip.
The darker the feather is toward the base the harder it will
be to use as a wing and the more easily it will split apart after
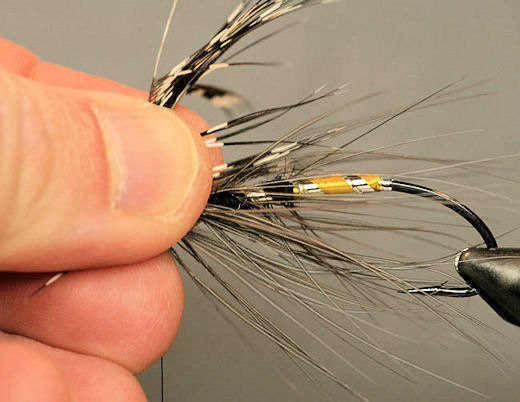
you tie it in. Now separate a portion of the feather from the
rest in the thickness you want the wing to be.
Stroke this portion of the feather into the shape you want
the wing to be.
Cut off the lower portion of the feather stem
and then cut your shaped wing away from the feather with its portion
of feather stem intact.
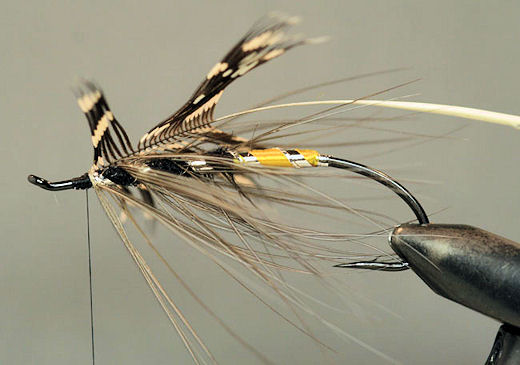
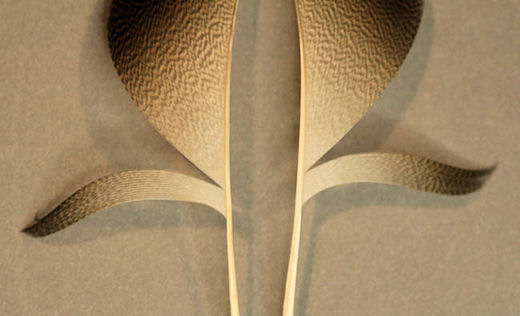
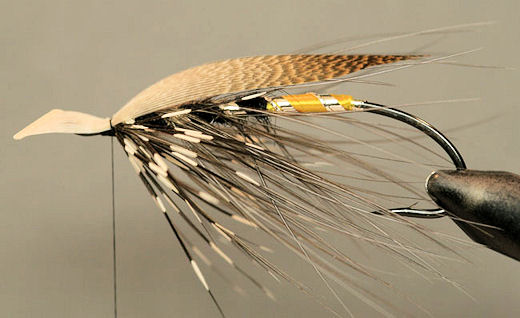
Hold the near wing up to the fly to make sure
it is shaped properly.
If it is not use your fingers some more to stroke it into shape.
When you are done shaping it, hold it back up
to the fly and take a loose turn of thread over it.
Before you tighten and lock the thread down use your fingers
to make sure the wing is in the proper position.
Then take a few wraps to lock it down and trim
off the excess.
Note:
Make sure you have a sharp pair of scissors to trim the wing.
Dull scissors can actually pull the wing apart during the
trimming process. Repeat the process of tying in the wing on the
opposite side of the fly.
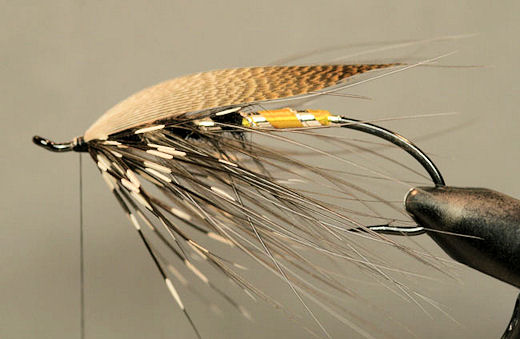
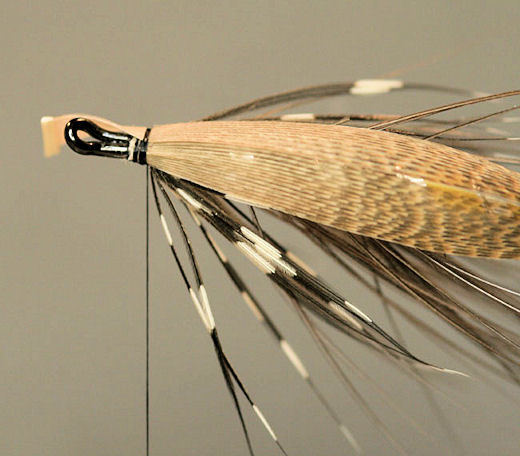
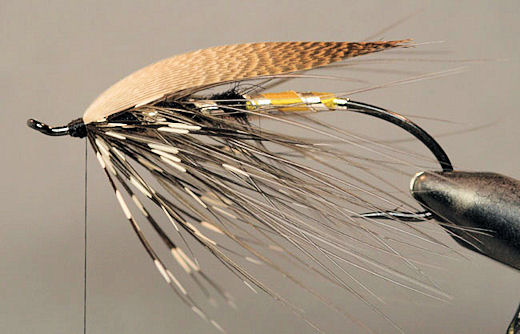
Finish the head with a whip finish.
Clip off the thread and cement the head.
Apply several coats of head cement to get a nice glossy
finish on the head.
Charles Dickson Jr. has taught fly tying and given demonstrations at various fly shops and organizations, including Trout Unlimited and the Federation of Fly Fishers, as well as some fly fishing shows. He has worked as a production tier from time to time, but decided it is a job he truly does not like. He would rather tie flies for himself or friends and as you can see here, share them with the readers of Salmonfly.Net. Read more about Charles on his webpage, The Flies of Charles Dickson Jr.
|
|
|||||||||||||||||||
|
|
|||||||||||||||||||||||
| Home | About Salmonfly.Net | Links | Stores | Contact the Webmaster | |||||||||||||||||||||||