3d raytrace gallery -- Island temple scene
Here are some pictures of a scene I made in Pov-Ray. Click on the images to view the larger version. Click here to go back to the main raytraced pictures page with a few other Pov-Ray pictures of mine.
|

|
|
I started this scene after experimenting with POV-Ray in early 2002. The scene is of a temple on an island. It took me most of 2002 to complete the scene. I also experimented with MORAY a bit before making this scene, but I found the interface too confusing. When I saw the height_field feature in MORAY I made a height field image to try it out, but I couldn't get it to work. I ended up using the height field image as the smaller island in this scene.
|

|
|
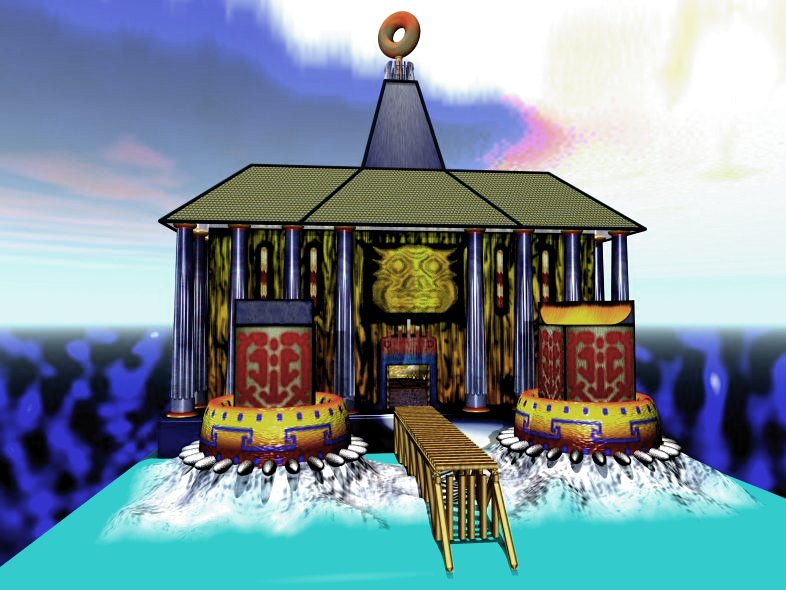
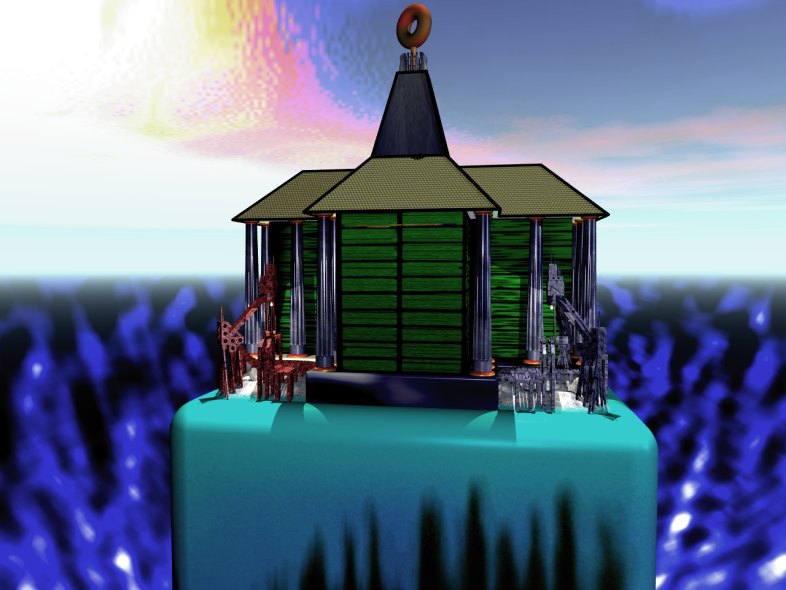
Here's a view of the temple from the front. The exterior of the temple was the second thing I made in this scene, after the two islands. I found coding the scene in POV-Ray challenging at first, but after finishing this scene I was quite good at the basic coding. An annoying thing in this picture is the slight moire pattern visible on the roof of the temple due to the repeating tile pattern. This could be fixed by making each tile have randomly varying size and colour.
|

|
|
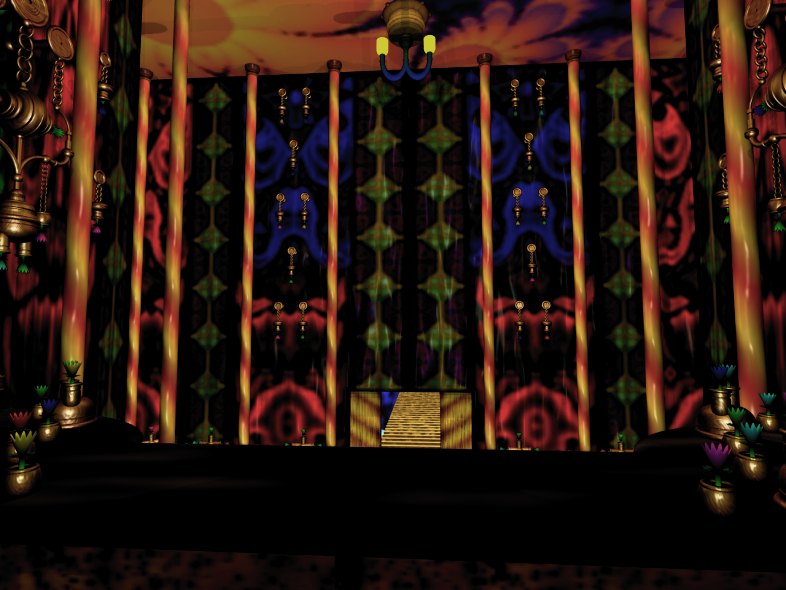
This picture shows the door and front wall of the temple. The weird face-like thing above the door is made out of a height-field. I didn't use any of the algorithmic POV textures in this scene, the textures and normals were mostly GIF image_maps and bump_maps, and also some plain colour or gradient pigments. I created the texture on the wall by drawing the black lines on paper, then scanning them and superimposing onto a yellow and orange gradient. I made the image maps with Corel PhotoPaint.
|

|
|
Here's the interior of the temple as you would see it after walking through the door. The interior is a T-shaped layout. As well as the section straight up ahead, there are two sections directly to the left and right of the camera position in this picture.
|

|
|
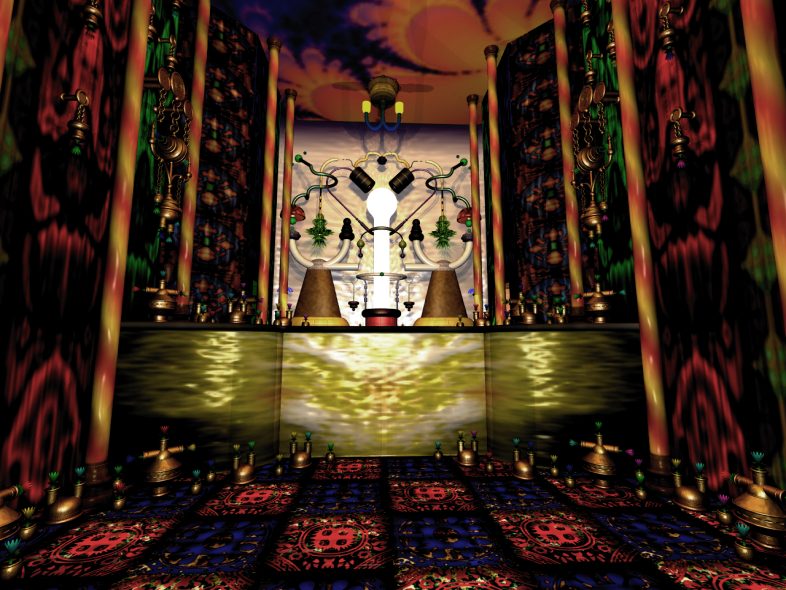
This is the section of the T-shape layout to the left of the camera position in the last picture. The background behind the large colourful ornament is a photo that I scanned from a book a few years ago for a school assignment. I used another photo for the corresponding section on the right side.
|

|
|
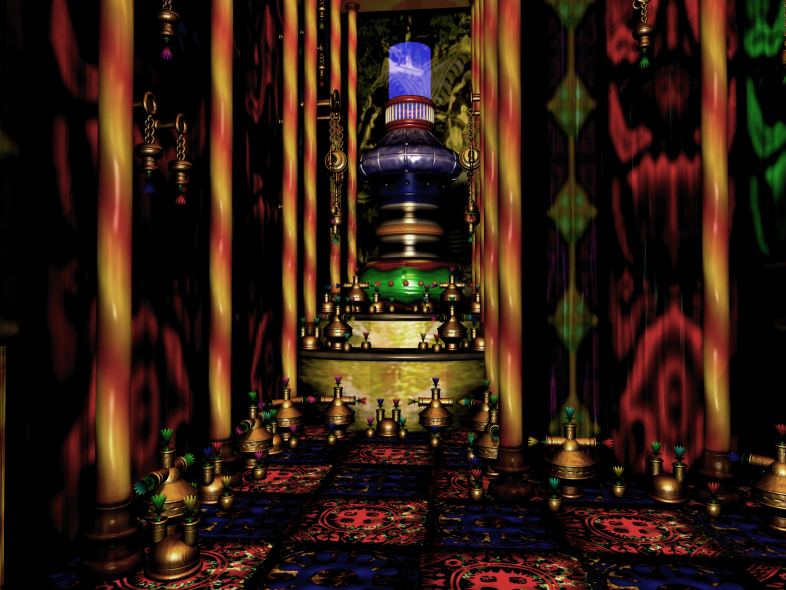
And here's the section to the right. It's mostly the same as the left section in the last image, apart from the different colour of the glowing thing at the top of the large ornament and the different photo. When I was making the temple interior I put in a lot of lights, but then I took most of them out because they made the rendering times too long, and made the shadows look all weird and fragmented.
|

|
|
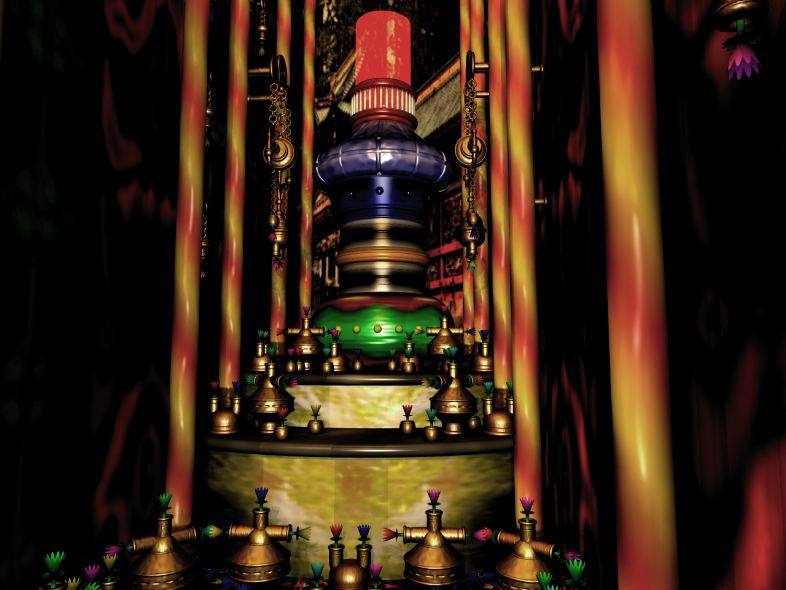
This image shows a large ornament on the wall. I put lots of other flower-holding ornaments like this around the interior of the temple, though this is one of the largest. Actually, I used some of the smaller ornaments as parts of this large one. I created the flowers from cones, with a material_map to make some parts opaque or transparent for the wavy edges. Each flower in the scene has a random colour selected from blue, yellow, red, green, cyan, violet (with 1 or 2 of the rgb values set to 1 and the others 0).
|

|
|
Here's a view from the back of the temple towards the front wall and door. I used too many colours in many parts of this scene, so I processed all the images on this page by decreasing the colour saturation and increasing the contrast. This made the colours less bright, and also made the interior of the temple darker with better defined shading on the objects, making the scene a bit more atmospheric. If I was making another scene I'd try not to use so many bright colours in the first place.
|

|
|
This is a large object at the back of the temple. I made all the objects in this scene by firstly ruling a grid on paper and drawing the shapes, which made it easy to code the objects in POV-Ray without getting confused. The left and right sides of this object are identical, so I only coded one side and then used scale (-1,1,1) to mirror the other side. I used the Metallic property in the finish of some of the parts of this object. The transparent parts of the object took a while to render.
|

|
|
Here's another view of the object in the last picture, showing the lower part of it. The glowing white thing in the middle of the object goes straight down to a cave beneath the temple, shown in some pictures further down this page. The small side passage in the middle of the image goes outside to one of the two pieces of land that are at the back of the island due to the temple's T-shape layout. I increased the camera's field of view for this image so that I could fit in more objects. Consequently some of the objects near the edges of the picture look a bit warped.
|

|
|
This picture shows the back of the temple. I used only one cylindrical image_map for the pillars around the temple, but rotated it to different angles for each pillar. I used a cylindrical image_map to apply the green texture around all the walls of the temple, except for the front wall where I had to use planar mapping because the cylindrical mapping would have distorted the image too much due to the large size of the wall. The sky texture is an image_map that I had to save as a 256 colour GIF image, so there is some pixelated dithering visible in the sky in this image. An explanation of the mapping technique used for the sky is further down this page. I later found out that the turbulence function can eliminate any dithering that is visible in image_maps.
|

|
|
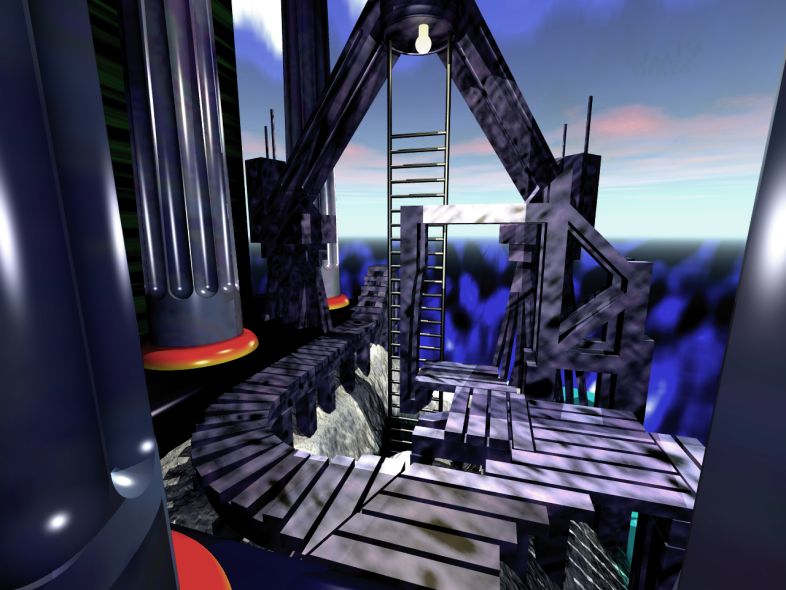
There is a wooden structure in each of the two corners of the island behind the temple, with a ladder leading down to a cave. As I put more objects in this scene the rendering times increased, so when I modelled individual objects like this wooden structure I mostly used substitute scenes with minimal geometry to represent the surroundings in which the object would be placed.
|

|
|
Here's a view of the wooden structure on the other side of the temple. When I was starting to model these structures I thought I might make a different one for each side of the temple, but I ended up just using the same model for both sides, with scale <-1,1,1> to duplicate it on the other side, and I gave one of them a red texture and this one blue-grey.
|

|
|
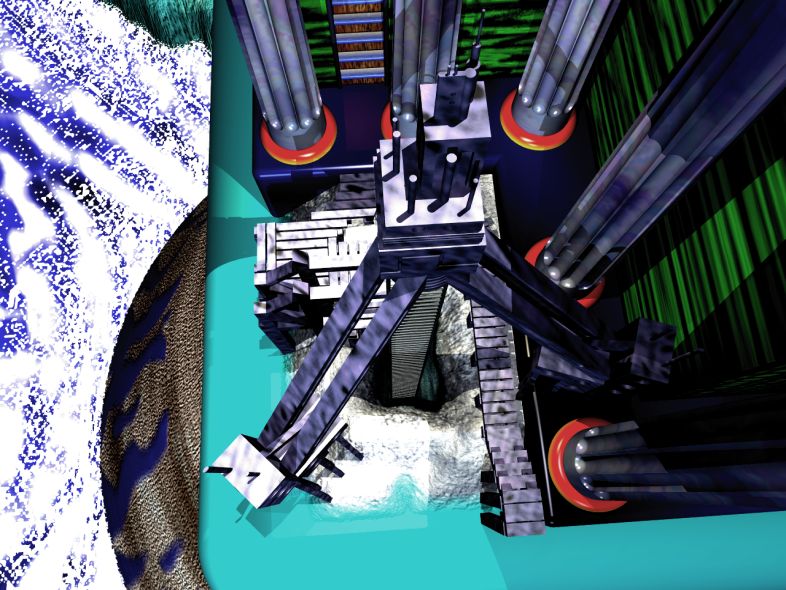
A birds-eye view of the ladder going down into the cave. Also visible is the bottom of the island and some of the smaller island in the sea. I made the white spray on the sea by using several planes on top of each other with dithered material maps to determine which parts were the white dots and which were transparent.
|

|
|
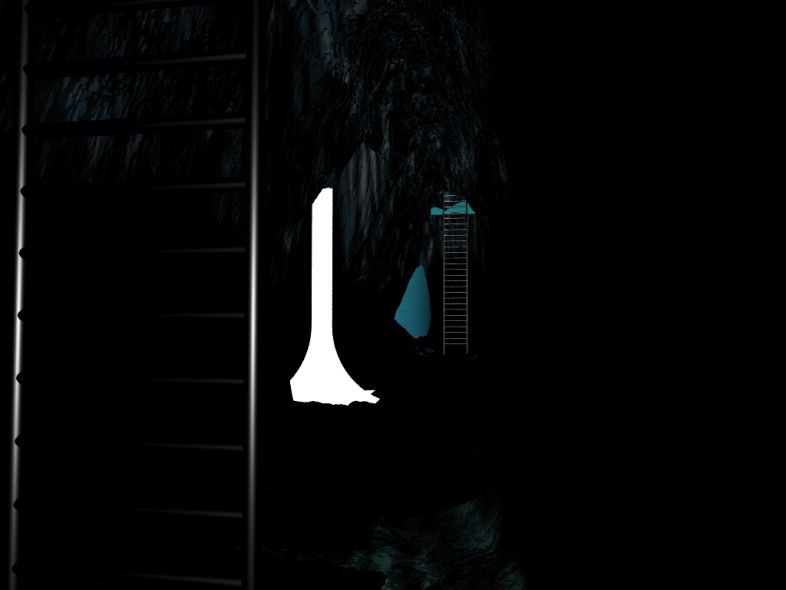
This is the cave that the ladder goes into. I made this cave with two height_fields on top of each other, one for the top half of the cave and one for the bottom. I started with the same height_field for each of them, and modified parts of each for their individual features, like the holes in the top of the cave that the ladders go through. The cave is located quite close to the blue shapes that made up the exterior surface of the island, so I used CSG difference to make sure they didn't intersect with the cave. I thought I had done it properly but when I did this render some of the blue shapes showed through. Oh well.
|

|
|
A closer view of the glowing white stuff in the middle of the cave. As I mentioned before, this glowing white stuff goes up to the large object at the back of the temple. In this scene, I needed to create some ambient light to illuminate the dark regions. Global illumination ambience values aren't good for this purpose because they make objects look flat. I used a good alternative with quick rendering times, which is to put a light_source at the same location as the camera. There are no light_sources in this cave, so the camera light_source illuminates the cave surface.
|

|
|
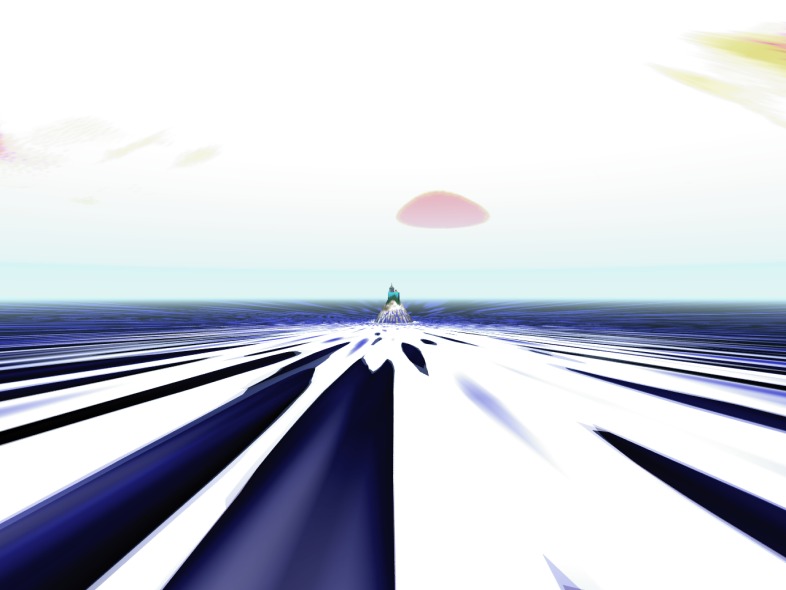
Here's a view of the island from far away. There's some weird stuff going on with the phong highlight on the sea. I made the sea texture so that it radiates from the island, so it gives a perspective effect in this image. I mentioned earlier how some pixelated dithering is visible in the sky. The sky texture is a cylindrical image_map mapped onto a very flattened sphere, so that the fog doesn't have much of an effect when looking upwards at the sky, but takes effect when looking towards the horizon. You can see how distorted the sphere was by looking at the red thing that's supposed to be the sun. It was a circle in the image_map but looks distorted here. But I was quite happy with the pink clouds that are visible in the sky. I had to make the colours very saturated in the image_map to account for the fog desaturating the colours.
|
|
Below is a 3d stereo cross eye image. To see it in 3D, cross your eyes so that the two images merge into one.
|

|
Well that's all on this page. Click here to go back to my main raytrace pictures page, or the homepage of my Electro Cave website.
|