
|
|
||
|
37.3 Cartoons - Leroy the Hawk, Animation 3 |
||
|
I begin with a fresh slate by loading 'Leroy_NoSkelegons.lwo' from the last tutorial. I do a 'Save Object As...', calling it 'Leroy_AutoWeightMaps.lwo'. I select 'Skelegons' from the 'Elements' section of the 'Create' tab and click in the middle of Leroy's chest to being the first skelegon, then click a second time at his elbow. 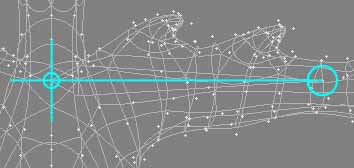  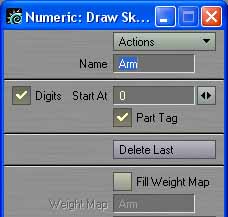 I click two more times, once at the wrist and again at the tip of the 'fingers'. 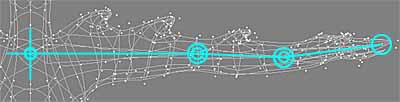 This time, though, when I look at the Weight Map' drop-down menu, there are no weight maps (I didn't checkmark 'Fill Weight Maps'). 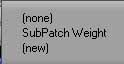  I don't do anything with the associated weight map names. I close the 'Skelegon Tree' window. I know that I need to create weight maps for the skelegons, so I click on the 'Maps' tab.  MODELER, 'MAKE BONE WEIGHT MAP' Yes, I know they're called 'Skelegons' in Modeler, but LightWave broke their own rule. They call it a 'Bone Weight Map' instead of a 'Skelegon Weight Map' when you use the 'Bone Weights' plug-in. From the 'Weight & Color' section of the 'Maps' tab I select  I'll use the information I obtained from the experiments that I did in the last tutorial. I select 'Inverse Distance' for the Falloff value. Since there are no weight maps defined at the moment, I don't choose the 'Additive' checkmark as that would add the effect to current weight maps. I guess at a value of 200 mm for the Threshold value and set 'Blend' as the threshold type.  The instant that I click 'OK',  appears in the 'Weight Map' drop-down menu at the bottom right of the Modeler window. appears in the 'Weight Map' drop-down menu at the bottom right of the Modeler window.When I drop the menu, I see that LightWave has used each skelegon name to create weight map names.  This is what the 'Leroy_Forearm' weight map looks like.  Therefore, the strongest influence will be around each end of the skelegon and there will sometimes be a little bit of a drop-off in influence at any points which are above the center of a skelegon when using this automated method of creating weight maps. If I didn't like the weight maps that LightWave created for me, I could press 'u' to undo them. I would then select and make slightly different choices.If the weight value on any point wasn't correct, I could easily modify those point's weight values as I've shown how to do in previous tutorials. MODELER, WEIGHTS TOOL When you wish to modify particular points to have greater or lesser influence, there's another way you can modify them. Magnify the area you wish to modify. From the 'Map' tab, 'Weight & Color' section select  In the 'Perspective' viewport with 'Weight Shade' chosen, click on any point with the left mouse button. Keep the left mouse button held down and roll your mouse to the right (slowly). This will increase the amount of influence on that point and the area around that point will grow more red. 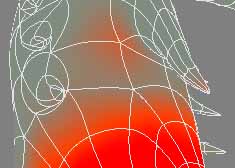 To reduce the amount of influence, press the left mouse button and hold it down, then move to the left. The intensity will lessen until it goes to green, where it will then begin to go to blue (blue is a negative weight which means it will be an inverse effect on that point). 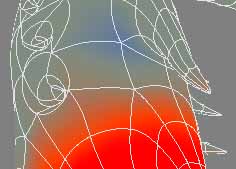 When you let up on the mouse button, it will take that as the new intensity value. If you press 'n' to bring up the numeric requester it will show you the percent of change as you do it.   The book says you must be directly over a point to use this method, and it says you'll get faster updates, but I don't see much difference in the speed in which it updates. However, a very handy aspect to 'Point Radial' mode is if you have no points selected and you have a very large radius. In that case, all points will increase or decrease in intensity throughout the entire object. If you have more than one point selected, all of those points will raise or lower at the same time. When using the numeric requester, realize that it's a relative change. If you let up at any time and then click again it will always begin again at 0%. Using the weights tool with no points selected will add the current weight map to ALL POINTS, not just the one being edited. Non-edited points are assigned a 0% value. If you don't want this to happen, select only the points you wish to modify before you use the Weight tool. You wouldn't see a difference when LightWave assigned the 0% value to every point, but if 0% is assigned to all points in that weight map, that can drastically slow things down (it would then attempt to redraw every 0% point). MODELER, AIRBRUSH TOOL Another good way to change the intensity of any point is with the 'Airbrush' tool, found in the 'Weights & Colors' section of the 'Map' tab. Just as with the 'Weights' tool, work in the 'Perspective' viewport and the 'Weight Shade' view type. Click  if you press 'n' the numeric requester will allow you to modify the airbrush tool. 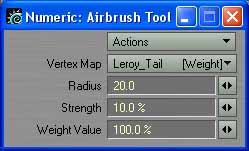 The radius affects how wide the area of influence you'll paint will be. The radius area must actually touch a point for it to have an effect since it must add value to a point. If you have points selected, only those points will be affected. The Strength' value sets the intensity of the tool. Negative strength values reduce the amount of weight (even below zero). You can increase the Weight Value above 100%, if necessary. You select which weight map you are modifying by selecting that weight map from the 'Vertex Map' drop-down menu ('Weight Maps' say [Weight] to the right of the name). NOTE - If the airbrush acts sluggish when you have a complex object, try using the 'Weights' tool, select that particular point with CTRL-g, and use 'Point Radial' as the Falloff' on the numeric panel. MODELER, AUTOMATING LEROY'S WEIGHT MAPS I'm done with those experiments so I save it by pressing 's' and re-load the Leroy which had a completed skelegon structure... but no weight maps. In the last tutorial I had saved it as 'Leroy_19.lwo'. 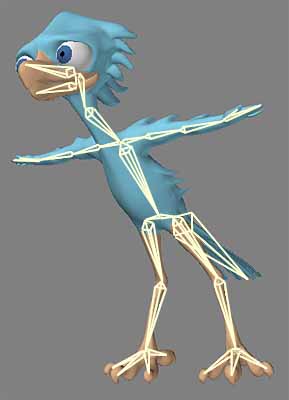 From the 'Map' tab, 'Weight & Color' section I select  I set the Falloff to 'Inverse Distance' and the 'Threshold Value' to 150 mm. Since there are no current weight maps (I deleted them all before I saved this version) I don't need to checkmark 'Additive'. I set the 'Threshold Type' to 'Blend'.  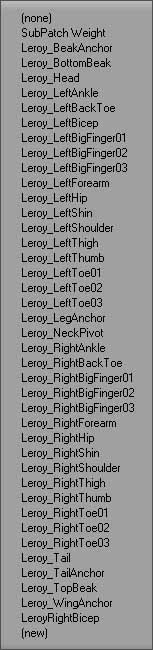 Doing weight maps this way, a tiny skelegon will have no influence at all, such as the one holding the beak together whereas the 'Leroy_Tail skelegon will have an enormous influence.  You can always click the 'Additive' button later to raise the falloff levels, extend the threshold clipping range, or change the threshold type to 'Clip'. I do a 'File->Save Object As...' and save the new version as 'Leroy_20.lwo'. MODELER, CLEARING ALL WEIGHT MAPS 'Bone Weights' can also be used to wipe clear all weight maps in your skelegon tree. That way you won't have to delete all weight maps manually if you make mistakes. To clear all weight maps so they have no influence on the skelegons, click 'Bone Weights' and make sure that 'Additive' is NOT checked. It doesn't matter which 'Falloff' value you choose. Set the threshold value to '0' and the threshold type to either 'Clip' or 'Blend'. 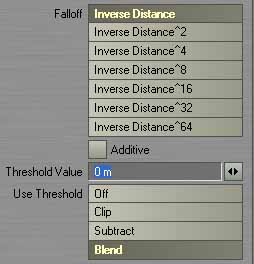 |
||
