
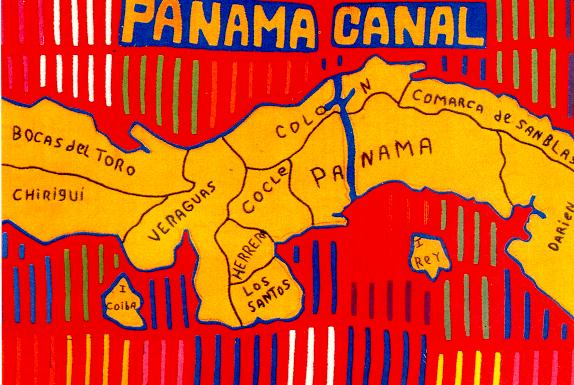
Molas of the San Blas Island Indians . . . Pictured above, is a Mola map of Panama.The San Blas are unique islands; life there goes on much as it did when Columbus sailed into the Bocas del Toro area 486 years ago. The short, industrious Indian population is known locally for its self-sufficient and democratic outlook. The San Blas live largely in 42 settlements scattered through 365 islands. They are adopting some modern conveniences, but socially they are selective, retaining many tribal customs and ceremonies.
The San Blas Islands are accessible by air, and the enchanting view from an airplane is, by itself, worth the modest price of a ticket. This is one of the musts for tourists and the trip can be taken both ways in a day.For a souvenir, the tourist may want to buy a mola, a beautiful and interesting creation of the San Blas women. Designs vary from geometric to birds, village scenes, animals, or symbols depicting cultural or religious themes. Sewn by hand, the complicated stitching requires hours of hard work. Framed, the mola is an equisite decoration.
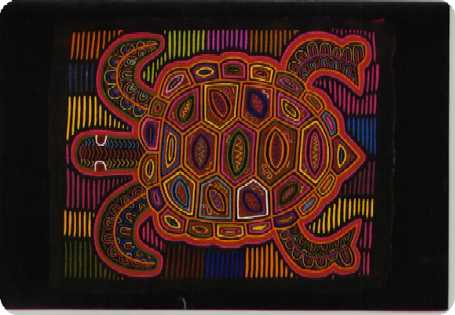
A turtle mola
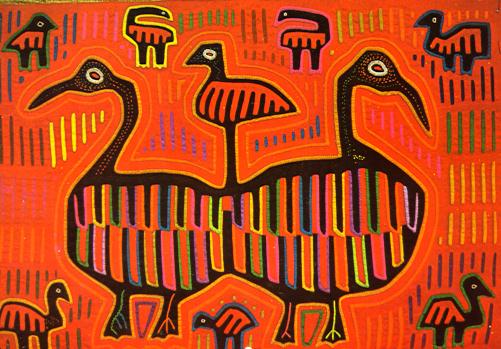
A bird mola.
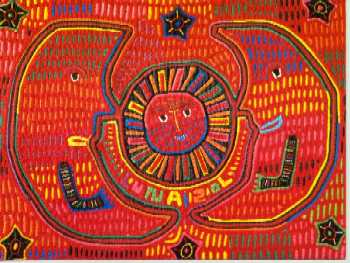 The Moon and Sun mola.

Cuna Girls and their parrot friends.
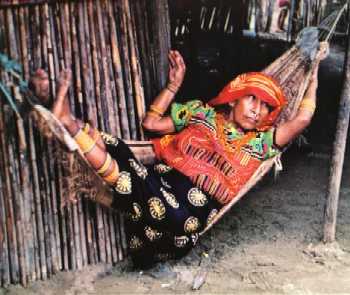
A Cuna woman relaxing in her hammock.
 The hotel that was built to house over-night visitors to the main island.
How to Make a Mola:
Materials: cotton fabric rectangles, 18 x 21 inches, one each in black, orange, and yellow and two in red . . . thread, in colors to match fabrics; scraps of cotton fabric, in light aqua, dark aqua, blue, lavender, purple, light pea green, and moss green. 1 package piping, in red (optional). . . dacron stuffing . . . Tools: brown wrapping paper, pencil, ruler, scissors, dressmaker's carbon, in white; tracing wheel, needle.
Instructions:Procedure.....1)Stack fabric pieces with one piece of red on the bottom, orange next, then yellow, and black on top. Baste all layers together around outer edges. 2)On brown wrapping paper, draw 1-inch grid and enlarge design pattern. Cut out pattern and transfer to top layer, using dressmakers' carbon and tracing wheel. 3)To reveal yellow fabric, start first cut by carefully pushing point of scissors through black layer on outside yellow design line. Begin cutting but do 'not' cut out design - as you cut, leave a small bridge of uncut fabric every 2 or 3 inches. Turn edges under to outline and with black thread, whip down, stitching every 1/4 inch and sewing through all layers. Cut bridges as you come to them, and clip corners and curves as necessary so that fabric will lie flat. Repeat this procedure to reveal all other yellow areas within figure. 4)Cutting through top two layers, repeat process to reveal orange design areas. To expose red fabric, cut through top three layers. Make no cuts on red fabric, since this is the background. 5)Cutting through top layer only, cut background slits to measure about 1 1/2 inches. To add various colors, cut strips of fabric slightly wider than the slits and slip under. If you wish, you may baste scrap to top fabric to hold in place. Turn under edges of slit and stitch through all layers of fabric to the back. 6)After completing figure and background, add a border around the edges. Working one side and one color at a time, cut on color outline; turn under edges and sew down. 7)If you wish to add piping, stitch piping to edge of pillow top at seam allowance. With right sides facing, machine-stitch second piece of red fabric to front of pillow, leaving open a section for stuffing. 8)Turn pillow right side out, stuff with Dacron, and sew opening together by hand.
Page Links
About Molas
Folklore - The Revolt of the Chagres
Panama - More Than A Canal
Front Page - Fly With Me to Panama
Page Five - Many Mango Recipes
Page Six - Many Plantain Recipes
Page Seven - My Home Town...Gatun
