

Weapons
Shield Ratings
Hull Rating
The Akira Class has been described as many things throughout the short time it has been in service. It has been called a light cruiser, a heavy cruiser, a battlecruiser, and a torpedo cruiser. Most sources say that the Akira has 15 torpedo tubes and a large hanger bay that can carry up to 50 fighter craft. However, you won’t see an Akira so heavily armed in Bridge Commander, though they easily rival the Sovereign in popularity and in power.
It may be best to think of the Akira as the “Sovereign Lite”, as it is a new design and carries a devastating payload of quantum torpedoes. However, it’s Type X phasers and slower top speed set it far enough apart from the Sovereign to consider them very different styles of ships. Type X phasers, though weaker than Type XII, will be more than enough to destroy an enemy once their shields are down. Taking down an opponent’s shields proves much easier using a full spread of quantum torpedoes, and the Akira has the advantage of being a smaller target carrying extremely powerful weapons.
The Akira has strong shielding that is evenly spread out over the entire ship. Like the Galaxy, it’s forward shield grid is stronger to protect vital systems on the front of the ship. The Akira is small enough to dodge incoming projectile fire, and though its overall top speed is slower than the Sovereign, its smaller size gives it much greater agility. The Akira can often maneuver in and out of a situation that would give a larger ship a considerable amount of problems. While it’s weaponry and shields are above average for Federation vessels, the Akira’s hull is the weakest of any of the 5 Federation starships. A hull rating of 9 won’t protect you for long if your shields fail.
My final analysis – Many will say that the Akira is the most balanced ship in the game. In multiplayer games, it’s often not surprising to see more Akira’s than Sovereign’s. Its quantum torpedoes are it’s highest redeeming factor. Without them, the Akira would just be another ship, and one with a weak hull at that. However, its torpedo load, high shield strength, and maneuverability make the Akira Class one tough ship. In multiplayer games, you’ll likely face Akira after Akira. They are popular and powerful vessels that can end your game very quickly, especially if you happen to be looking at their “business end”.
Like all Federation ships, the 270+ degrees of phaser arrays should be used as much as possible. In multiplayer games, the fight isn’t always on the virtual battlefield. It is as much a mental game as anything else. If you can keep a phaser beam firing on your opponent most of the time, chances are they will be forced into a defensive posture, giving you the upper hand. Even though phasers do not have the power of torpedoes or disruptors, they can scare an enemy away from his attack positions. When he starts running is the time to act – lock on with a full spread of quantum torpedoes and fire. Although the Akira Class is small and nimble enough to make strafing or attack runs, you may just want to follow your opponent. The Akira becomes even more deadly when it’s vital systems are turned up to 125%. If your Akira comes under attack, move to face the enemy as quickly as possible. Even though its shields are stronger than those on the Galaxy Class, an Akira cannot sustain repeated assaults from above or below. If a shield grid fails completely, try to keep the enemy away from that area until it can be repaired.
While many will applaud the Akira for being smaller, more maneuverable, and just as well armed as a Sovereign, it is a considerably weaker ship. You will want to find a shield grid to take down on the Akira, and keep firing at it until you can get to its hull.
Since the Akira’s rear torpedoes sit inside the pod between the nacelles, they can often be an easy target. Once the dorsal, ventral, or aft shields are destroyed, the aft torpedo tubes can easily be disabled. Damaging these also does a fair amount of damage to the Akira’s overall hull integrity. Once its aft torpedoes are disabled, you can follow the Akira without the threat of being hit by a spread of quantums. Because of the Akira’s agility and quick turning rate, you may have a hard time tracking it. Just remember to match its speed and roll with it if you have to. Once shields are disabled, you can take your pick of subsystem targets. A few of my favorites are the bridge, warp nacelles, or impulse engines. If you happen to disable its impulse drive, the Akira’s hull isn’t strong enough to allow it to function as an immobile weapons platform. You’ll find the Akira is a fairly balanced ship, and while it has its weaknesses, its strength in battle will probably surprise you.
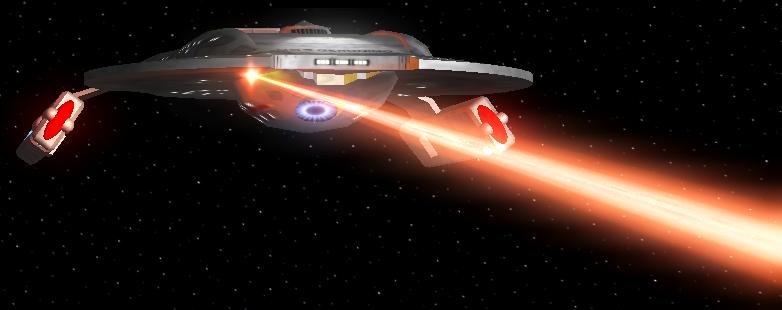
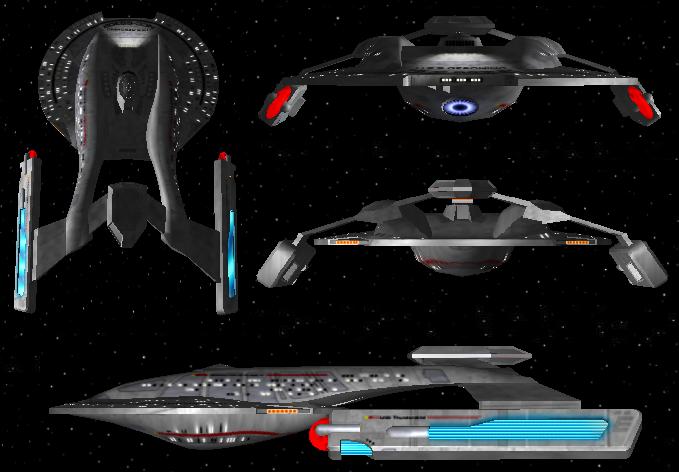
The Federation Akira Class Battlecruiser is one of the newest and boldest designs in Starfleet. Akiras are meant to complement the Galaxy and Nebula Classes, and while they aren’t as large as those older vessels, they are every bit as powerful. Akira Class vessels began to enter the Federation fleet as early as 2370, and several participated in the defense of Earth during the Borg invasion in 2373. Employing a “catamaran”-style hull, the Akira Class saw extensive duty as well as heavy combat during the Dominion War. Their emphasis on weaponry is a step away from Starfleet’s traditional role; however, the Akira Class has proven to be a capable starship, both in times of peace and in times of war.
Ship Specifications
- 8 Type X Phaser Arrays
- 6 Torpedo Tubes Photon/Quantum (4 fore & 2 aft)
- 15 Fore, 10 Aft, 10 Dorsal, 10 Ventral, 10 Starboard, 10 Port
- 9
Analysis of the Akira Class

 Strategies for the Akira Class
*When playing as the Akira*
Despite it’s small profile, the Akira carries one of the most powerful torpedo payloads in the game. If you make wise use of both forward and aft torpedo tubes, even the strongest opponent can be defeated. *When playing against the Akira*
Strategies for the Akira Class
*When playing as the Akira*
Despite it’s small profile, the Akira carries one of the most powerful torpedo payloads in the game. If you make wise use of both forward and aft torpedo tubes, even the strongest opponent can be defeated. *When playing against the Akira*
 All original material, including ship descriptions and analyses on "The House of Martok" copyright Jesse Manning 2002.
All ships, pictures, and Bridge Commander information copyright and courtesy of Paramount Pictures, Activision, and Totally Games.
