
Step 8
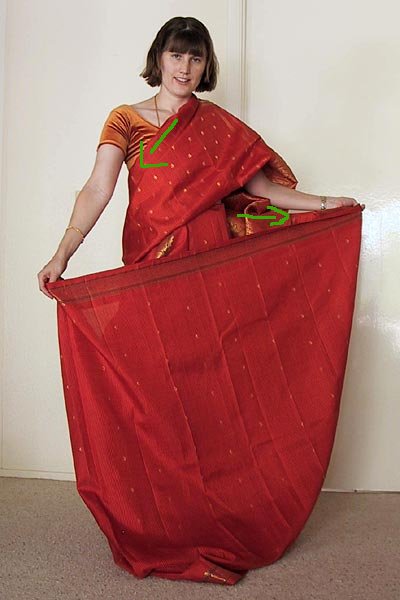
Now reach under the pallu and find the fabric that
runs
from your pallu, around your body,
and to where you tucked it in front of your belly button.
The green arrows show the flow of the the top edge.
Spread this fabric out and make sure it is not
twisted all the way around.
If it is twisted you can repeat Steps 4-7 above
by taking off your pallu,
tracing the fabric around, and then putting your pallu back on.
Note: Pay attention to the
flow of the upper edge of the fabric shown in this photo,
as it will be a useful reference for later.
Step 9

Pull the fabric somewhat firmly from around the back
to the front (under the pallu),
in the direction of the arrow until you feel it is tight across the back and chest.
Tuck it into the petticoat near your bellybutton
next to where the other bellybutton tuck has been made,
but not on top of it.
Step 10

Now it's time to make front pleats.
This is very challenging at first for some, and takes lots of practice.
The Indian way of making the pleats is to fold them between an outstretched
thumb and finger as shown, but you can also improvise a method that makes you comfortable.
The point is to make the pleats about three inches in width, no matter how it is done.
Keep making pleats until all the fabric between the two bellybutton tucks is used up.
It is okay if there is a little extra fabric left over that won't make that last pleat.
Step 11

Take your fingers and trace down the pleats to keep their shape
down the front of the sari. It helps to have someone else do it for you at first,
especially if you are using a stiff fabric.
Step 12

To make it look more polished, do a waterfall cascade
of the pleats
by spreading them out just right and holding them in place.
This can also be done after you tuck the sari into the petticoat
but it looks better if you try it during this step.
Step 13

Keeping note of the length of the sari in front,
and keeping a firm grip on the pleats,
lift high and then tuck them into the petticoat.
Make sure the pleats are going to the left.
For added security fasten a large safety pin (I use a
diaper pin)
through the sari and petticoat on the inside of the petticoat.
If the petticoat is too loose it will sag at this stage
and cause the sari to be too long in front.
The only way to fix this is to start over at the beginning.
