|
|
|
|
|
|
|
|
|
|
|
|
|
|
|
|
|
|
|
|
|
|
|
|
|
|
|
|
|
|
|
|
|
|
|
|
|
|
|
|
|
|
|
|
|
|
|
|
|
|
|
|
|
|
|
|
|
|
|
|
|
|
|
|
|
|
|
|
|
|
|
|
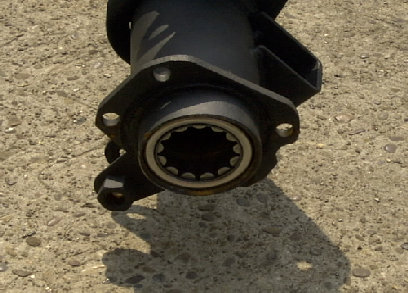
Axle Bearings: Removal and Installation
|
|
|
|
|
|
|
|
|
|
There are two ways to do remove axle bearings. One is the "correct" way and the other is the way I
was forced to remove them. My way only works if you have the
differential out of the rear end. If you
are reading this in order to learin how to install and remove axle bearings without doing the rest
of the rebuild, you have two
choices: remove the carrier bearing caps and carrier and use my method
or use the correct method. I must say that I think the way I did this is the best way
considering it is not
very tool intensive. If you are removing axle bearings you will have to open the center section and
remove the pinion shaft, C-clips and axles.
Since you must do all of these steps I do not think that removing
the four carrier bearing cap bolts and the carrier is a big deal. You decide. I'll provide
information
on both methods.
|
|
|
|
|
|
|
|

|
|
|
|
|
|
|
|
|
|
|
|
|
|
|
|
|
|
|
|
|
|
|
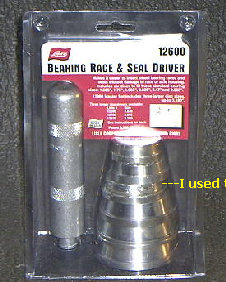
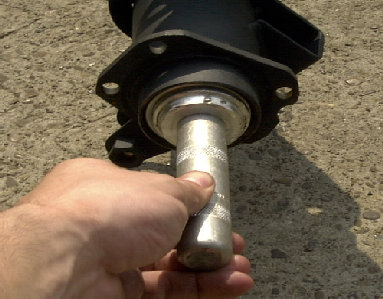
- If you feel inside the axle tube you will notice that part of the axle bearing race can be grabbed from
behind. You will need something to catch the
backside of the race with something. I used a Bearing
Race and Seal Installer tool. Slide whatever you decide to use down the axle tube from the inside until
it
catches on the bearing race.
|
|
|
|
|
|
|
|
|
|
|
|
|
|
|
|
|
|
|
|
|
|
|
|
|
|
|
|
|
|
|
|
|
|
|
|
|
|
|
|
|
|
|
|
|
|
|
|
|
|
|
|
|
|
|
|
|
|
|
|
|
|
|
|
|
|
|
|
|

|
|
|
|
|
|
|
|
|
|
|
|
|
|
|
|
|
|
|
|
|
|
|
|
|
|
|
|
|
|
|
|
|
|
|
|
|
|
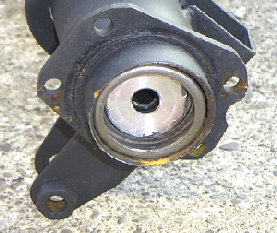
The tool attachment catching the rear of the
bearing race.
|
|
|
One of the attachments that came with the tool above fit down the
axle tube and caught the back of the bearing race perfectly. The
third piece down was the
attachment that I used.
|
|
|
|
|
|
|
|
|
|
|
|
|
|
|
|
|
|
|
|
|
|
|
|
|
|
|
|
|
|
|
|
|
|
|
|
|
|
|
|
|
|
|
|
|
|
|
|
|
|
|
|
|
|
|
|
|
|
|
|
|
|
|
|
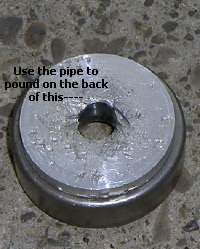
In the picture above is the tool attachment and the axle bearing race
that we are trying to get behind when it is in the axle tube.
|
|
|
|
|
|
|
|
Another photo of the tool catching the rear of the bearing
race. If you were to shine a light down the axle tube from
the inside this would be what you would
see before pounding
the bearing out.
|
|
|
|
|
|
|
|
|
|
|
|
|
|
|
|
|
|
|
|
|
|
|
|
|
|
|
|
|
|
|
|
|
|
|
|
|
|
|
|
|
|
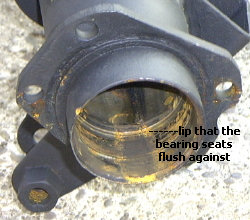
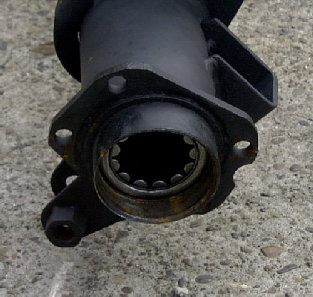
In the photo above notice a few things. One is
that after cleaning the housing out rust has built
up (overnight.) I'll clean that out before installing
everything. Second, notice the lip that the axle
bearing sits flush against when fully seated.
|
|
|
|
|
|
|
|
|
|
|
|
|
- Slide the five feet of black iron pipe through the axle tubes. Start it through one side and let it slide
all the way through to the other, catching the
attachment used to catch the bearing race.
|
|
|
|
|
|
|
|
|
|
|
|
|
|
|
|
|
|
|
|
|
|
|
|
|
|
|
|
|
|
|
|
|
|
|
|
|
|
|
|
|
|
5" of black iron pipe slid through one end of the housing so that it can reach the axle bearing
on the other end.
|
|
|
|
|
|
|
|
|
|
|
- Using a sledge hammer take a few strikes on the end of the black iron pipe until the seal and bearing
pop out of the other end.
|
|
|
|
|
|
|
|
|

|
|
|
|
|
|
|
|
|
|
|
|
|
|
|
|
|
|
|
|
|
|
|
|
|
|
|
|
|
|
|
|
|
|
|
|
|
|
|
|
|
|
|
|
|
|
|
|
|
|
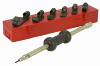
To the left is an example of a slide hammer with puller jaw attachments
|
|
|
|
|
|
|
|
|
|
|
|
|
|
|
|
|
|
|
|
|
|
|
|
|
|
|
|
|
|
|
|
|
|
|
|
|
|
|
|
|
|
|
|
|
|
|
The better attachment to pull off axle bearings. This tool works like a cuff link. The head
swivels so that it is in line with the piece of the tool that
hooks to the slide hammer. Once
inside the axle tube the head swivels back perpendicular as shown and grabs the back
of the bearing race.
|
|
|
|
|
|
|
|
|
|
|
- Positioning the jaws behind the bearing race use the slide hammer to pull out the bearing and seal.
|
|
|
|
|
|
|
|
|
|
|
|
|
|
|
|
|
|
|
|
|
|
|
|
|
|
|
|
|
|
|
|
|
|
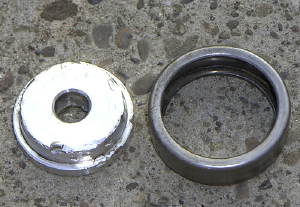
Axle bearing placed in the end of the axle tube.
|
|
|
|
|
|
|
|
|
|
|
|
|
|
|
|
|
|
|
|
|
|
|
|
|
|
|
|
|
|
|
|
|
Driving the axle bearing into the tube with the installer
tool.
|
|
|
|
|
|
|
|
|
|
|
|
|
|
|
|
|
|
|
|
|
|
|
|
|
|
|
|
|
|
|
|
|
|
|
|
|
|
|
|
|
The axle bearing driven into the housing
|
|
|
|
|
|
|
|
|
|
|
|
- Place the axle seal in the end of the axle tube as above. Drive it into the housing the same way as
above.
|
|
|
|
|
|
|
|
|
|
|
|
|
|
|
|
|
|
|
|
|
|
|
|
|
|
|
|
|
|
|
|
|
|
|
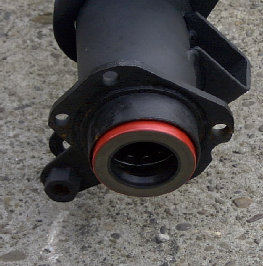
The axle seal placed in the end of the axle tube.
|
|
|
|
|
|
|
|
|
|
|
|
|
|
|
|
|
|
|
|
|
|
|
|
|
|
|
|
|
|
|
|
|
|
|
|
Using the installation tool to drive the seal into the axle tube.
|
|
|
|
|
|
|
|
|
|
|
|
|
|
|
|
|
|
|
|
|
|
|
|
|
|
|
|
|
|
|
|
|
|
|
|
|
|
|
|
|
|
|
|
|
|
|
|
|
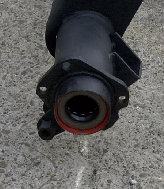
The axle seal driven in flush against the axle bearing.
|
|
|
|
|
|
|
|
|
|
|
|
|
|
|
|
|
|
|
|
|
|
|
|
|
|
|
|
Back to Contents
|
|
|
|
|
|
|
|
|
|
|
|
|
|
|
|
|
|
|
|
|
|
|
|
|
|
|
Ring Gear Removal and Installation
|

