|
|
|
|
|
|
|
|
|
|
|
|
|
|
|
|
|
|
|
|
|
|
|
|
|
|
|
|
|
|
|
|
|
|
|
|
|
|
|
|
|
|
|
|
|
|
|
|
|
|
|
|
|
|
|
|
|
|
|
|
|
|
|
|
|
|
|
|
|
Ring Gear Removal and Installation
|
|
|
|
|
|
|
|
|
|
|

|
|
|
|
|
|
|
|
|

|

|
|
|
|
|
|
|
|
|
|
|
|
|
|
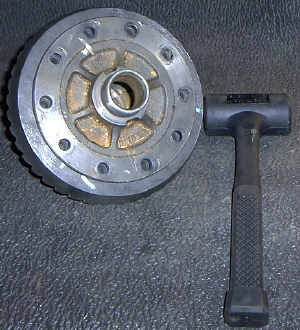
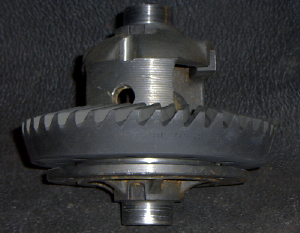
- Using a dead blow hammer lightly pound on the top edge of the ring gear until the ring gear pops
off. It only took me a few blows evenly spaced around the
ring gear.
|
|
|
|
|
|
|
|
|
|
|
|
|
|
|
|
|
|
|
|
|
|
|
|
|
|
|
|
|
|
|
|
|
|
|
|
|
|
|
|
|
|
|
|
|
Dead blow hammer used to remove the ring gear from the
carrier.
|
|
|
|
|
|
|

|
|
|
|
|

|
|

|
|
|
|
|
|
|
|
|
|
|
|
|
|
|
|
|
|
|
|
|
|
|
|
|
|
|
|
|
|
|
|
|
|
|
|
|
|
|
|
|
|
|
|
|
|
|
|
|
|
|
|
|
|
|
|
|
|
|
|
|
|
|
|
|
|
|
|
|
|
|
|
|
|
|
|
|
|
|
|
|
|
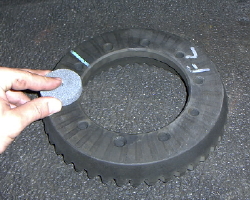
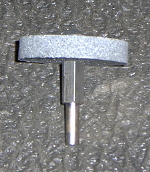
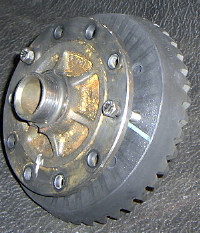
The cheap little grinding stone I used and stoning the ring gear and carrier surface
|
|
|
|
|
|
|
|
|
|
- The ring gear will need to be pressed onto the carrier and then drawn in using the ring gear bolts.
Our first step in that direction is to fabricate a few
pieces so that while we are in the process of seating
the ring gear the bolt holes line up. You can be creative or you can follow the pictures and use a few
stray
bolts like I did.
|
|
|
|
|
|
|
|
|
|
|
|
|
|
|
|
|
|
|
|
|
|
|
|
|
|
|
|
|
|
|
|
|
|
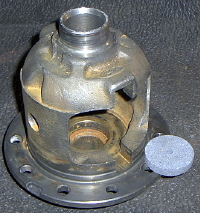
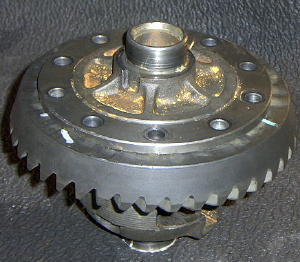
As you can see in the picture the ring gear slides over the carrier
but does not seat without being pressed further down.
|
|
|
|
|
|
|
|
|
|
|
|
|
|
|
|
|
|
|
|
|
|
|
|
|
|
|
|
|
|
|
|
|
|
|
|
|
|
|
|
|
|
|
|
|
|
|
|
|
|
|
|
|
|
|
|
|
|
|
|
|
|
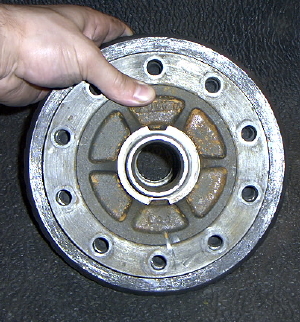
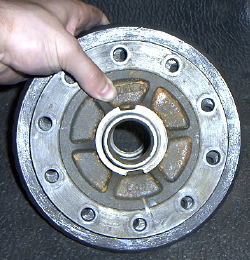
The picture on the left illustrates exactly what we do not want; the ring gear pressed on without the bolt holes being
lined up. In this case we would have
to remove it and repeat the installation. The picture on the right illustrates what
we are looking for. We have to have those bolt holes line up.
|
|
|
|
|
|
|
|
|
|
|
|
|
|
|
|
|
|
|
|
|
|
|
|
|
|
|
|
|
|
|
|
|
|
|
|
|
|
|
|
|
|
|
|
One method, illustrated on the left, is to use a smaller diameter bolt
to guide the ring gear onto the carrier so the holes line up. Besides
using smaller
bolts, you can use your imagination to come up with
another piece that can guide the ring gear on.
|
|
|
|
|
|
|
|
|
- Place the ring gear in a pot of boiling water for a few minutes. We want to heat the ring gear slightly
so that it will slide easier over the carrier
flange. If you have access to a press you do not need this
step.
|
|
|
|
|
|
|
|
|
|
|
|
|
|
|
|
|
|
|
|
|
|
|
|
|
|
|
|
|
|
|
|
|
|
|
|
|
|
|
|
|
The ring gear in a pot of boiling hot water. I lifted this technique
off a race mechanic I know. This is also used in another
gear install web page on the net.
|
|
|
|
|
|
|
|
|
- Set the bolts (or other fabricated pieces) in place so that the ring gear can be taken directly from the
pot of water to the carrier.
|
|
|
|
|
|
|
|
|
|
|
|
|
|
|
|
|
|
|
|
|
|
|
|
|
|
|
|
|
|
|
|
|
|
|
|
|
|
|
|
|
|
|
|
|
|
Bolts in place and carrier ready to accept the ring gear.
|
|
|
|
|
|
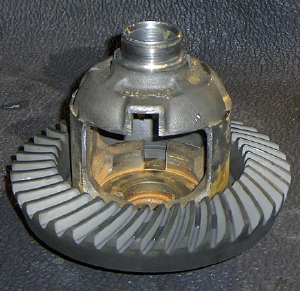
- Set the ring gear on the carrier flange, line up the bolt holes, and apply a bit of pressure downward.
The ring gear should slide most of the way down onto
the carrier.
|
|
|
|
|
|
- Install five ring gear bolts and tighten them in sequence so that the ring gear is drawn toward the
carrier evenly. You will need to brace the carrier as
shown in order to apply torque to the bolts. The
bolts should tighten very easily, drawing the ring gear against the carrier flange very gently.
|
|
|
|
|
|
|
|
|
|
|
|
|
|
|
|
|
|
|
|
|
|
|
|
|

|
|
|
|
|
|
|
|
|
|
|
|
|
|
|
|
|
|
|
|
|
|
|
|
|
|
Tightening the five ring gear bolts evenly to draw the ring
gear against the carrier flange. Notice that I braced the
carrier by placing a piece of pipe
through it and resting
that pipe against a stationary object (in this case a vice.)
If you are not rebuilding the Traction Lok you will need to
find another method
of bracing the carrier.
|
|
|
|
|
|
|
- Remove the ring gear bolts and turn the carrier upside down so that any water in the bolt holes
can drain. Allow the ring gear and carrier to dry
completely.
|
|
|
|
|
|
|
|
|
|
|
|
|
|
|
|
|
|
|
|
|
|
|
|
|
|
|
|
|
|
|
|
|
|
|
|
|
|
|
|
|
|
|
|
|
|
|
|
|
|
|
|
|
|
|
|
Ring gear bolts removed.
|
|
|
|
|
|
|
|
|
|
|
|
|
|
|
|
|
|
|
|
|
|
|
|
|
|
|
|
|
|
|
|
|
|
|
|
|
|
|
|
|
|
|
|
|
|
|
|
|
|
|
|
|
|
|
|
Carrier and ring gear resting so that any water can
drain from the bolt holes.
|
|
|
|
|
|
|
|
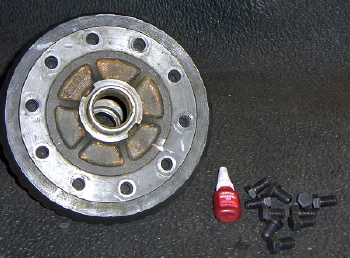
- Install ring gear bolts with blue loctite. Torque in a star pattern to 20 ft./lbs., 40 ft./lbs., 60 ft./lbs.,
85 ft./lbs.
|
|
|
|
|
|
|
|
|
|
|
|
|
|
|
|
|
|
|
|
|
|
|
|
|
|
|
|
|
|
|
|
|
|
|
|
|
|
|
|
|
Ring gear bolts and blue loctite. Don't ask me why but
the blue loctite comes in a red bottle. I picked mine up
at Home Depot for a few bucks.
|
|
|
|
|
|
|
|
|
|
|
|
|
|
|
|
|
|
|
|
|
|
|
|
|
|
|
|
|
|
|
|
|
|
|
|
|
|
|
|
|
|
|
|
|
|
|
|
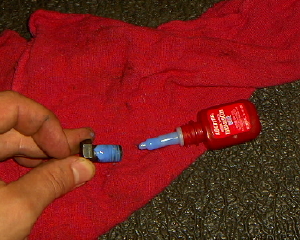
Coat the threads of the ring gear bolt evenly with the threadlocker.
|
|
|
|
|
|
|
|
|
|
|
|
|
|
|
|
|
|
|
|
|
|
|
|
|
|
|
|
|
Go to Page 2
|

