Disclaimer: The instructions below are what I did to my car and can be used as a "guide" for working on yours. But, I take no responsibility for what you decide to do to your car. Be sure to read through all of the instructions first before doing anything to your vehicle.
Purpose: Just for looks.
Application: 1st Generation '95-'99 Dodge Neons, but I'm sure 2nd Gen is very similar.
Time Required: 3 hrs
Scale of Difficulty: 3 (5 being the hardest)
Cost: ~$40
Tools Required:

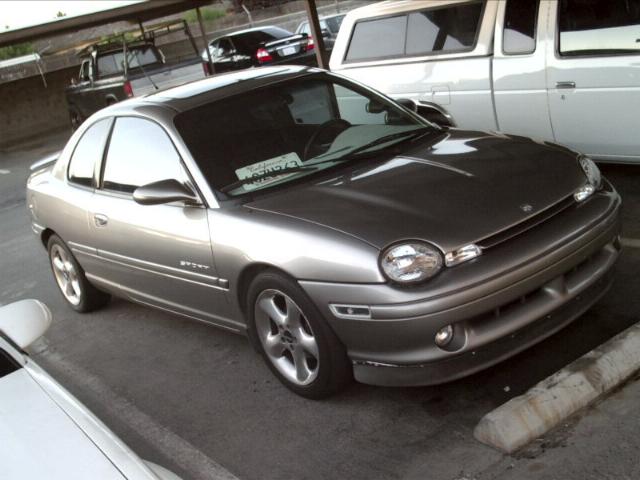
AFTER:
This how-to combines both of the ones I used found on GuaNu's website and Brent's page as well as a bit of my own insight.
|
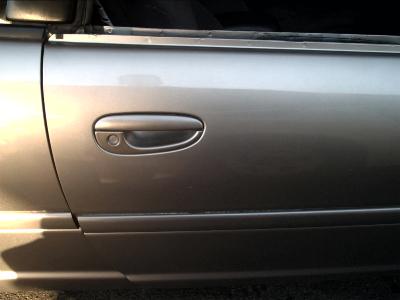
1. First thing to do is to remove the door panels. Start off by removing the phillips screw in the plastic cup handle. Then take out the T25 Torx screw located behind the handle by pulling on the handle to get to it. The only thing holding the door panel on now are the clips. NOTE: If you have manual windows, you will need a tool to remove the window crank and new clips from any auto parts store.
2. Start from the bottom of the door panel using your flat blade screw driver to carefully pry the panel enough to get your fingers in. Give it a few firm tugs and the clips will pop right out. |
 |  |
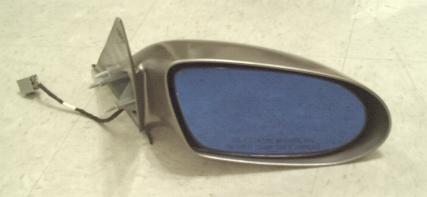
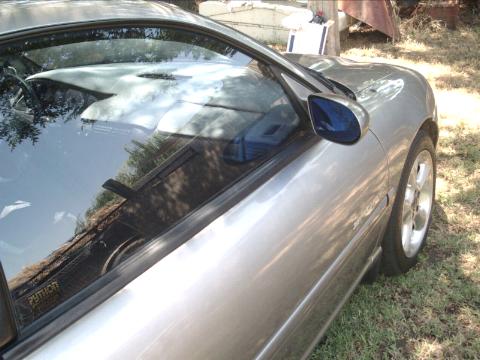
3. Now remove the metal bar connecting the inside handle to the door lock by unsnapping the plastic end off the bar and lifting the bar up and out of the hole. With the door panel removed you can now see the (3) 8mm nuts holding the mirror on. Remove these and unplug the electrical connector if you have power mirrors.
4. Now, you can either mask off the mirror and paint it as is, or you could remove the mirror from the housing so you can get the inside painted too (which also looks a lot better IMO).


5. As you can see in the pics above, you need to remove the (3) #10 torx screws holding the mirror in the plastic housing (there is a 4th screw on the driver's mirror where the mirror mounts to the car). You really gotta bend the mirror to its extremes to get to them.
Everytime I washed my car I hated it when the water would collect in the mirrors. Then when I would drive around, the water would be blown onto my clean windows leaving water spots. Just a little thing I know, but since I had the mirrors all apart I figured why not spend the extra 5 minutes to fix it.
The easiest way for me was to use a cut-off wheel with my Dremel and cut a slit along the bottom of the mirror case. Then I beveled the inside lip so water would flow out the slit easily. This, along with waxing, prevents the water from collecting and allows it to drain out of the housing very easily. Here's some pics:


If you don't have a Dremel you could drill a few small holes instead.
2. Start off by using the 320 or 400 grit sandpaper to get rid of most of the texture, then use the 600 to finish it off. Wipe it clean.
3. Spray a couple of light coats of Plastic Adhesion on and let it dry. Then spray 4-6 light coats of the Primer. Let it dry completely and then sand it down with the 600 grit to get it nice and smooth. Wipe it clean.

4. If you decided to paint the bottom strip black then mask off the mirror portion and paint it now. Let it dry for as long as possible and then mask it off.
5. Don't forget to mask off the bottom strip of the mirror and spray 4-6 light coats of your Color Paint until you get a nice coating. Then use 3-4 coats of the clearcoat to get it nice and shiny. Waxing the inside and out is definately recommended.

Adding some light tint to your mirrors cuts down the glares you get from the sun and headlights from cars behind you. Plus you can use any color you want for a unique custom look. I used some 35% blue tint from Pep Boys. I would rather use some lighter tint (60-75%) but they didn't have any and I didn't feel like going to a tint shop. But the 35% isn't too bad once you get used to it.
1. Cut out a piece of tint larger than the mirror, so it overhangs. Clean the mirror extremely well and then spray some soapy water onto the mirror.
2. Peel the backing from the tint and place it on the soapy mirror. Use a credit card to squeegy the air bubbles out of the tint.
3. Wait about 10 min. for the tint to setup a bit and then use a *sharp* exacto knife to trim the excess tint off. You'll prolly have to squeegy more water out of the ends and soak it up with a towel. If it's still rippled at the ends, just give it time for the water to evaporate and press it out every 10 min. or so. Eventually it will lay flat.
2. Put the mirror on the car and bolt the (3) 8mm bolts back on. Plug the electrical connector in if you have power mirrors.
3. Put the door panel back on the opposite way you removed it and you're done !


1. If you don't have the door panels off already then read how to do it up in the Mirrors section above.
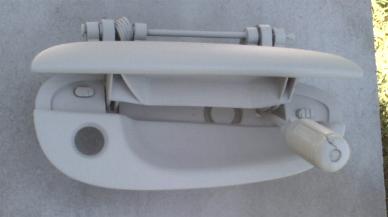
2. With the windows down, pull off both of the weatherstrips. Peel back some of the vinyl on the inside of the door so you can get to the (2) 10mm bolts (actually, one is a nut and one is a bolt). This can be tricky, but going in from the top or from one of the holes from the bottom you can reach the bolts. Be careful not to let them drop to the bottom of the door.

3. Remove the metal "C" shaped bar that the bolts were holding on to the back of the handle. Now, there are (2) metal bars connected to the handle. The green & white connectors go to the handle, the red & purple with yellow boots over them go to the lock. Unclip the ends connected to the door end and leave them connected to the handle. Take note of which end goes to which. Or, if you look at my disassembled pic above, the top of the bars go to the handle and the bottom goes to the door portion.
4. Manuever the handle out of the door through the outside hole and then you can remove the both bars connected to it. Remove the lock by removing the metal "C" clip that holds it in and the lock will slide right out.
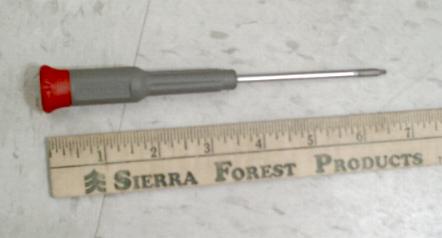
2. To help painting, you can stick a screwdriver in the handle to keep it open. Make sure you put it on the side that has the spring on it. In the pic above, the screwdriver should be on the left side or the handle part will bend and not sit flat when you take out the screwdriver.