
Disclaimer: The instructions below are what I did to my car and can be used as a "guide" for working on yours. But, I take no responsibility for what you decide to do to your car. Be sure to read through all of the instructions first before doing anything to your vehicle.
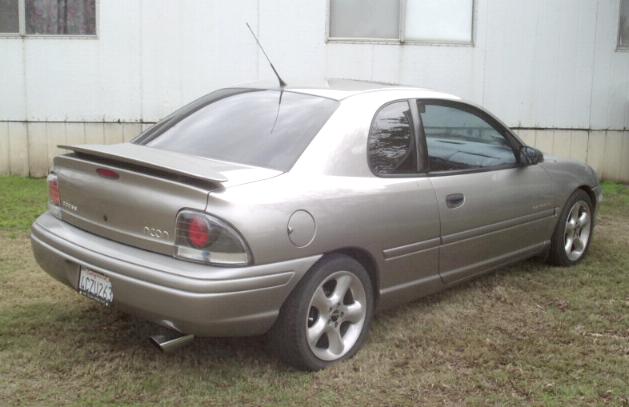
Purpose: Mainly for looks, but is advertised to provide better AM/FM reception due to the fact that they have a built-in signal amplifier requiring a 12v source. My aftermarket rubber one broke off during a car wash incident, so I opted to go for this new look.
Application:
1st Generation '95-'99 Dodge Neons, but pretty much all cars will use the same procedure
Time Required: 2 hrs
Scale of Difficulty: 2 (5 being the hardest)
Cost: ~$50
Tools Required:
|
| _______________________ |
 |
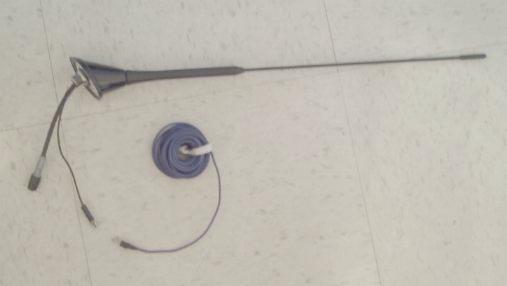
Just a little FYI --> Fuba antenna's come in a variety of different styles and can be found on newer VW's, Mazda's and Toyota's. Most OEM pieces require a 15mm x 15mm square hole or 19mm round hole to fit. Most aftermarket Fuba's use a 15mm (~9/16") round hole. The antenna I'm using measures ~16" long and is a 50° angle base.
If you aren't going to use the built-in amplifier just leave that wire unplugged and your antenna will still work using just the antenna cable, but your reception may suffer.
|
2. The 12v wire on the Fuba base has a connector that we can't use. So I cut it off and soldered on a female "quick connect" electrical connector. These are the same type of connectors used on speakers and speaker wire (see pic to the right). Then I soldered a male "quick connect" electrical connector onto one end of a piece of wire.
3. You'll also want to check how you're going to connect the antenna cable from the Fuba base to your 12 ft. extension piece. Different Fuba bases have "screw on" connections or "snap on" connections (like mine). I had to use both the DIN-4 and DIN-7 adapters from Antenna World to make it work. |
 |
 |

|
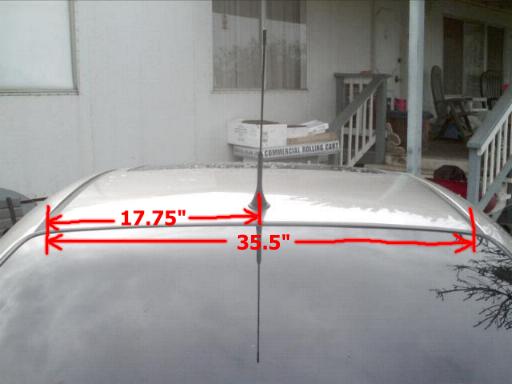
1. The first thing to do is to find the center of the roof. I measured from the inside of the black rails on the roof and it came to 35.5". Half of that is 17.75". Then I measured up from the first defroster line 6.75" and marked it with a pen.
2. Now get in the back seat and take out the clothes hangers on both sides by removing the T20 screws. Pull the top of the side panels out (it's held in by the usual clips) and pry out the plastic fastener holding the roof liner up then go back outside. You may want to get someone to hold the roof liner down out of the way so the drill bit doesn't go through it as well as putting a rag in there to catch the metal shavings. 3. Carefully dent your mark w/ an awl or pointed object so the drill bit won't wander and drill a pilot hole. Then work your way up using slightly bigger drill bits until you get a 9/16" hole. Or just use your Dremel like I did.
4. There's a metal brace on the underside of the roof that has a hole for the plastic fastener that holds the hoodliner up. Unfortunately this gets in the way to tighten the nut, so you'll need to notch out a section of it (see pic below). |
|
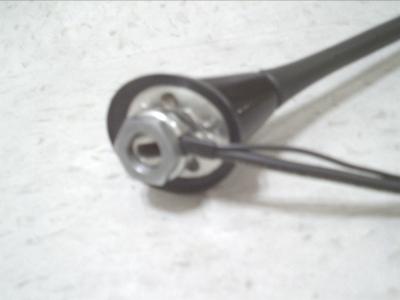
5. Apply a layer of silicon on the base of the antenna and put it in the hole, then tighten the 7/8" nut down to hold it. The wires from the antenna do not go through the nut - they bend and go to the side of it (see pic on the right). Make sure the antenna is straight when you tighten it.
6. With the antenna installed, all you have to do now is run the wires. How you want to get the wires from the antenna to the radio is up to you.
|
 |
 |
7. From the "A" pillar, I maneuvered the antenna cable down to the floorboard area. There you will find another antenna cable that connects the cable that goes from the stereo to the OEM antenna mast. (see pic to the left) Disconnect it and plug your new cable into the cable that goes to the stereo.
8. Remove your old antenna mast and put a rubber plug in the hole OR you can go through the trouble of filling it, sanding it and painting it. |


