
Basic Premise: The Story of the Triforce and Ganondorf
Most of this background story is told to you by the Deku Tree and Princess Zelda. If you have not yet defeated the evil within the Deku Tree or talked with Zelda, you may want to skip this section for now. They will go into more detail than I will here.
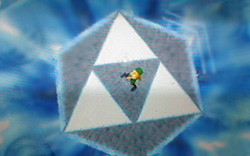
The Triforce is what this entire story centers around. It is the combined power of the three Great Goddesses: Din, Farore, and Nayru. The Triforce is represented by three triangles forming a larger triangle. It is also the symbol of the Royal Family of Hyrule (and if you'll take my advice, play Zelda's Lullaby whenever you see this symbol). The Triforce holds a lot of power, and is protected in the Sacred Realm.
Ganondorf is the King of the Gerudos--Zelda calls him the 'evil man from the desert'--who wants to control the Triforce. He cannot enter the Sacred Realm without the keys: the 3 Spiritual Stones and the Ocarina of Time.
Child Link: The First Three Dungeons
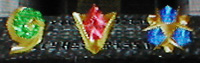
The 3 Spiritual Stones are what Link is looking for when he's a kid. Each time he defeats a dungeon, someone connected with that dungeon will give him a Spiritual Stone. The 3 stones are: the Spiritual Stone of the Forest (also called the Kokiri's Emerald) which is given to you by the Deku Tree, the Spiritual Stone of Fire (Goron's Ruby) which is given to you by Darunia (Big Brother), and the Spiritual Stone of Water (Zora's Saphire) which is given to you by Princess Ruto. Link must defeat the Deku Tree before he can leave Kokiri Forest, and he must get at least partway through the Goron Dungeon before he can get to Zora's Domain (he needs bombs to blow up the rocks). Once Link has found these 3 stones, he must return to the Castle to give them to Zelda...but as he approaches the drawbridge, it starts raining, and he sees a horse wildly galloping out into the field. On the horse's back are Impa and Princess Zelda. Zelda throws something into the moat, but before Link can go look for it, Ganondorf appears. He is chasing Zelda and Impa because he believes that they have the Ocarina of Time, which is one of the keys to the Sacred Realm. Ganondorf asks you where they went, and you say nothing, so he zaps you with a fireball or something. When you recover, he is gone and you can go get the thing from the moat. It is (drum roll please)...the Ocarina of Time! Zelda has left a message for you...and a new song: the Song of Time.
The Temple of Time and the Sages
Now, it's time to grow up. Don't worry about leaving your youth behind...you can always come back later (well, actually, you might want to take care of a few things first--see General Hints). Go to the Temple of Time, with the 3 Spiritual Stones and the Ocarina of Time, and play the Song of Time in front of the altar. A huge door will open behind the alter, and you can enter another room. At this point, you must realize that, in order to solve the game, you must let the bad guy win...for now.
| Grab the Master Sword from the stone, and watch as Ganondorf catches you in the act. It turns out that the 3 Spiritual Stones and the Ocarina of Time were not the only things needed to enter the Sacred Realm: Ganondorf also needed someone pure of heart to pull the sword from the stone--and guess what, Link, you just volunteered your services! | 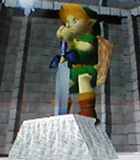 |
So, now Ganondorf has the power of the Triforce, and he will turn Hyrule into a rotting wasteland. But don't despair: all is not lost....
Link wakes up in the last remaining good part of the Sacred Realm: the Chamber of Sages. He talks to this dude called Rauru, who is the Sage of Light. Rauru gives him the Light Medalion. The Sage tells Link that 7 years have passed, and Hyrule is now a ruined land under the control of Ganondorf. Link must now awaken the other 5 Sages, from 5 Temples around Hyrule. These Temples are, in order: Forest Temple, Fire Temple, Water Temple, House of the Dead, and Goddess of the Sand.
Adult Link: The Six Temples, their Sages, and Sheik
 | The Temple of Time is the first Temple. This might also be called the Light Temple, because the song you eventually get to warp there is called the Prelude of Light, and the Sage and Medalion from there are also Light. |
Now, you have to go and rid these other 5 Temples of their evil. Some are easier to defeat than others, but all have their challenges. The first of the 6 Temples was the Temple of Time. The others are located in their appropriate areas. I will not be able to go into all of their secrets or puzzles here, of course, but I will tell you how to get to the entrance of each Temple (in some cases, this is the most difficult part). If you have a specific question about the Temple itself, go to the walkthrough. You can also go to the Discussion Board and post a question.
You will meet this guy called Sheik. He is mysterious, and has a face partly covered by unruly blond hair and a sort of bandanna. Go ahead, speculate about his identity if you wish. I certainly did, and I guessed something about Sheik way back around the Fire Temple somewhere. I won't tell what it is here; read down past the Spirit Temple and you'll find out. If you don't know what the Spirit Temple is yet, then you shouldn't be reading that far anyway :-)
Whatever his identity, Sheik helps you along throughout the second half of the game, pointing you in the right direction. He tells you where to head next after defeating a Temple; he also teaches you songs that can warp you to a point near to the Temple entrance (to those stone pads with the symbol of the Triforce on them). These songs will prove very useful--for some Temples, it is very difficult to get to the entrance without a song; for others, it is impossible.
The Forest Temple (Boss=Phantom Ganon, Sage=Saria)
The Forest Temple will be your first challenge as an Adult. Go ahead and try to get there (it's that place in the Lost Woods where Saria was sitting on a stump and she taught you Saria's Song). Be warned: it's no longer those dinky spitters that block the way. Instead, we have huge, brutish guards who patrol up and down the halls of the maze. If they spot you, they grunt loudly and ram into you with their spears. This can get frustrating, but rest assured that you can blow them up with Bombs or, even better, Bombchus. One you get to the Temple entrance, you meet Sheik who, to your relief, teaches you the song to warp there (the Minuet of the Forest), so you won't have to bother with the guards any more. (Actually, you might want to go through the Ice Dungeon first, so you can warp back and forth between the Forest and Lake Hylia). After Sheik leaves, look up at the high entrance to the Forest Temple. Hmmm...how to get up there? You can try to jump, chop, bomb, burn up, or climb the tree for all you're worth, but it won't get you anywhere. You have to get something else to be able to get up there. Go to Kakariko Village and find Dampe's grave (hint: look for something special). In case you don't know, you can pull the gravestones back to reveal the entrance to the tombs. Go down there and Dampe will challenge you to race him. So, do it and if you're fast enough, he'll leave you a prize: the Hookshot!
So, now I leave you on your own to figure out how to solve the Temple (just remember that the Hookshot is one of the most useful items you can find in the entire game, and it should hook onto anything made of wood).
The Fire Temple (Boss=Volvagia, Sage=Darunia)
This is probably the easiest Temple in the game. To get started, go to the Goron City and stop the little rolling dude with a bomb (but watch it, he packs quite a wallop!). He'll tell you about Volvagia the Dragon, and give you a Goron Tunic. Now, go to Darunia's room and pull the statue forward. This is a shortcut into the Death Mountain Crater (the other entrance is from the mountain peak). Hookshot across the broken bridge and you'll meet Sheik again, who teaches you the Bolero of Fire. Now you're on your own.
The Water Temple (Boss=Morpha, Sage=Ruto)
To get into the Water Temple, you must first go to Zora's Domain. Note the ice. The entrance to the store is frozen over with a red substance. King Zora is similarly imprisoned in his throne room. No other Zoras are to be found. Go to Jabu Jabu's pond. This is mostly liquid water, but there are icebergs floating around in it. Notice that some of them lead to what appears to be the entrance to a Dungeon.
The Ice Dungeon is something that you have to go through to be able to enter the Water Temple. Inside, you'll find a lot of ice, plenty of enemies, and a substance called Blue Fire. You can catch Blue Fire in a bottle and use it to free anything trapped in red ice (like King Zora and the store). If you're a sissy, you can buy Blue Fire from the Potion Shop, but it's expensive. Once you fight the White Wolf at the end of this dungeon, you get the Iron Boots (which allow you to walk under water) and another visit from Sheik, who teaches you the Serenade of Water, which warps you to Lake Hylia.
Get the Zora Tunic (from King Zora), put on the Iron Boots, and clomp down into the last remaining water in Lake Hylia. You'll find a closed gate with a switch above it. Since the Hookshot is the only weapon that you can use under water, 3 guesses as to what you do to get in.
The Shadow Temple (Boss=Bongo Bongo, Sage=Impa)
This is where things start to get complicated. In order to visit the Shadow Temple, simply enter Kakariko Village after completing Water Temple, and it will be on fire (this only works if you enter the village from the field; if you enter it from Death Mountain Trail, the village is still normal). You'll meet Sheik again, who gives you the Nocturne of Shadow (the song to get to the entrance to Shadow Temple). Play it, and you'll get to that ledge above the Graveyard (you know, that one you've been wondering about ever since you first visited the graveyard). Go inside and play around with Shadow Temple, but be warned, you won't be able to get very far without one important item: the Eye of Truth.
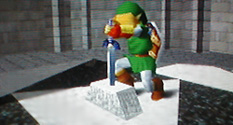
| The Eye of Truth (also called the Lens of Truth) cannot be found in the Shadow Temple itself. Instead, you must go where practically everyone is telling you to go: into the well. Okay, that's fine and dandy, but the doorway at the bottom of the well is sealed off. The solution lies in the past. You may have already figured out that if you go to the place where you pulled the Master Sword out of the stone, you can replace the sword and go back to being a kid. |  |
The Spirit Temple (Boss=Twinrova, Sage=Nabooru)
I beat this temple quite quickly, once I got to the entrance :-) That's right, you heard me. I found that one of the hardest things about Spirit Temple was getting to it in the first place. Getting into this temple is, well, complicated--even more so than getting to the last one. I'll try to explain it as clearly as I can.
First of all, go to the entrance of Gerudo Valley, where there used to be a bridge across the canyon. Notice that the bridge is broken. You can either ride Epona across (just speed her up like for any other jump), or use the Longshot. Talk to the guy outside the tent. This is the grumpy fellow that used to live in Kakariko Village. His workers (you know, the guys who used to run aimlessly around Kakariko Village) have been captured by the Gerudos, and he wants you to find and rescue them. So, go up the path. You will see stairs leading up to the right. Go up them and get captured. The Gerudos will throw you into a cell, but don't despair--there's a way out. Look up and you'll see a wood thing. Hookshot it.
(If you don't have the Hookshot, i.e. if you used Epona to jump across the canyon before you entered Dampe's grave, the Gerudos will throw you out of their territory, rather than into a cell, and you'll end up back with the grumpy guy and the tent. In this case, you don't want to be captured, but you should be doing other things at that point anyway :-)
Anyway, so you're up on the ledge that you used the Hookshot to get to, looking down at the Gerudo girls patrolling below. Wait until the nearest guard is at the point farthest away from you, and jump straight down. Turn quickly to the left and enter the dark doorway. If you're not the sneaking type, just shoot the girls with your Bow or stun them with your Hookshot, but they'll come back to life the next time you come out. But anyway, inside the Thieve's Hideout, go ahead until you come to a large room with a prison cell. Go up and talk to the prisoner (the first worker), and be ready to fight. As soon as you're done talking to him, a Gerudo guard will attack you. Use your shield a lot, because one hit can put Link back into the cell. If you want, you can use Biggoron's Sword, but it's hard to defend with your shield if you do. Just keep slashing at her, or shoot her from a distance with the Bow. Once she's dead, pick up the key she dropped and free the prisoner. Talk to him, and then go on down the hallway. You'll come outside again, this time behind some boxes. Don't venture out past the boxes or the guards will see you. Take the door in wall to Link's left. Go forward, turn right, then turn right again before you get the the patrolling guard. You'll be outside again, on a ledge. Go along the ledge, using Z-targetting to look to Link's left. There's a Gerudo patrolling on the roof. Wait until she's at the point farthest from Link, then get up on the roof she's on and go quickly through the door to Link's left. You'll come to the second prisoner's room. Do the same routine you did with the first prisoner, then continue on outside. Link should be standing On a rooftop with two doors opening onto it. Go through the door to Link's right. You'll come to a room with two Gerudos patrolling on the lower level. Use the wooden beams on the ceiling to Hookshot straight across (they won't see you unless you fall). If you're doing this in order, you should have the Longshot; if you do, you can simply Hookshot to the farthest beam. If you don't have the Longshot yet, use the middle beam first. Go outside again. Link will be facing toward you again. Turn to Link's right (your left) and drop down to the lower ledge. There's a door on this ledge; go through and stop. Be ready to shoot the Gerudo who will come into view. After she's done with, turn right, left, then right again to come to the third prisoner. Same old routine. Return to the door you came in through. Now, drop to a location where you can shoot all of the Gerudos patrolling outside. Go over to the door next to the white Gerudo (you can't kill her) and the grate. Enter the doorway and you'll be at the last prisoner.
After you release the last prisoner, a Gerudo appears. She tells you that Nabooru left her in charge and that she's impressed with the way you evaded their capture. She gives you a Gerudo Membership Card, and you can now roam free around the entire area.
So now, the Gerudos are just as friendly as Gorons or Zoras...well, maybe not quite. But anyway, you can do several things here now. You can try out the Horseback Archery, which is past the white Gerudo on the far right side of the Fortress. You can get a couple of neat prizes there. You can also try the Gerudo Training Grounds if you want, but you don't have to. If you win, you get the Ice Arrow, which I have not found particularly useful (but it's kinda neat). Anyway, the thing you should be most concerned about is reaching the last temple. So, climb to the top of the ladder next to the big gate, talk to the Gerudo there, and she'll let you through.
Now you're out in the desert. The wind's blowing, and it's hard to see anything. Follow the flagpoles to the River of Sand. Don't try to walk across; it's rather like an ant trying to cross a river of honey...you sink. So, since there are some wooden boxes and flagpoles on the other side, you can figure out how to get across yourself. Once you're across, follow the trail of flagpoles (the sign you find will lead you to a shop, where a guy sells you Bombchus). Sometimes, the next flagpole is very hard to see, but don't stray from the track or you'll be sent back to the beginning. You'll know the end of the trail when you see it: a circle of flagpoles, surrounding a building made of stone. There's a doorway in the side of the building where you can climb down to get a Gold Skulltula. On the top of the building is some writing. Read the inscription and use the Lens of Truth to see the Poe that will be your guide. Follow the Poe until it leads you to a wooden box. Stop following it here or you'll be sent back. Look around until you see two flag poles. Go straight towards them and you'll be at the Desert Colossus. If you run out of magic while following the Poe, you might still make it, since you can still see the Poe's shadow without the Lens of Truth. However, I don't recommend it.
At the Desert Colossus, you'll see a huge stone building, a warp pad, some palm trees, and other stuff. The thing that looks like a grave next to an empty pond is your key to Pink Fairy supply out here (I'll leave you to figure out how to get them to appear). Go inside Spirit Temple (the big building, duh), mess around a bit if you wish, then come back outside. Now, you'll meet Sheik again, who teaches you the Requiem of Spirit that will warp you back there. If you go over to the right side of the Colossus, you'll see two palm trees next to the barrier. Blow up the wall at the crack and you'll find another Great Fairy, who teaches you Nayru's Love (the blue spell that protects you). Go back into the Spirit Temple and enjoy!
 | Although I won't walk you through the temple here, I'll just add a few things. As you probably have gathered from what Sheik tells you and from reading the writing on the cobras, you have to do part of this temple as a kid. When you enter the temple as a kid, You will meet Nabooru, the leader of the Gerudos. She'll tell you some background, and you find that she's not such a bad person afterall. She asks you to find the Silver Gauntlets for her, so do it. When you find the Gauntlets, you'll be out on a ledge overlooking the outside of the entrance, and you'll see Nabooru imprisoned by two witches. Well, so much for keeping your promise. |
| Since the Silver Gauntlets only work for an adult, grow up and come back to complete the second half of the Spirit Temple. Later, you find that Nabooru is the Sage of the Spirit Temple, which just goes to show that you shouldn't believe gossip from idle workers :-) If you're stuck in the room with the big statue (what I'm guessing is the "Goddess of the Sand"), and can't figure out how to get to the boss, just remember how important the Mirror Shield is in this temple. |  |
The Final Battle: The Seventh Sage and Ganon's Castle
Now that you've rescued all of the Sages, You talk to Sheik again. Sheik tells you more about the Triforce. Apparently, it's divided into three parts: Power, Courage, and Wisdom. Ganondorf was only able to get his greedy hands on the Power portion of it, because he doesn't have much in the way of courage or wisdom. Two other people have the power to claim these other two parts of the Triforce. The first is...tah dah, Link! He is able to claim the Courage portion of the Triforce because he is very...well...courageous. The second person, who can claim the Wisdom is...well, here Sheik pauses, and suddenly reveals his true identity...Zelda! Well, I knew it all along, but maybe some of you didn't :-) Anyway, Zelda (who has abandoned the raggedy Sheikah look and is now back to looking like a princess) tells Link how she had to disguise herself as a Sheikah so that Ganondorf wouldn't find her. She says that she's the Seventh Sage, and, together with the other six Sages, she will seal Ganondorf into the Sacred Realm forever. She gives Link the Light Arrow so that he can protect her while she creates the seal. But then, Ganondorf suddenly imprisons Zelda into a crystal of what looks like purple ice. He now has two parts of the Triforce, and he has his eye set on the third. Link must try to save Zelda from Ganondorf, but he risks giving the evil Gerudo King access to all three parts of the Triforce....
Well, you can't just sit there and do nothing, can you? Go to Ganon's Castle (which, for those of you who have not explored properly, is where the old castle used to be). The Sages will create a bridge for you to cross to enter it. Inside Ganon's Castle, you will find a huge room with a lot of doors along the walls. Don't try to enter the central doorway yet; you must first enter the ones along the side of the room--there's one for each temple. Although it generally doesn't matter what order you do these in, you have to complete the one for the Shadow Temple (purple medalion) before you can complete the one for the Fire Temple. At the end of each of these "mini-temples" is a room with a weird pulsing thing. Shoot them with the Light Arrow. Once you've completed them all, you can enter the central doorway, and after some more enemies and puzzles you meet up with Ganondorf.
If you want to be safe, have a few pink fairies or Ultimate (blue) Potions with you (the best combination I've found is to have two of each). The potion will restore both your magic power and your life energy (if you battle well, the magic will run out first), and the fairies are there in case you don't have a chance to take a potion before you die (they'll bring you back to life if you do). If you're short on cash (which really shouldn't be a problem at this point of the game), buy a couple of green potions instead; they're cheaper than the blue potions. Another thing I reccomend that you do is to go back outside the castle to the final Great Fairy (she's in the same place as another one used to be near the castle). You need the Golden Gauntlets (which you found in the Shadow Temple portion of Ganon's Castle) to move the big pillar. This Great Fairy enhances your defensive capabilities. Visually, this means that your little hearts now all have white outlines. Practically, it means that attacks will now do only half as much damage to you (i.e. what used to cost you a full heart now only costs you half a heart). I know what you're thinking: why couldn't we get this earlier in the game? Well, Ganondorf is so much tougher than the other bosses that you're going to need all the help you can get :-)
Now, go back inside the castle and go up the stairs in the central column. After you've used the Boss Key and climbed the last stairway, you will enter a large room. You see Princess Zelda imprisoned in the purple crystal. Then you see Ganondorf, doing what all bad guys are doing when you find them in their castles: playing sinister chords on an organ. He laughs at you and demands that you and Zelda both hand over your pieces of the Triforce. Naturally, you refuse. Ganondorf decides to take it from you by force, and a dark wind blows at Link. Navi tells you that the darkness is too strong; she can no longer help you. Great. This just means that you can't use Z-targetting, and really, it's no big deal. Anyway, the room becomes bare, and Ganondorf is ready to strike. Go to one of the corners of the room and use your Master Sword to deflect his attacks. The Giant's Knife will not work with this. Once he is hurt, shoot him with a light arrow (quickly, before he recovers). If your arrow hits him, jump over to the central platform and hit him with your sword for all you've got (it's okay to use the Giant's Knife here, if you remember to switch back to the Master Sword before you deflect his next attacks. Repeat this until he starts gathering a big dark fireball to hurl at you. You can shoot him with the light arrow while he's powering up for this. Eventually, you will defeat him....
You are suddenly on the roof of the castle, as the walls of the room have crumbled. Zelda is freed, but you must follow her to get out of the castle before it collapses. This isn't that hard; just don't fall off the ledge. Zelda will make the bars disappear from the doorways. After a few doors, Zelda is trapped in flames, and you have to fight two of those armored skeletons to get her out. Just use the Giant's Knife and work quickly. A few more doorways, then freedom. There's a mummy guy along the way; just stun him with the Hookshot or slash with the sword (he gives a magic bottle, so it might be worth killing him if you're low). Don't let him grab you if you're running low on time. Once you're outside, you and Zelda watch the castle collapse. Then, she hears a noise from the ruins of the castle. Go and investigate, and you find that Ganondorf is regenerating as a mutant monster, Ganon. This guy is actually a little tougher to beat than Ganondorf was, especially if you're low on arrows or magic power. First of all, there is a fire wall around the fighting area, with Zelda helplessly watching from the other side. This guy knocks Link's Master Sword out of his hands, to the other side of the fire wall. Avoid his attacks; they hurt. Shoot him from the front with the light arrow (Navi is back by this time, so you can use Z-targetting if you want). While he's stunned, quickly go around behind him and shoot his tail with the light arrow. Do this as long as you can. If you're low on arrows or magic, you can shoot the tail with the Hookshot, but you must have the light arrows to shoot him from the front. If you run out of arrows or are low on magic (and don't have a potion left), run around behind the pillars; when Ganon shoots at you the pillars turn into a bunch of arrows or other useful items. Eventually, he will be stunned and you can run and retrieve the Master Sword. Now, finish him off.
Once you finish him, the Sages will imprison him in the Sacred Realm. He swears that he'll be back to kill your descendants. Of course, you don't listen to him.
Link and Zelda are floating in the clouds. She says that this whole mess was her fault, because she let Ganondorf into the Sacred Realm in the first place (by having Link open the Door of Time). She wants to give Link back his childhood, and takes the Ocarina of Time from him. She plays a song and Link is suddenly a child again. Roll Credits. You really should watch these; they're kind of fun. You see everything restored to normal, and everyone is partying. At the very end, you see Link as a child, just after the Master Sword has been replaced. He runs and sees Zelda where we first met her. And that is THE END.
Back to:
The Zelda Hint Site
Illani's Game Domain
