I wont go over the basics of moving and fighting, Z-targetting moves, the concept of life energy or magic power, or other such things that are clearly explained either in the game itself or in the Zelda booklet. The Kokiri people are very informative about such matters, and any specific questions you have about Z-targetting, equipping items, or moving around will be answered by them. The tips below are intended to make the game go more smoothly, and to help those who need a nudge to get past a puzzle. If you're looking for specific solutions to puzzles, go on over to the walkthrough.
Tip #1: Listen to Navi
Navi is, of course, the fairy that the Great Deku Tree assigned to be your helper and guardian. Do not ignore her. If the Navi icon (the top C button) flashes, see what she has to say; it will point you in the right direction. If Navi says to go to the desert, go to the desert. If she says to check out the well, check out the well (in the correct time period, of course). When Navi turns green somewhere, there is a secret. It is usually either a place where you can play the Scarecrows Song or a place where you can play a song and get a Big Fairy (which restores both life energy and magic power). She'll also turn green near rocks in front of Great Fairy Fountains, or signs that you should read. Navi can also, of course, tell you an enemys weaknesses when you use Z-targetting.
Tip #2: The Best Ways to Get Rupees
| Rupees are the Hylian currency. They come in several denominations: Green Rupee=1, Blue=5, Red=20, Purple=50, and Gold=200 (if youve played Majoras Mask, you know that Silver=100, but that denomination doesnt appear in Ocarina of Time). When you first start out playing the game, you are stuck in Kokiri Forest and the Lost Woods until you beat Queen Gohma in the Deku Tree. Here, you have to run through grass, break jars, throw rocks, or (once you have the sword) cut down clumps of grass to get a few Rupees. But here Ill list the best places to stock up on Rupees in the game: |  |
Tip #4: Always Carry a Pink Fairy
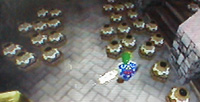
Market--at the entrance to the market, there is a room with a lot of jars. Throw them or break them with your sword to get a lot of Rupees in a short time. When you run out of jars, leave the room and then go back in: the jars will be back. Although you can get as many Rupees as you want with this, it takes a little time and can get boring after awhile. Kakariko Village: the Chicken Lady--the lady will give you 50 Rupees if you collect all of her chickens and put them in the pen. (The first time you do this, she gives you a bottle). This can be fun, but again, can get tedious after awhile. There are much faster ways to get 50 or more Rupees, but for the record, there are seven chickens: one near the pen, one up near the gate to Death Mountain, one near the gate to Hyrule Field, one in a box near one of the houses, one on a ledge next to the house of Skulltula (to get this you need to get another chicken and jump off of the nearby higher ledge, then throw away the chicken you are carrying and get the other one), one behind the big fence near the windmill, and one up on the high ground behind the windmill. To get the last two, take another chicken and run along the ledge in front of the windmill and jump off, aiming for the small fence on the ledge next to Grannys Potion Shop. Throw both the chicken that you flew over with and the chicken down by the fence over to the other side, then climb the ladder and jump off with the last chicken. Dont fall down the hole in the ground while youre doing this, or all of the chickens will return to their original positions. If you leave to the Graveyard, Death Mountain Trail, or Hyrule Field before finishing, you have to start over.
Zoras Domain: the Diving Game--this is personally my favorite way to get Rupees. The first time you win the game, the prize is the silver diving scale. After this, the object of the game is simply to pick up as much money as you can. You pay 20 Rupees to play, but if you practice you can easily come out with much more money than you had going in. Sometimes, the Zora will thow out a couple of Red, Purple, or even Huge (Gold) Rupees--get them first!! Remember, after you have the silver scale, there is no prize for picking them all up, so go for the Golds, Purples, and Reds before you bother with the Blues or Greens.
The Lost Woods: the Forest Stage--once you have access to at least some of the masks, take them to the Forest Stage and show it to the little Deku guys. They will either love the mask or hate it, so be prepared. If they like it, happy music starts playing (if they really like it, they start dancing). When they go back into the ground, they leave money behind. Exactly how much money they leave is random, but they leave more if you make them dance--sometimes as much as four Red Rupees (with the rest being Blue). But watch out: if they dont like your mask, they will all start viciously spitting Deku Nuts at you. If this happens, run or jump back into the warp portal and then go back in to try again (the reaction is pretty much random). (If you use the Skull Mask, the little guys might start following you around. Go over to the bigger Deku Scrub and hell give you the ability to carry more Deku Sticks.) If you dont know where the forest stage is, you obviously havent been wandering around in the Lost Woods enough ;-). Heres the directions: from Kokiri Forest, enter the Lost Woods. Turn right, left, right, left, and left again. You should be in a room with two Business Scrubs and a dead tree. Go over to the grass and run around in the area with the butterflies. You will eventually fall into a hidden hole, which takes you to the Forest Stage.
Market: Shooting Gallery--If youre a shooting ace, you can easily win 50 Rupees every time you win the Shooting Gallery (once you have the Deku Seed Bag and Quiver upgrades).
Goron City: The Bomb Game--You can win money by throwing bombs into the turning urn thing (after you win the heart piece, it is replaced by a Purple Rupee).
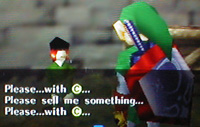
The Sell Me Something with C guy in the Market--when you have a bottle, catch a fish or a bug and sell it to the guy. He pays 100 Rupees for each fish, and 50 for each bug. If you have more than one bottle, you can multiply your bug supply by letting it go and catching two or three of them. This is probably the fastest and easiest way to get cash, especially if you have 3 or 4 bottles. Theres no sport in it, though. If you cant find any bugs or fish, just jump into one of the holes in the ground (theres one in the field to the right as you exit the Market). In the secret grottos, theres always a small puddle with a fish, and two clumps of grass with 3 bugs each. Fish are also plentiful in Zoras Domain and Lake Hylia. The small rock near the House of Skulltula in Kakariko Village always has 3 bugs under it, as do the ones near the graveyard and the tree on the way to the castle. Once Link is Grown Up--Once Link is grown up, money is just a little harder to come across, but there are still a few good places. The Sell Me Something guy has relocated to Kakariko Village, but still pays the same prices for the fish and bugs. The room in at the entrance to the Market is now a ghost shop, but there are still a few jars, and one of them has a Red Rupee in it. The Diving Game and Forest Stage cant be used when Link is and adult, because Zoras Domain is frozen and Adult Link cant wear the masks.
If you planted a bean in Kokiri Forest near the store, you can use it to get to a ledge with a Red and several Green Rupees on it. This reappears if you leave the area and return.
Shooting and selling Big Poes gets you points toward the fourth bottle, but it also gets you 50 Rupees for each one. The guy pays just 10 Rupees for the ordinary Poes.
Once you have the Light Arrow (which is very late in the game), enemies such as Tekites or birds yield 50 Rupees when they are shot with it. This doesnt work on some enemies, like Poes.
Pink Fairies will revive all of your life energy when you need it. They are essentially an insurance policy in case you run into unexpected danger. Once you have a couple of bottles, I highly recommend keeping a Pink Fairy with you, especially when you venture into dungeons. Although Lon Lon Milk is available whenever you meet a cow and have Eponas song, it only recovers 5 hearts per drink. If you have less than 5 hearts, this is a very good deal. However, if you have more than 10 hearts, one bottle of milk won't be enough to recover all of your life energy. Although Red Potions will also revive your life energy, they cost money. Besides, potions and milk must be taken before Link runs out of hearts, whereas fairies will help him even after he is out of hearts. Fairies can be bought in the potion shop, but they are ridiculously expensive.
| Its a much better idea to go find one from the underground fairy fountains or the gossip clocks. One or the other of these can be found in most holes in the ground. There are underground fairy fountains in northwest Hyrule Field on the other side of the river, in southern Hyrule Field in the trees, in the Lost Woods Sacred Forest Meadow Maze (you must climb the ladder), in a hidden hole in Zoras Domain (play Song of Storms on the platform), and under the gravestone with the flowers in Kakariko Graveyard. |  |
Tip #5: Dont be too Eager to Grow Up
Once you beat Barinade and nearly get creamed by Zelda and Impa escaping
on their horse, dont grow up right away. You dont lose any points or
opportunities by waiting, and you could save yourself a bit of trouble.
Go to the moat and pick up the Ocarina of Time, but dont go to the Temple
of Time yet. (Once youre grown up, you will not be able to travel back
in time until you beat Forest Temple--and some people take awhile to beat
it.) Here are the things you should make sure to do before becoming Adult
Link:
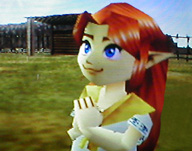
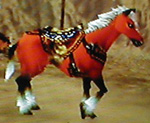
1. Get Eponas Song--without it, you havent got a hope in hell of getting a horse to ride in the field, and a horse is very helpful for a lot of reasons. Go to Lon Lon Ranch after you wake up Talon, and you will find Malon singing in the middle of the fenced-in horse field. Talk to her, try to catch her young horse, talk to her again, and then show her that you have an ocarina. She will teach you Eponas Song.
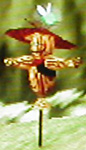
2. Get the Scarecrows Song--the Scarecrow can help you out a lot after you grow up, so be sure to have this song. This is a song of 8 notes that you make up (if you are not musically inclined or have trouble remembering songs, just play the same note 8 times). Talk to the lower Scarecrow first and show him your ocarina. Play your song for him. Then, show the ocarina to the other Scarecrow, and play the same song for him. Now you are set up with the Scarecrows Song. When you grow up, play the same song for the Scarecrow (theres only one next to Lake Hylia in this time period). Now the other Scarecrow will pop up to help you in certain places when you play the song. When you get him to appear, you can use your hookshot to pull yourself over to him and get to places that are otherwise inaccessible. Examples include: the fish pond (before the lake is filled again), the top of Lake Hylia House (if you forgot to plant the bean), the platform where the fire arrow appears (before the lake is filled), platforms with Rupees in Death Mountain Crater, the roof with the treasure chest on top of the Gerudos Fortress (once you have the Longshot, you can reach far enough to hook onto the chest itself, without bothering with the Scarecrow), and ledges in Dodongo's Cavern, Forest Temple, Shadow Temple, Spirit Temple, and the Gerudo Training Grounds. 3. Plant the Magic Beans--these will usually help you get to a heart piece or a Gold Skulltula. Sometimes, they just serve as handy shortcuts. Buy all of the magic beans from the guy next to the fence in Zoras river (in order to afford all of them, you need at least the Adults Wallet, and will probably have to go and restock on Rupees several times, since the price keeps going up with each bean you buy). You can buy only 10 beans before the man runs out of stock. You can plant all but two of these before Link grows up (the other two must be reached later by warp songs). The 10 bean plots are located in: (1) Kokiri Forest behind the store, (2) the Lost Woods near the bridge, (3) the Lost Woods in the same room as the Forest Stage hole, (4) Kakariko Graveyard, (5) Death Mountain in front of the entrance to Dodongos Cavern, (6) Lake Hylia next to the house, (7) Gerudo Valley down in the canyon next to the white Gerudo and the cow, (8) Zoras River next to the bean salesman, (9) Death Mountain Crater next to the Bolero of Fire warp platform, and (10) in the Desert Colossus (reached by the Requiem of Spirit) near the entrance to Spirit Temple. You can also release bugs on a bean plot to force out a Gold Skulltula (works on all but the one on Zoras River).
4. Get the Bomb Bag upgrades--in some dungeons, being able to carry only 20 Bombs at a time can be a handicap. Get the two Bomb Bag upgrades before you grow up. In Goron City, stop the rolling Goron on the third level by placing a bomb in front of him. This must be done inside the tunnel (near the sign). Once he stops, quickly go and talk to him before he starts rolling again, and hell give you a Bomb Bag that holds 10 more than you could carry before. The second upgrade is one of the possible prizes at the Bombchu Bowling Alley. It might also be a good idea to stock up on Bombchus before growing up.
5. Make sure that you have all of the first 3 bottles--you get one from the chicken lady, another from playing Talons chicken game, and the third from Lake Hylia. Dont grow up if you dont have all 3. You can get the fourth bottle after Link grows up, from collecting 10 Big Poes and selling them to the guy in the ghost shop.
Tip #6: Use Z-targetting wisely
Targetting your enemies has many advantages: it keeps them in sight, prevents other enemies from attacking, allows you to use the backflip, sideways jump, and jump attack, and greatly improves your accuracy when using the slingshot, bow, hookshot, or boomerang. But dont get so reliant on it that you cant do without it. With some enemies, such as circling Poes, shooting with Z-targetting wont work very well; if you just shoot without targetting, you can anticipate the Poes movement and shoot ahead of it. When youre shooting from horseback, you cant use targetting either, since the Big Poes are too far away. Some enemies cant be targetted until youre so close that youre in danger (for example ReDeads and Gibdos). Also, when you fight Ganondorfs first incarnation, Navi wont be able to help you (in other words, no Z-targetting!), so you have to know how to function without it. Practice shooting arrows in the Shooting Gallery and the Gerudos Horseback Archery Range (when you have an arrow cocked, you should aim slightly below your intended target). But Im not saying that targetting is a bad thing--not at all! For fighting Wolfos, Lizarfos, bats, birds, Gerudo warriors, and countless other enemies, Z-targetting is a must-have. You should also use it on Ganons second incarnation, when Navi can help you again.
Tip #7: Its not as hard as you think
99% of the puzzles in this game have very strong hints close by, and are not tricky to solve if you pay attention to all of the clues. If you get stuck on something for a long period of time, you are probably just trying too hard. Take a deep breath and step back. Look at the items in your inventory; perhaps one of them will help you. Walk around the area and keep an eye on Navi to see if she turns green somewhere. Use C-up to look around the area for anything that looks odd or out of place. Sometimes, all it takes is killing that last bat hovering near the ceiling to trigger a door to open. Leave no stone unturned (I mean this both literally and figuratively). Yes, you should blow up, smash, or pick up and throw every rock that you come across, but more than that, you must explore every possibility. Talk to everyone that you can (this includes most people that Navi turns blue next to, except the Gerudos before you get the membership card). Remember what the people say, since they often give valuable information about puzzles. Listen carefully for hints about time travel or locations. Some puzzles require travelling back to Child Links time; others require specific items--in both cases, Sheik and others will point you in the right direction, as will Navi. Listen to them! When youre in the dungeons, use the map and compass to find unopened treasure chests. From Shadow Temple onward, use the Lens of Truth in rooms to check for hidden enemies, chests, gaps in the floor, spikes, doors, walls, platforms, and hookshot targets.
Back to: