

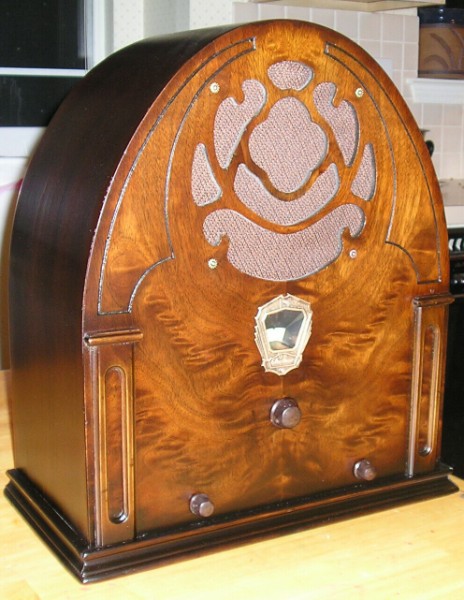
 This is a Gloritone cathedral radio Model 26P from 1931 or 1932 that was in much worse shape than the "before" picture tells. The case was falling apart and it's chassis was so rusted from the elements and rodent urine that the chassis bolts wouldn't turn. I wound up having to grind/cut them off with a Dremel tool. I used a shop vac to vacuum out all the debris and other undesirable materials that the mice had deposited underneath the chassis. The transformer cans were full of trash, straw and mouse droppings. The thing was in such sorry shape that about 80% of the cloth-covered wiring had been eaten by the mice. It did turn out pretty nice, albeit it lighter, in the end.
 I wound up working on the chassis and electronics first. I took everything off the top side of the chassis and removed the rust with many many coats of navel jelly. It did a fair job, but not great. I used a wire brush on parts, including the transformer cover. When I got the chassis down to bare metal, I sprayed the chassis with a metal conditioner (purchased from an auto paint supply house) because I didn't want it to start rusting again. Its been 9 months now and not a bit of rust has reappeared.
 Once I got into the electronics, it became apparent what was wrong and why the radio had been taken out of service. The antenna transformer was mostly missing, and its wood core burnt. It had to have been a lightening strike to the outdoor antenna wire. From there, this radio probably found its way to a garage or barn for the next several decades. Judging from the globe tubes, it hadn't worked since the mid '30s.
I learned from the Antique Radio Forum that the turns ratio on the antenna transformer wasn't that critical, so I wound up making a new transformer out of plastic sewing machine bobbins and magnet wire. One of the RF transformer was shot too, but the measurements of this one was critical. Fortunately, I had the other RF transformer to go by and got the resistance for this transformer almost dead on.
 The speaker cone was completely gone, probably eaten by the mice. Luckily the voice coil was intact as was the centering spider. This can be seen in the "before" picture. (Lucky too, the field coil wasn't fried because it is a tapped field coil, and although I have rewound a field coil in the past, I wasn't up for tackling a tapped coil.) By using a basic program provided to me by a fellow radio restorer, I was able to calculate the size of the cone. Click here for the file. If you need the Qbasic for you computer (like I did) Click here. I bought a heavy black craft paper from Michael’s and used this for the cone. This tip too comes from the Antique Radio Forum. I attached the voice coil and Viola! I got two strong local stations (without an antenna). The fidelity of the radio is surprisingly good for AM.
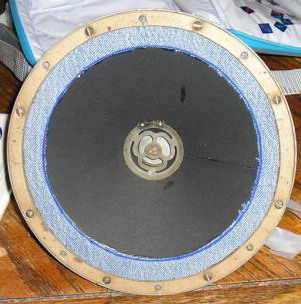
It took me months to work up to adding the surround to the speaker. I could find nothing on the net where people had done this, although I found some reference in old Usenet postings about using canvas or denim as the surround. I chose to cut up an old pair of jeans. You will note that the denim surround goes underneath the cardboard speaker gasket and on the inside of the speaker cone. It wound up working pretty well. I used fabric glue to attach it both to the frame and to the cone.
 >
>
This is my final result on the speaker. Note the denim surround. The blue line was my "cut" line.
The cabinet restoration was tricky, but not horrible, as most of the cabinet was there. The veneer on the front is remarkably thin and was delaminated in many places. Often, I would be sanding some part of the cabinet and break a piece of the veneer off. The veneer is so thin that at the top of the radio, it had been sanded down to the sub layer (by the factory!).
I replaced the missing bit of grill work by layering up thin pieces of wood from a junk console that I rescued from the curb. Fortunately, the three layers of wood and the thickness of the veneer that I used worked out to be the same thickness of the original. The actual grill repair is good, but the color of veneer is somewhat noticeable on very close inspection.
The molding around the bottom of the radio was attached when it arrived, but it just fell off when I tugged on it. This revealed that the bottom 6 inches of the radio had completely delaminated, as did the plywood board on which the chassis sits. All of this needed to be reglued. I reglued the cabinet to the plywood chassis board and reattached the molding with glue and brad nails. There were a couple of pretty big chunks missing from the molding and I filled them in with pieces of wood and wood putty.
I sprayed the cabinet in Parks Corp. lacquer that I bought at Home Depot. I made my own toning lacquer using Minwax Jacobean stain. I used an airbrush to make the bottom molding dark (there were plenty of defects and this helped to hide them) and to "feather" around the top and sides of the arch. This worked out well, as it hid where the veneer had been sanded down to the substrate by the factory. I used the toning lacquer on the sides to make them dark (per the original) but did only one pass of toning lacquer on the front. I applied 4 coats of gloss to the cabinet, using very fine steel wool in between coats, and finished with a coat of satin. I used Testor's model paint to paint the horizontal surfaces of the grill work as well as the groves to either side of the speaker. The radio is not as dark as the "before" picture, but I don't know how much of the "before" was factory toning lacquer and how much was just accumulated grime and dirt. I like the way the veneer stands out now.

I polished up the escutcheon and decorative speaker screws with a bit of copper/brass cleaner. I spayed them with a coat or two of the satin lacquer so that the did not tarnish again.
The grill cloth is a reproduction from Antique Grille Cloth. I highly recommend the company. Very prompt service and quality materials that you can't find anywhere else.
When a radio is this bad to begin with, its hard to remove all imperfections, and I didn't get them all, but overall I am very pleased with the results. This was a cheap ($49 in early '30s money -- in actuality not all that cheap) little cathedral that probably would have thrown out if it wasn't for me and ebay. Come to think of it, it probably should have been thrown out, but I like it anyway. Below is a link for the Model 26, the sister of this model. Its electronics are very similar.
Click here for the advertising flyer for the model 26.
