
BABailey's Project Photo Pages
Duke's DIY Tour Bag Project
The $15 TOURING BAG Mod
A Few Ideas on Economy Luggage for your Next Bike Trip!
My wife wanted a touring bag for her bike, but her refusal to carry the traditional wide, bulky, box-shaped tour bag and her tiny six-pack size luggage rack has made finding one difficult. And even if we did luck into something that would work, well she's not to keen on lugging it about _off_ the bike, and I am not always able. Well the other night we happened to be in Sprawl-Mart and on my way to find some chip brushes, I stumbled across this little beauty:

It had a lot of things going for it (I can’t really explain why I tend to look at luggage; I rarely buy it.): it was a convenient size - narrow, not too terribly tall; it was somewhat taller than a school kid’s back pack, and a good bit deeper. The small footprint meant that it would balance well on the six-pack rack. It had several external pockets to stow gear you might need to reach before unpacking, like lunch, sunscreen, shades, rain gear, or whatever. I liked the visibility of the color scheme. It was dernier nylon, and thus inherently water resistant-- a good coat of Scotch Gaurd makes it about as waterproof as as it's going to ever get. And the best thing about was that it was only fifteen dollars! That’s right; the manufacturer’s tag had a price of thirty-odd bucks inked to it [I have since discovered that at some Sprawl Marts, this bag is sold for 39.95, but other lower-priced options are present at all of them-- so far], but thanks to the corporate extortive powers of Sprawl-Mart, this was some sort of special buy that allowed them to sell it for only fifteen bucks!
And it had one huge bonus:
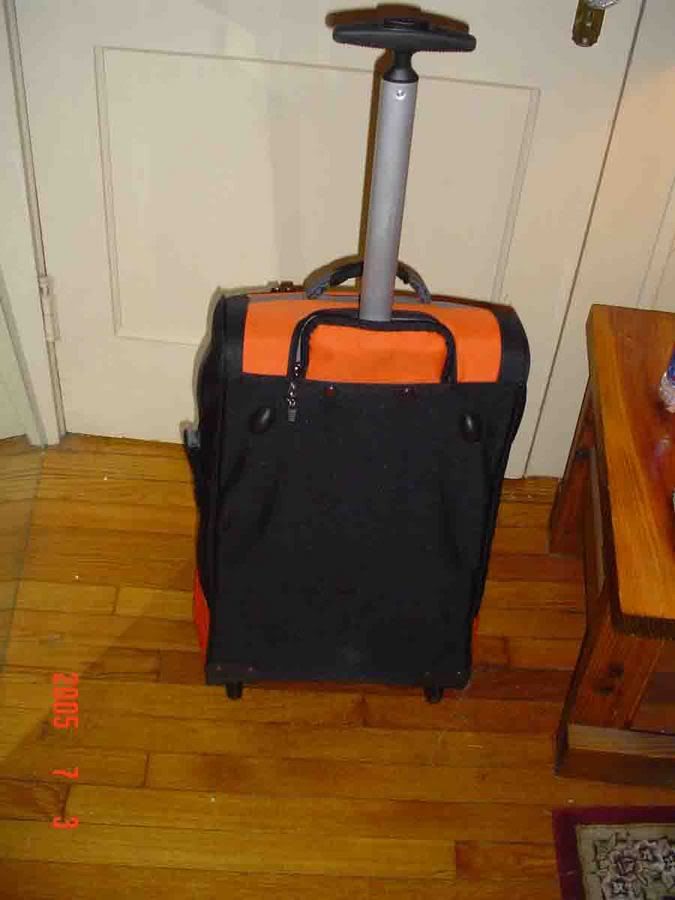
Yes indeedy! It was a roll-around, complete with internally-stored collapsible handle!
In fact, the only thing wrong with it was that it was not actually a motorcycle touring bag.
Yet...
So how do you turn this spiffy little roll-around into a Touring bag? Well, lots of ways, really, but I had some inspiration. It seems that one of the complaints of a lot of new riders is the cost of luggage. In fact, a lot of new riders seem to think that if it doesn’t specifically say 'motorcycle parts' on it, then it won’t work. So I decided not only would I make this a fine touring bag, I would do it on the cheap. The real cheap.
When I got back home, I raided the shop to see what I had laying around that would assist me in this project. Among tons of other things, I found all this stuff:

Some of this stuff I used; some I considered and discarded in favor of other things (and influenced by the wife, of course). For example, I thought I’d use the belt (and another one like it) to make straps, but she insisted on the tie-down straps. Go figure... And of course, I ended up going back to the shed for some stuff that isn’t in the picture.
Before going over the details, I’d like to mention that there aren’t a lot of pictures for this project. The whole project took less than thirty minutes. Stopping every step to snap a picture would have doubled that time, or possibly tripled it. Given that the pictures aren't really necessary to replicate this project, I opted to forgo taking too many snaps (though I wish I had the four that were stuck inside the lens cap ).
The great thing about a piece of rolling luggage is that it has a sturdy plastic one-piece panel that doubles as a frame for the top and bottom. Not only does this help with shape retention when the bag isn’t completely full, it makes attaching fasteners to it an absolute snap! Simply drill and use plenty of fender washers.
So how do you hook a touring bag to a bike? Well, most of the modern ones have a big pocket or ten-inch wide strap that either drop over or wrap around the backrest. Now I don’t have any ten-inch straps, and I’m fresh out of extra-large pockets. Fortunately, I’m an old man, and I remember when a touring bag was attached with a couple of straps wrapped around the backrest. I decided that with what I already had on hand, I could best create a bag that mounted in this fashion. Like I said, the wife insisted that the bag be secured with the pull-straps, so now all I had to do was figure out where and how to mount them.
I took the bag out to her bike and held it in place. Using a black marker, I traced the outline of the backrest onto the pack. I used black ink on the black nylon so that it wouldn’t show except under the closest of inspection. The downside is that there was no way at all to take a picture of it. But it was there, when I looked very closely, and it would serve as a guideline for all my mounting hardware.
And I decided that the best way to mount the straps were with little pieces of hardware called ‘mending straps’.
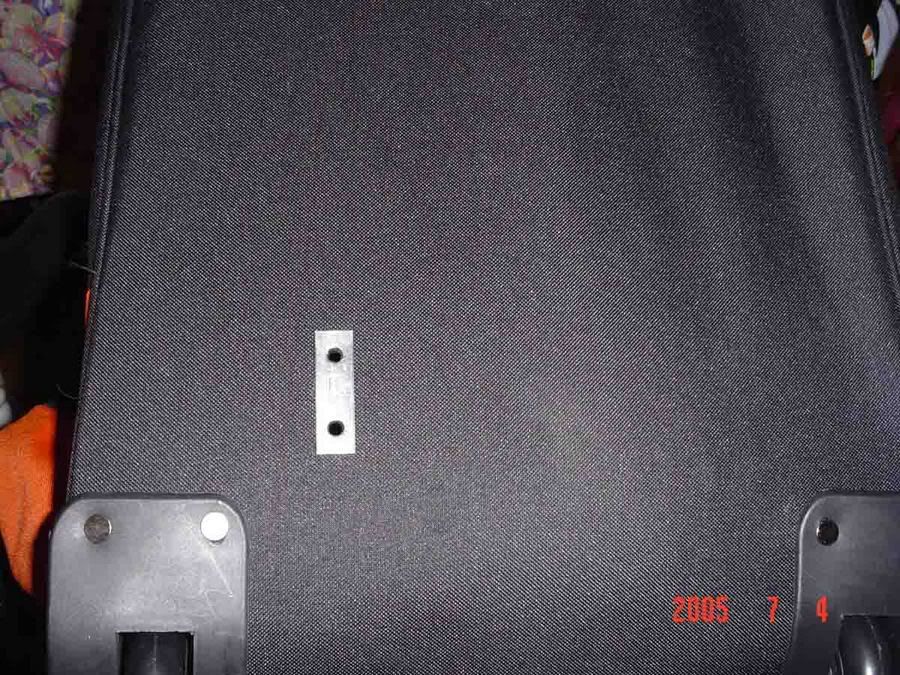
Mending straps are used to repair splits in wood, particularly furniture such as table tops, drawer fronts, etc. And they work great for building touring bags, too! The picture does not represent the actual location of the strap, but the black background allowed the strap to show up really well.
The lower strap should be as absolutely low as you can reasonably mount it around the seatback. This helps to keep the bottom of the bag tight to the backrest, and prevents it from shifting. Locate the straps carefully. Make sure that the straps are inside the outline of your backrest. Ideally, you want the straps to be narrower than the backrest, as this allows the mounting straps to be pulled their absolute tightest and leaves no room for the bag to lean or shift. Also, if your backrest rail is exposed, make sure that the hardware is positioned so that it falls ‘inside’ the area of the rails and cannot scratch them.
Drill some holes through the bag, lay the strap in place, and get ready to secure it.
Now for the hardware options:
As stated above, my goal was to do this on the super-cheap; I used exclusively hardware that I had lying around. I’d like to take a minute to say that the over-all fit and finish of your touring bag will be greatly affected by your hardware choices. For example, most of my hardware is actually a good bit larger than it has to be for the job (with the exception of the mending straps; they were a perfect fit for the web strap).
So a quick list of ideas to get your creativity flowing:
1) The straps. Maybe you disagree with my wife, and think that the straps she chose are a bit of overkill. You wouldn’t be alone, really. But what other options do you have?
Well, a couple of simple belts (child sized) will work - that was my original idea. Or you could run to a better-stocked fabric store. A lot of them actually have nylon web strapping in a variety of sizes and strengths and colors. They even stock fasteners and tension adjusters to fit the strapping, and often in colors there, as well. I think if I repeat the project that I will try to incorporate a more ‘finished’ look with web straps, tensioners, and quick-connectors.
What about the hardware? Well really, any good piece of something strong and flat will do. You could make something custom just for this job, or you could even use a screw-down loop fastener that would let you completely remove the strap when you weren’t using it. Again, I went with what I already had on hand.
As for the bolts, I used Ľ" x 20 tpi, and they were 3/4" long. Looking back, I probably could have used something like a number 14, or even a #12, or possibly even a #10 screw only about ˝ inch long, and saved some cutting. But I used what I had on hand.
Using the same techniques you just mastered, mount the upper strap to the bag. Ideally, the upper strap should be somewhere between ˝ and Ľ the distance from the top of the sissy bar or backrest. This prevents the possibility that the strap will slip up off the backrest if you hit a jarring bump or if you run at racing speeds for long periods of time.

While the mending strap itself was plenty strong for the outside of the bag, keep in mind that these few anchoring points are where all the wind and weight stress are going to be focused against the bag. A simple nut would eventually tear through the backing. To prevent that, I used a 11/2 inch (one and one half inches) fender washer on each bolt, then added a lock washer and a nut. The fender washers help to distribute the stress across a greater area of the stiffener, reducing the odds of a stress-related tear-out.
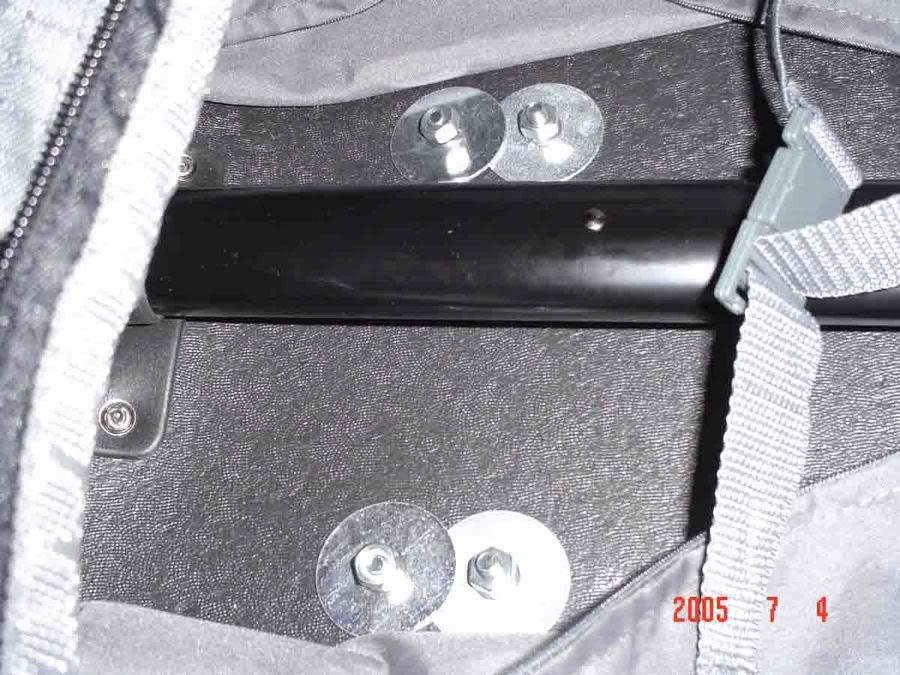
As you can see, my washers overlap a bit on the inside. As long as the nuts are tight, this is not going to be a problem. One thing to keep in mind: Be careful that you don’t over tighten the nuts; it is possible to tighten them enough to cut them through the stiffener, and that’s what you are trying to avoid.
Another thing that you can notice in this picture is that the bag has a zip-open liner. This is great news, as it means that I can open the liner to do all this work, and when the liner is zipped shut, none of the fasteners will show. Talk about tailor-made!
Now let me take a quick minute to explain one other detail. I decided to do it here, because you may not do this the way that I did. Remember that there are now holes in the water-resistant nylon. Obviously these holes are going to be substantially less water-resistant. To combat this, I used a sealer / cement (in this case, ‘Amazing Goop’) to seal the holes. Essentially I worked a blob of it under the fabric at each hole and also filled the hole itself. Then I stuck the bolt through the Goop and tightened everything up.
I wanted to mention this here; in case you have opted to just build a quick touring bag and hit the road, you would have this information and could seal as you went. You’ll want to seal those holes if you are unsure of the weather ahead (or if you are sure that it will rain!). But I did not do it at this point. While I wanted to do this fast and cheap, I wanted to do as nice a job as I could. To that end, I opted to simply tighten the bolts down as I went through the job. Then, when the bag was done, I used a red marker to color the threads that protruded through the bolt and removed the bolts. I used the red ink as a guide and cut off most of the red-colored threads. This let me reassemble the hardware in the bag and use cap nuts, so as to prevent any unwanted snags.
But even then I didn’t use the Goop just yet. (yeah, I know; it’s killin’ ya). I knew that once I used the Goop, the nylon would be permanently spot-glued to the internal stiffener, and I wanted to test drive my bag to see what changes I might need to make before I made it impossible to make them. (And a good thing, too! More on that later.)
Now one thing that very few touring bags (even the high-dollar brand name ones) never mention is that the bag as sold is rarely ready to use. Invariably, you will end up tethering a couple of bungee cords to it to get it to hold it still or to sit ‘just so’ on your bike. This is especially true if you are running an angled backrest (_any_ angle, no matter how small!) or a six pack type rack or worse: both! And all the bikes in my yard right now have that worst possible combination. What usually happens is that the bag either catches very little support from the rack, or it sits so far from the bottom of the backrest that it wobbles mercilessly going down the road, and may even slip off the rack at speed. Fortunately, the majority of the large touring bags have places to attach bungee cords (they don’t tell you that you should use them for that; nothing shatters the illusion of a ‘perfect,’ ready-to-use bag like an instruction manual that starts with ‘get a few bungee cords’). These mounting points range from small loops of fabric to actual D-rings.
Well I didn’t have actual D-rings laying around (though if you want to use them, there are commercially-available D-rings made into metal tabs; they are used to hang supremely large picture mirrors and the like. Drill a hole or two into the tab for your screws.) I did have some stainless steel eye-bolts (also Ľ inch by 20 tpi, and 11/2 inches long). I ran a stainless steel nut all the way up to the eye end of the fasterner and ran the whole thing through a 1 Ľ inch stainless steel fender washer placed on the outside of the bag. This will prevent any movement of the eye hook or nut from damaging the bag. (The nut on the eye end allows the eye hook to be tightened more securely; hook eyes don’t pull up tight very well against the eye itself.) And again, on the inside, I used the 1 ˝ inch fender washers, lock washers, and nuts. Somehow, I lost the close-up photo I took of the first hook eye, but if you go up this page two pictures to the picture of the completely finished bag, you will see where I opted to mount them (and you will also see that I opted to mount four of them).
The bottom hook eyes (or D-rings, or whatever you opt to use) are placed out as close to the edges as possible - remember that there is a fender washer going behind them. They are also as low as possible while still being forward-facing. This is for both convenience and stability: they are easy to get to, and when you have a time getting the bag pulled up tight against the backrest, you’ll want to run your cords down and forward to keep a steady ‘pull’ on the bottom of the bag. Now the roll-around bag was perfect for this, because the lower corners had additional reinforcing inside and out for the wheel hardware. Wonderful! Two extra layers of strength! So a quick drilling and a couple of fender washers later (and sealant, if you're ready to just hit the road), and the first one was in. Repeat on the other side.
At this point I took the bag to the bike again and test fitted it. The straps hit where I wanted them to hit (and I again lamented that there was no ‘bare’ area under my wife’s backrest - it would be perfect for the bottom strap to fit under the pad) and a couple of mini bungees run from the hook eyes down to the spacers on her saddlebag brackets kept the whole thing nice and tight without intruding on passenger space or comfort.
The height of the bag left me remembering some of my early camping experiences: a very tall pack can shift or flop at the worst times. At best, they just flap around a lot, especially if they aren’t filled to bursting to keep them rigid. Now this pack isn't particularly tall, but it is a bit narrower than 'traditional' tour bags... And what if she wanted to tie a bedroll or another bag to the top....? So I decided to add two more hook eyes (again, D-rings or whatever you opt to use will work fine) about two-thirds of the way up the bag. These could be used to keep the bag upright and wobble-free if a load were top-heavy or another bag was tied to the top. While they proved in the road test to not be necessary for a "standard" lightly packed load, I thought it would be better to have them and not need them than to need them - well, you all know how that goes.
The hook eyes here may cause some issues with the shoulders of some passengers, but not if you can run the cords so that they pull out a bit away from the passenger. Or you could use D-rings, which would lay flat when they weren’t in use. My wife simply will not take passengers, so for this project, it was a non-issue.
And that’s it! Project done. From start to finish, after materials gathering, I spent about thirty minutes making a useable bag. Pulling the bolts back out and cutting them added another twenty minutes (I used a pneumatic die grinder. Figure an hour or so if you are using a hacksaw). Pulling the bolts again after the test ride and sealing the bag took about an hour (there is a great deal of care to be taken when working with the Goop; don’t let it make a mess!).
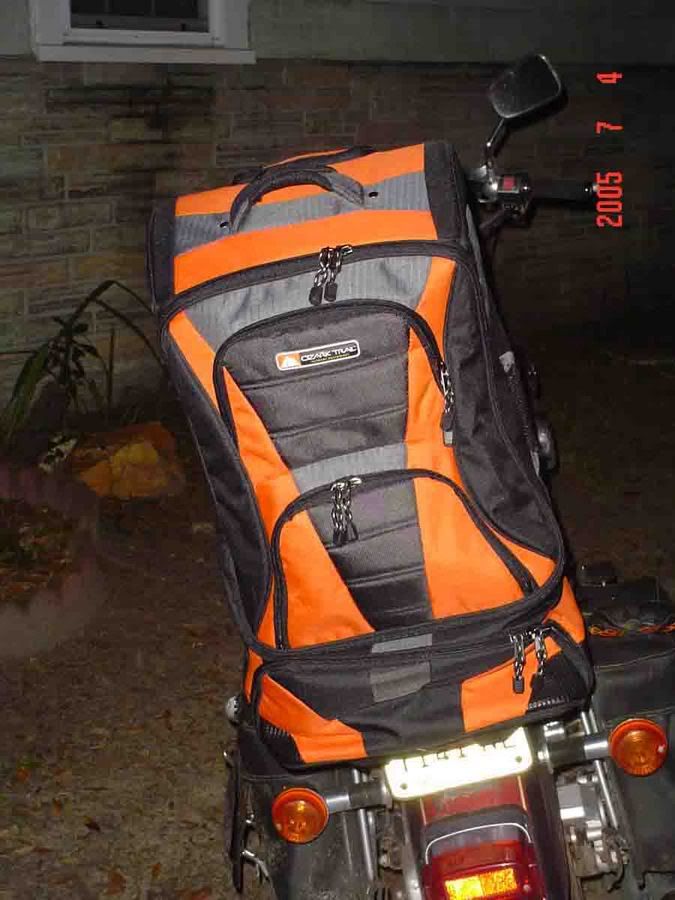
And now, the pics of the bag as it sat on the bike prior to test ride:
From the rear. While the bag isn’t reflective, this night shot with flash gives a good idea of just how visible the bag is in headlights. The key is off, if you are wondering why there is no tail light in this shot.
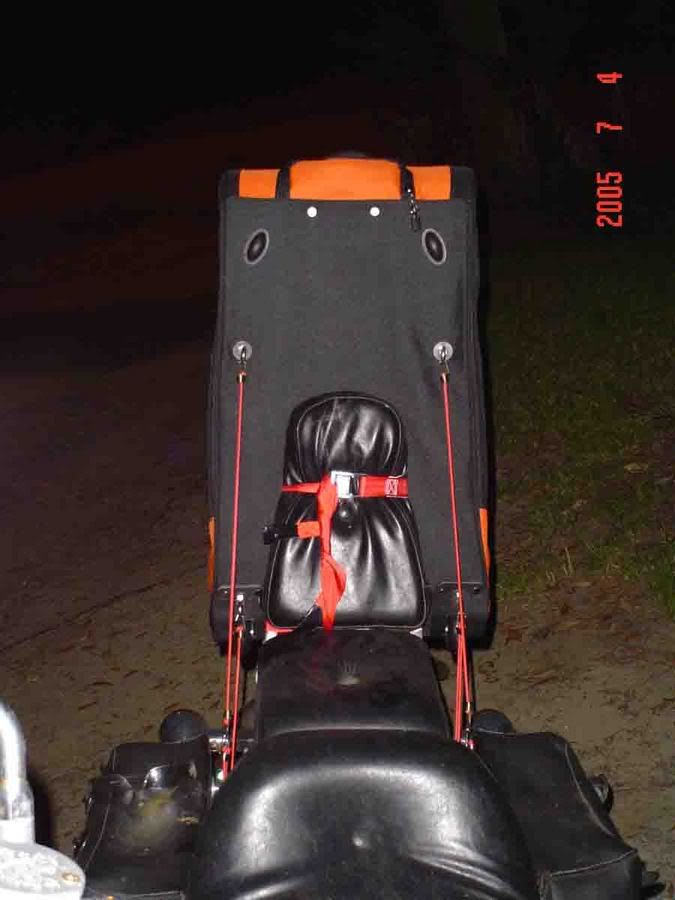
From the front. This shows where the straps hit on the seatback, as well as highlighting my reasons against using the tie down straps - they are bulky; you won’t have a happy passenger. Using web strap and regular fasteners would solve this problem. Even using the belts as in my original plan would still leave the backseat an option for someone. Notice also how tightly the straps are pulled- they are wrinkling the vinyl. This is really over-kill, but that’s the best kill I know! Seriously, I probably don’t have to pull them that tight; many commercially made touring bags have nothing more than a pocket and do not tighten at all. (But let it be known that I don’t trust that type of bag, and always bungee that sort of bag, and in numerous places.) I also want to point out that I cut off several feet of excess strap. I left plenty of strap so that they could be loosened enough to remove from the bike without having to open them completely. In fact, they will have more strap cut off as soon as I can find someone with a searing shear to prevent raveling. Right now, the ends are wrapped with electrical tape to keep them from fraying.

A close-up of the side view, with all four hook eyes tethered. Notice how neatly the bungess run. Almost like a production unit, yes?
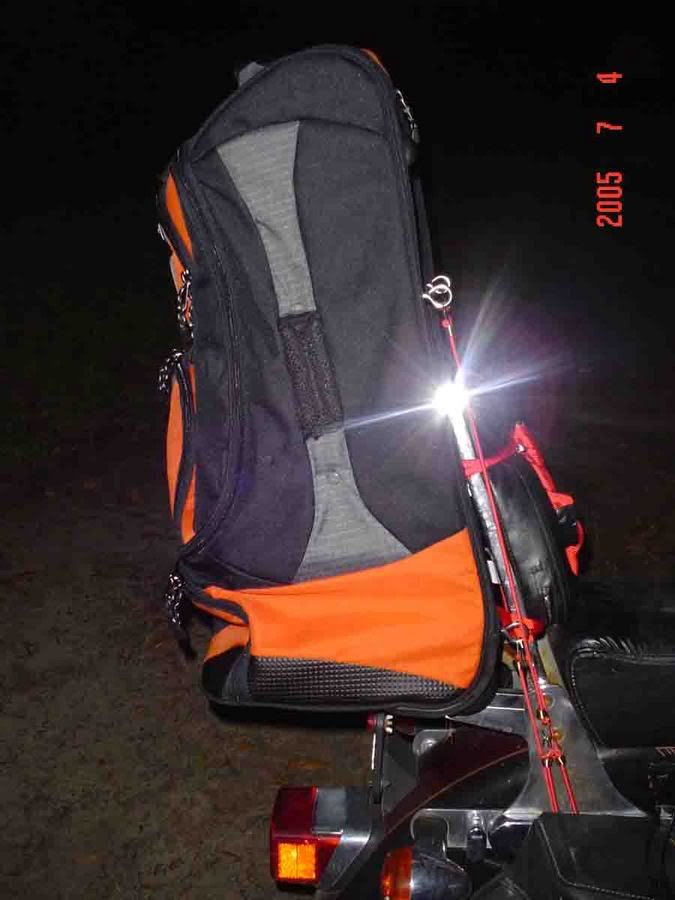
A better shot of the side. The straps and bungees let the bag sit tightly up against the backrest, ensuring that the bottom of the bag gets as much rack under it as is possible.
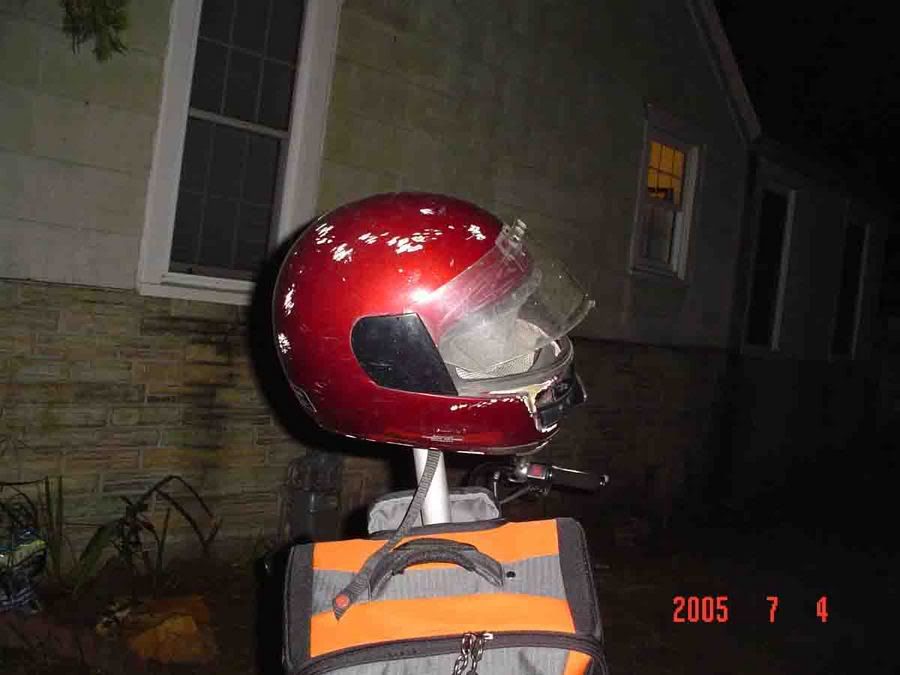
Why, I even found a great use for that little pop-out handle! It’s just perfect for parking:
And that’s it. That is how I spent thirty minutes and fifteen bucks to make a great touring bag for my wife’s bike. Hopefully, it might give you a few ideas of your own!
Variations on a theme:
In addition to switching up the different hardware to customize or stylize your bag's looks, here are a few other ideas that struck me:
You of course have the option to select any bag you like; there are many seriously high-end roll-abouts. Or you can use a backpack: simply cut a template from a stiff material (say 1/4 inch plywood, available in quarter-sheets from most home centers) and insert it in the back to provide shape, security, and something to bolt to. You can even find some black leather for that 'biker' look. If you want that western look, you'll have to rustle up some conchos (online, or fabric stores), and for those 'cowgirl' moments, fringe is surprisingly easy to make!
Results from test ride:
My brother and I spent the fourth logging many, many, many miles, thrashing this thing through all kinds of conditions, ranging from way too fast on the interstate to way too bumpy through construction zones and dirt roads to way too hot and slow in parking lots. And every single modification made to it has passed with flying colors. Though we did run across a need for one more modification: A bit of foam.
My wife rides a V-twin. As a result, there is a lot of vibration. At lower revs, the bike gets a vibration that sets the stiffener of the bag to buzzing against the top of the backrest. Fortunately, this was easy to cure (and also fortunately, I had not yet ‘cemented’ this job with the Amazing Goop!). I found a piece of foam in the shed - one of those ľ inch thick pieces you can find at fabric stores for fluffing up bar stools and the like, though I suppose you could use about anything reasonably spongy. Those little ‘kneeling pads’ for gardening come to mind. I removed enough of the hardware so that I could easily reach in between the nylon and the stiffener. I put a few blobs of Goop on the foam and slid it behind the stiffener, using my inked outline of the backrest as a placement guide. Then I simply reinstalled the hardware (with Goop this time) and viola! all done.
A quick spin around the neighborhood proved that the noise was gone completely.
Also, I discovered that the bag was still perfectly useable as a roll-around: simply take one of the bungees used for stabilizing and run it from one upper hook eye down through the straps to the other upper hook eye. This keeps the straps from rattling or dragging the ground.
All in all, I’m really happy with this project.
Can’t wait to do another one!
Oh, and if you hadn't figured it out yet, I was too tired to finish chopping and editing, so this started out 'Lite,' but about halfway, it's the whole thing, warts and all.
Hope it's useful to someone.....
_________________
Duke

This page has been viewed ...

... times since the Hit Counter was added on July 15th,2005


Click on this icon logo to RETURN to BAILEY Motorcycle MAINpage