|
+Instructions+
This
will help you further on how to make your own
dolls from my drag~n~drop page. If you are using
Paint Shop Pro, then click
here
*I
would really appreciate it if you put up a banner
or a link for me if you are going to use the dolls
that you have made on my page*

If
you are going to use Windows Paint (Start -->
Programs --> Accessories --> Paint)...
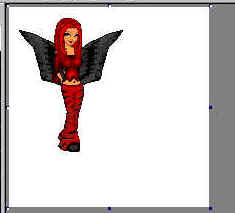
1.
After you've made your doll in the white box,
press the "Print Screen" button on your
keyboard. (This
is next to the button that says F12)
2.
Then go into Windows Paint (where? Look at the
blue section up top!).
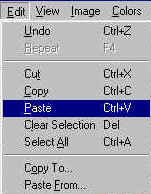
3. Once you're in Paint, go to Edit --> Paste,
shown below:
4. When the window
that asks you if you want the canvas enlarged pops
up, click "YES". If the window does not
pop up, then skip this step.
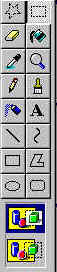
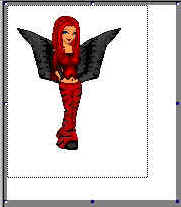
5. Now that you have
your doll in Paint, go to the Tool Box and select
the rectangular selection tool
as it is shown below (also make sure the blue
background is on the FIRST selection option as it
is
shown on the WAY bottom!) :
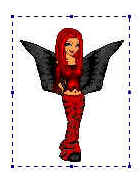
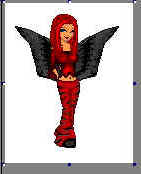
6. Now, select your
doll by dragging your mouse and putting a box
around the doll on the WHITE background like the
following:
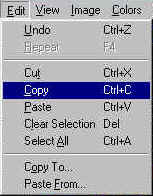
7. After you have the
box around your doll, go to Edit --> Copy as it
is shown below:
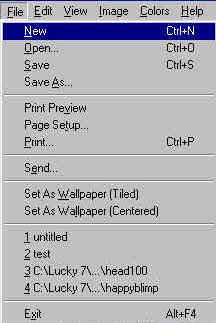
8. Now go to File
--> New (shown below) and when it asks you if
you want to save Changes to Untitled, say
"NO".
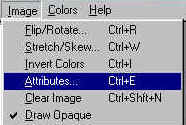
9. Now that you have
a new canvas, go to Image --> Attributes...,
shown below:
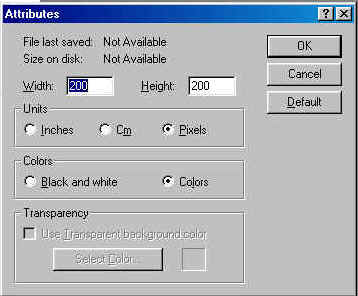
10.
Make sure the Attributes are filled out exactly as
mine below (including all the number crap) and
then press OK:
11.
Now, go to Edit --> Paste (if you don't know
how go back to step #3)
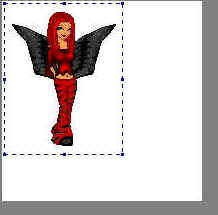
12.
Once you paste it in, image should automatically
line up on the top left hand corner, if it does
not, then move the image to line up on the top
left by clicking on the image and dragging it.
Once you've done this, the image should be lined
up like the following:
13.
As you can see, there is a lot of excess white
space, so how do we get rid of it? Well first
click on the canvas (not your image but the
surrounding white space and you will see that
there will be dots around the white area like
below:
14.
Now, put your mouse to the bottom right hand dot
so that a double-sided arrow appears, with one
side pointing to the northwest direction of a
compass and the other pointing to the southeast.
15.
Now click down on the bottom right dot and drag
upwards and toward the left so that you are making
the white areas around the doll smaller, like the
following:
(the dotted line represents the new image if you
were to stop dragging and letting go of the left
mouse button you your mouse)
16.
Now, once you've gotten rid of as much white area
as possible around your doll, like below:
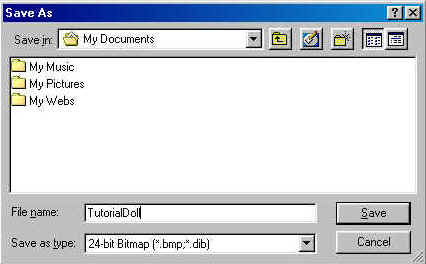
17.
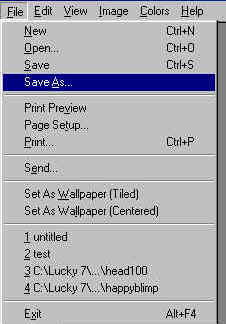
Go to File --> Save As...:
And then choose a place where you want to save
your doll and give it a name and the press SAVE:
CONGRATULATIONS!
YOU'VE JUST MADE YOUR VERY OWN CARTOON DOLL!
Last
Updated
|

