|
|
|
| ||||||||||||||||||
|
|
|
|
|||||||||||||||||
|
|
|||||||||||||||||||
|
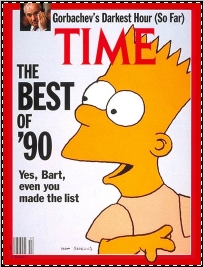
EFFECT GULUNGAN PADA KERTAS Langkat 1: Klik kanan pada gambar dibawah (Gbr.1.2) pilih Save Picture As, pada kotak dialog Save, Anda pilih directory atau folder tempat menyimpan gambar tersebut, ketik nama file kemudian anda click tombol Save. setelah itu barulah anda membuka program Adobe Photoshop. Klik File, Open pada kotak dialog open, anda cari / pilih folder tempat anda menyimpan gambat tadi kemudian anda pilih file gambar tersebut selanjutnya anda klik tombol Open. setelah anda buka gambar tersebut, Anda tekan Ctrl + A. Klik menu File pilih New, OK. kemudian anda tekan Ctrl + V pada layer kosong. Set Warna Background dengan warna #c0c0c0.
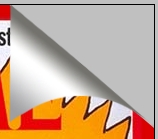
Langkat 2: Now Hold CTRL and click on the magazine layer to select it, so it looks like the image below.
Click on the
Polygonal Lasso Tool
Subtract from your selection until you have only the edge of the magazine selected. Make sure you are still on the magazine layer and with the edge still selected press you delete key. If you did it right your image will look like my image below.
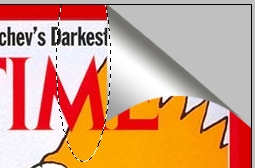
Now hold CTRL and click
on your layer to select it, click on the
Rectangular Marquee Tool and set the
selection to Subtract From Selection
Langkat 3: At this point your
selection should look like the image on the right.
Create a new layer, Click on the
Gradient Tool
color:#73726d color:#FFFFFF color:#9f9fa1 color:#9f9fa1
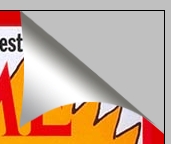
Apply the gradient from top going down to the point of your selection as shown in the image below. The
Still on the same layer
and with your selection still selected click on
the Elliptical Marquee Tool
When your selection looks like the image above press SHIFT+CTRL+I to inverse your selection and press the DELETE key. If you did everything right you should have what I have below.
Still on the same layer
we need to create another curve on the left hand
side of the paper. Click on the Elliptical
Marquee Tool
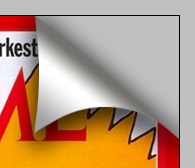
Langkat 4:
At the point your fold should look like the image above. Now right click on the fold layer, click Blending Options, and add the setting below.
With the setting applied to the layer your image should look like what I have below.
That is it, you are finished.
User Examples | Submit Tutorial | Comment | More Tutorials | Downloads
This Tutorial was
Created By
Mark
|
|||||||||||||||||||