Site hosted by Angelfire.com: Build your free website today!
26 Nov, 07 > 2 Dec, 07
5 Nov, 07 > 11 Nov, 07
15 Oct, 07 > 21 Oct, 07
Entries by Topic
All topics  «
Crochet Patterns
Blog Tools
Edit your Blog
Build a Blog
RSS Feed
View Profile
You are not logged in. Log in
MarjorieCrochets!
Monday, 26 November 2007
Let It SnowBaby
Mood:  chillin'

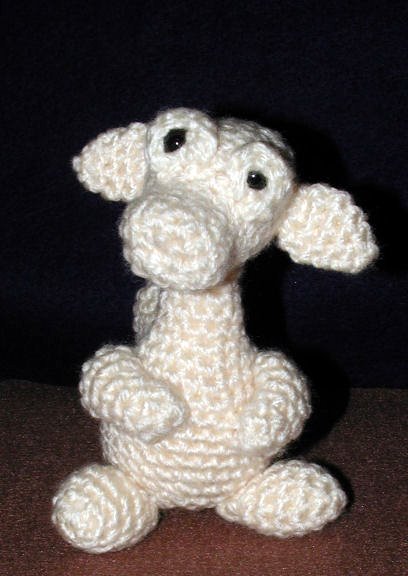
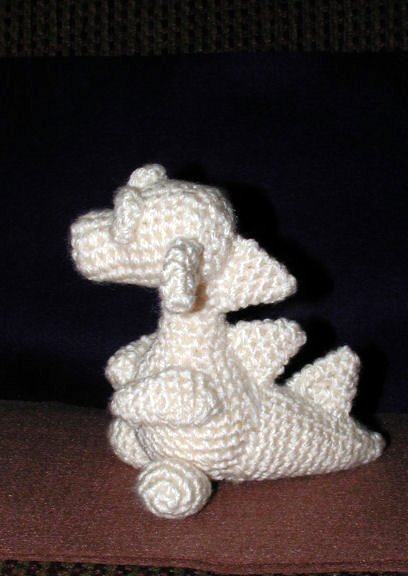
  I have been waiting and waiting for it to snow here, but other than a slight dusting on Thanksgiving Eve, I have been out of luck. I just love making snowmen and since I can't have the real thing, I decided to crochet myself one. After looking around online, I couldn't find a free pattern that I liked, so I made up one of my own. It hasn't been tested yet, so if you have any problems, please don't hesitate to let me know!


Oh yes, he has poseable arms, but you don't have to make him that way.


Materials required:

Small amounts of ww yarn in white, and orange.
Size D (3.0 mm) hook
2 snap on safety post eyes, or two buttons
tapesty needle
small amount of black embroidery floss for mouth
dental floss for poseable arms
fiberfill for stuffing
small amount of baby or sport weight yarn for hat and scarf

Nose: Using orange yarn,

Row 1: 6 sc in a magic ring. (6 sc)
Rows 2 - 3: sc even. (6 sc in each row.)
sl st the next st, FO leaving a long tail to sew on to the snowmans face.

Snowman Body: working from the bottom up, and using the white yarn:

Row 1: 6 sc in a magic ring (6 sc)
Row 2: sc inc around (12 sc)
Row 3: *sc inc in first, sc in next sc*, repeat from * to * around. (18 sc)
Row 4: *sc inc in first, sc in next 2 sc*,  repeat from * to * around.  (24 sc)
Row 5: *sc inc in first, sc in next 3 sc*,  repeat from * to * around.  (30 sc)
Row 6: *sc inc in first, sc in next 4 sc*,  repeat from * to * around.  (36 sc)
Row 7: *sc inc in first, sc in next 5 sc*,  repeat from * to * around.  (42 sc)
Row 8 - 13: sc even (42 sc in ea row)
Row 14: *sc dec, sc in next 5 sc*,  repeat from * to * around.  (36 sc)
Row 15: *sc dec, sc in next 4 sc*,  repeat from * to * around.  (30 sc)
Row 16: *sc dec, sc in next 3 sc*,  repeat from * to * around.  (24 sc)
Row 17: *sc dec, sc in next 2 sc*,  repeat from * to * around.  (18 sc)
stuff
Row 18: *sc inc, sc in next 2 sc*,  repeat from * to * around.  (24 sc)
Row 19: *sc inc in first, sc in next 3 sc*,  repeat from * to * around.  (30 sc)
Row 20: *sc inc in first, sc in next 4 sc*,  repeat from * to * around.  (36 sc)
Rows 21 - 25: sc even (36 sc in ea row)
Row 26: *sc dec, sc in next 4 sc*,  repeat from * to * around.  (30 sc)
Row 27: *sc dec, sc in next 3 sc*,  repeat from * to * around.  (24 sc)
Row 28: *sc dec, sc in next 2 sc*,  repeat from * to * around.  (18 sc)
stuff
Row 29: *sc inc, sc in next 2 sc*,  repeat from * to * around.  (24 sc)
Row 30: *sc inc in first, sc in next 3 sc*,  repeat from * to * around.  (30 sc)
Rows 31 - 35: sc even (30 sc in ea row)
Note: At this point, I prefer to sew the nose to the head, attach my safety post eyes, and sew the smile. This way, the thread ends are hidden completely inside the head, and I can also reach in easily to put the eyes on.
Row 36: *sc dec, sc in next 3 sc*,  repeat from * to * around.  (24 sc)
Row 37: *sc dec, sc in next 2 sc*,  repeat from * to * around.  (18 sc)
stuff
Row 38: * sc dec, sc in next sc*, repeat from * to * around (12 sc)
stuff more if needed
Row 39:  sc dec around (6 sc)
sl st into next sc and FO leaving long end to weave through last row, pull tight to close, and take a couple of stitches to secure. Weave in ends.


Arms: (Make 2) Using white yarn:

Row 1: 6 sc in a magic ring.
Row 2: sc inc around (12 sc)
Rows 3 - 8: sc around (12 sc in ea row)
Row 9: sc dec 2times, sc in remaining 8 sc (10 sc) Note: doing the two sc dec right next to each other helps form a sort of elbow in the arm.
Row 10-14: sc even ( 10 sc in ea row)
stuff lightly
Row 15: sc dec around (5 sc)
sl st in next st, FO leaving a long end to weave through last row, pull tight to close, and take a couple of stitches to secure. Weave in ends.

To make poseable arms, I thread my needle with a double strand of dental floss, and insert it at shoulder level on one side of the snowman, run it straight through to the other side of the snowman, then through one arm, and reinsert it one or two stitches over, pushing it back through the arm and snowman and out the same side I began, one to two stitches away from where I began. Then I run it through the same arm I began and back out one or two stitches apart. I pull the two ends of the thread tight as I can, then knot it three times.

You can make your arms non-poseable by just sewing them to the snowmans body in whatever place you desire.


Hat: Using sport or baby yarn,

Row 1: Leaving a long end for sewing later, ch 19, sc in second ch from hook and in ea remaining ch across, ch 1, turn. (18 sc)
Rows 2 - 26: Working in back loops only, sc in ea sc across, ch 1, turn. (18 sc in ea row)

At the end of row 26, fold your work in half, bringing the first row up to meet row 26, and sc through the back loops of foundation row and row 26. (This forms a tube for the hat) FO, leaving a long end to weave through the ends of the rows at the top of the hat. Pull tightly to close opening, and take a couple of stitches to secure. Turn hat inside out, and fold the open end up to form a brim. I place a small bit of stuffing inside the hat, and put it on the snowmans head, then usung the remaining long end of yarn, run some small stitches around to hold it in place.

Scarf: Using the sport or baby weight yarn:
Row 1: Ch 75, sc in second ch from hook, and in ea ch acorss. Ch 1, turn. (74 sc)
Row 2:  Working in back loops only, sc in ea sc across. FO

For fringe, I cut 6 pieces of yarn about 3 inches long, then attached them to the ends of the scarf, by folding each piece in half, then pulling it through one of the end stitches, and pulling the ends through the hoop formed. I then trimmed the ends of the fringe to even.

Tie the scarf around the neck of the snowman.

Please be creative with your snowman! If you're good at making pompoms (I am not!), I think one would be cute attached to the top of his hat, or maybe one on each end of his scarf. A shovel or a broom stick for him or her to hold would be nice, or maybe a Christmas wreath for the holidays!

ENJOY!

 p.s. You can use the standard ch 2, crochet in the second ch from the hook, instead of the magic ring if you are more comfortable doing so. Otherwise, a good tutorial for the magic ring can be found here:

http://crochetme.com/Dec_Jan_0405/reads_round.html


Posted by pa/ChloesCorner at 9:48 AM CST
Post Comment | Permalink | Share This Post
Friday, 2 November 2007
Waves of Color Tote Bag
Mood:  caffeinated
Topic: Crochet Patterns


Materials

Desired colors of worsted weight, great for using up scrap yarn!
size F hook
Tapestry needle for weaving in ends
4 stitch markers or yarn or what ever you chose to mark stitches.

Abbreviations Used:

sc = single crochet
ch = chain
st = stitch
sk = skip
FLO = front loop only
sl st = slip stitch
dc = double crochet
hdc = half double crochet
dec = decrease
repeat from * to * = repeat the instructions between the *'s for the remaining stitches of the row.
rsc = reverse single crochet

Special stitches used:
Alternative reverse single crochet or Alternative rsc = (I read about this method on the Crochet Partners group, and love it as an alternative to reverse single crochet, which can be difficult to master at times.) Insert hook into stitch as if you were doing a regular single crochet, yarn over and draw through, with the two loops on the hook, rotate the whole hook 360 degrees, yarn over and draw through.

Ch 31, sc in second ch from hook, and in each ch across. Ch 1, turn. (30 sc)
Row 1: Sc in each st across. Ch 1, turn. (30 sc)
Row 2 - 6: Sc in each st across. Ch 1, turn. (30 sc)
Row 7: Sc in each st across. Ch 1, DO NOT TURN
Row 8: Begin working across the ends of the rows, *2 sc in the end of the row you just finished, sc in each row, work 2 sc in the end of beginning row*, then sc in free loop of foundation chain, and repeat from * to *, join with a sl st. (79 sc) Ch 1. Do not turn. NOTE: You will not be turning the work from this point on.
Row 9: Working in FLO, sc in same st as joining st and in each st around, join with a sl st. Ch 1. Do not turn
Row 10: (Working in both loops) Sc in same st as joining, and in each st around. Ch 1
Row 11: Sc in same st as ch 1, skip 2 sc, work 5 dc in next st, skip 2 sc, *sc in next st, sk 2 sc, work 5 dc in next st, sk 2 sc*, repeat from * to * around, join with a sl st in the first sc. Fasten off.
Row 12: Join yarn with a sl st, ch 2, work a dc dec in next two st, dc in next st, work 3 dc in next st, dc in next st, *dc dec over next 3 st, dc in next, work 3 dc in next st, dc in next st*, repeat from * to * around, end with a sl st in the top of the first dec. Fasten off.
Row 13 - 22: Repeat Row 12.
Row 23:Join yarn with a sl st, ch 2, work a dc dec in next two st, hdc in next st, work 3 sc in next st, hdc in next st, *dc dec over next 3 st, hdc in next, work 3 sc in next st, hdc in next st*, dc dec over next 3 st, repeat from * to * around, end with a sl st in the top of the first dec. Ch 1.
Row 24: Sc in each st around. Join with a sl st. Ch 1.
Row 25: Sc in each st around. Join with a sl st. Ch 1.
At this point, we begin the handles construction. You may want to locate the center of the bag by folding the bag flat, then folding it in half, marking the center stitches. Count 8 stitches to each side of the center stitch, and mark with a stitch marker or small piece of yarn or thread. This will mark the handle opening. For my bag, as follows:
Row 26: Sc in first 17 st, ch 16, skip next 17 st, sc in next 22, ch 16, sk next 17 st, sc in last 5 st, join with a sl st, ch 1.
Row 27: Sc in each st and ch around, join with a sl st. Ch 1. (76 sc)
Row 28: Sc in each st and ch around, join with a sl st. Ch 1. (76 sc)
Row 29: Sc in each st and ch around, join with a sl st. Ch 1. (76 sc)
Row 30: Alternative rsc or rsc in each st around. Join with a sl st. Fasten off.

Finishing: Alternative rsc or rsc in each st of inside edge of handles. Fasten off. Weave in all ends. Line purse if desired.

Enjoy your new tote!


Posted by pa/ChloesCorner at 7:19 AM CDT
Post Comment | Permalink | Share This Post
Monday, 15 October 2007
Baby Dragon or Baby Snow Dragon
Mood:  a-ok

   This pattern is one of my most popular, and I am delighted to find it is still going strong. There are baby dragons all over the world now, with my pattern translated into french, german and who knows what other languages! I originally posted it on Crochetville.org, and due to it's popularity there and other places, I developed a tutorial on the assembly process I used. I still need to figure out how to make that tutorial read right, instead of backwards!


Bulky yarn (I used Bernat Softee Chunky for my baby snow dragon)
"G" hook
tapestry or darning needle to sew pieces together
stitch markers (or a piece of yarn or thread to mark ends of rounds)
two post eyes or buttons, or for young children, eyes could be embroidered on
fiberfill or stuffing material


Abbreviations used:
sc = single crochet
st = stitch
ss = slip stitch
inc = increase (do 2 single crochets in one stitch)
dec = decrease ( insert hook into first stitch, yarn over, pull up a loop, insert hook into the next stitch, yarn over, pull up a loop, yarn over and pull through the two loops on your hook)


Head

As amigurumi is made in spirals, do not join rounds. Use a stitch marker or a piece of thread or yarn to mark the end of your rounds.

Start 6 sc in a magic ring. (6 sc)
Rnd 2: 2 sc (inc) in each st around (12 sc)
Rnd 3 -6 : work even, no inc or dec (12 sc)
Rnd 7: 2 sc (inc) in each of the first 6 st, sc in each of remaining 6 sc (18 sc) (This starts to form the forehead ridge)
Rnd 8: sc in each of the first 8 st, 2 sc (inc) in the next 2 st, sc in the remaining 8 st (20 sc)
Rnd 9 - 11: work even, no inc or dec (20 sc)
Rnd 12: *sc first 2 st together (dec), sc in the next 3 st* repeat from * to * around (16 sc)
Rnd 13:*sc first 2 st together (dec), sc in the next 2 st* repeat from * to * around (12 sc)
Rnd 14: *sc first 2 st together (dec), sc in the next st* repeat from * to * around (8 sc)
ss in next st and fasten off, leaving a long tail for closing and sewing.


BODY

Start 4 sc in a magic ring. (4 sc)
Rnd 2: 2 sc (inc) in each st around (8 sc)
Rnd 3 -5 : work even, no inc or dec (8 sc)
Rnd 6: *1 sc in first st, 2 sc (inc) in second st* repeat from * to * around. (12 sc)
Rnd 7 - 8: work even, no inc or dec (12 sc)
Rnd 9: *1 sc in first 2 st, 2 sc (inc) in third st* repeat from * to * around. (16 sc)
Rnd 10:*1 sc in first 3 st, 2 sc (inc) in fourth st* repeat from * to * around. (20 sc)
Rnd 11: *1 sc in first 4 st, 2 sc (inc) in fifth st* repeat from * to * around. (24 sc)
Rnd 12: *1 sc in first 5 st, 2 sc (inc) in sixth st* repeat from * to * around. (28 sc)
Rnd 13 - 16: work even, no inc or dec (28 sc)
Rnd 17: *sc first 2 st together (dec), sc in the next 5 st* repeat from * to * around ( 24 sc)
Rnd 18: *sc first 2 st together (dec), sc in the next 4 st* repeat from * to * around ( 20 sc)
Rnd 19:*sc first 2 st together (dec), sc in the next 3 st* repeat from * to * around ( 16 sc)
Rnd 20: *sc first 2 st together (dec), sc in the next 2 st* repeat from * to * around ( 12 sc)
Rnd 21: *sc first 2 st together (dec)* repeat from * to * around. (6 sc) ss in next st and fasten off, leaving a long tail for closing and sewing.


TAIL

Start 3 sc in a magic ring (3 sc)
Rnd 2: 2 sc (inc) in each st around (6 sc)
Rnd 3: work even, no inc or dec (6 sc)
Rnd 4: *1 sc in first st, 2 sc (inc) in second st* repeat from * to * around. (9 sc)
Rnd 5: work even, no inc or dec (9 sc)
Rnd 6: *1 sc in first 2 st, 2 sc (inc) in second st* repeat from * to * around. (12 sc)
Rnd 7: work even, no inc or dec (12 sc)
Rnd 8: *1 sc in first 3 st, 2 sc (inc) in second st* repeat from * to * around. (15 sc)
Rnd 9: work even, no inc or dec (15 sc)
Rnd 10: *1 sc in first 4 st, 2 sc (inc) in second st* repeat from * to * around. (18 sc)
Rnd 11: work even, no inc or dec (18 sc)
Rnd 12: *1 sc in first 5 st, 2 sc (inc) in second st* repeat from * to * around. (21 sc)
Rnd 13 - 15: work even, no inc or dec (21 sc) At the end of rnd 15, ss in next st and fasten off, leaving a long tail for sewing.


FEET (Make 2)

Start 4 sc in a magic ring. (4 sc)
Rnd 2: 2 sc (inc) in each st around (8 sc)
Rnd 3: *1 sc in first st, 2 sc (inc) in second st* repeat from * to * around. (12 sc)
Rnd 4 - 6: work even, no inc or dec (12 sc)
Rnd 7: *sc first 2 st together (dec), sc in the next st* repeat from * to * around (8 sc)
Rnd 8: work even, no inc or dec. (8 sc) ss in next st, and fasten off, leaving a long tail for closing and sewing.

ARMS (Make 2)

Start 6 sc in a magic ring. (6 sc)
Rnd 2 - 6: work even, no inc or dec (6 sc)
Rnd 7: *1 sc in first 2 st, 2 sc (inc) in second st* repeat from * to * around. (8 sc)
Rnd 8 - 9: work even, no inc or dec (8 sc)
Rnd 10: *sc first 2 st together (dec), sc in the next 2 st* repeat from * to * around (6 sc) ss in next st and fasten off, leaving a long tail for sewing.


EARS AND SPINES (Make 5)

Start 4 sc in a magic ring. (4 sc)
Rnd 2: *1 sc in first st, 2 sc (inc) in second st* repeat from * to * around. (6 sc)
Rnd 3: *1 sc in first 2 st, 2 sc (inc) in second st* repeat from * to * around. (8 sc)
Rnd 4: *1 sc in first 3 st, 2 sc (inc) in second st* repeat from * to * around. (10 sc)
Rnd 5: work even, no inc or dec (10 sc) ss in next st, and fasten off, leaving a long tail for closing and sewing.

Weave long tail through the last row of two of these pieces and gather, these are the ears.
The other 3 pieces fold flat (to look like a triangle) and are sewn on the back for the spines.

EYELIDS (Make 2)

6 sc in a magic ring. This is the exception to working in spirals. At the end of this round, chain one, and turn
Rnd 2: sc in each st around (6 sc)
Fasten off, leaving a long tail for sewing

ASSEMBLY DIRECTIONS:

It's easiest for me to pin my body parts into place before sewing them, to make sure they're balanced and in the correct position.

Sew eye lids into place on the head, then attach eyes. Stuff head, and weave yarn through last row of stitches in the back of the head, gathering to close. (I run the yarn down the back of the head to use to sew the head to the neck) Set aside.

Stuff body and neck. Weave yarn through last row of stitches on the bottom of the body, gathering to close. Fasten off, and weave in end.

Stuff feet, and weave yarn though the last row of stitches to gather closed. Use remaining yarn to attach feet to the bottom of the body.

Stuff tail, position on the back of the body, and sew into place.

Stuff only the bottom of the arms, and sew into place on the body. (I positioned them folded across the belly of my dragon to pose him, and sewed them into place.)

Sew head onto body. Position ears on head and sew into place.

Sew spines in a line down the back of the dragon.

A good tutorial for making a magic ring can be found here:
http://crochetme.com/Dec_Jan_0405/reads_round.html

If you're not comfortable with using a magic ring, you can also start with the traditional method (chain two and work appropriate numbers of sc into second chain from the hook) but I find it leaves too big a hole for my tastes.

Tutorial on assembly can be found here:

http://www.quizilla.com/users/MarjorieCrochets/journal/


Enjoy your baby dragon!


Posted by pa/ChloesCorner at 5:03 AM CDT
Post Comment | Permalink | Share This Post
Sunday, 14 October 2007
Baby Lamb
Mood:  down
Topic: Crochet Patterns

   I am brain-dead this morning after a practically sleepless night. Not that you really expected to read anything witty here anyways. Another of my fav patterns, a huggable baby lamb.


Baby Lamb

Materials needed:
ww or 4 ply yarn, white and black. (I used I Love This Yarn in white, and Caron Simply Soft in black)
Size F crochet hook
snap post eyes and nose or buttons or beads. (For young children, I would recommend embroidering the face details on.)
stuffing material
darning or tapestry needle for sewing the parts together

Abbreviations used:
sc = single crochet
st = stitch
ss = slip stitch
inc = increase (do 2 single crochets in one stitch)
dec = decrease ( insert hook into first stitch, yarn over, pull up a loop, insert hook into the next stitch, yarn over, pull up a loop, yarn over and pull through the two loops on your hook)

NOTE: As amigurumi is made in spirals, do not join rounds. Use a stitch marker or a piece of thread or yarn to mark the end of your rounds.


Head:

Using white yarn:
Rnd 1: 6 sc in a magic ring
Rnd 2: * 2 sc (inc) in next st* repeat from * to * around. (12 sc)
Rnd 3: *1 sc in first st, 2 sc (inc) in second st* repeat from * to * around. (18 sc)
Rnd 4: *1 sc in first  2 st, 2 sc (inc) in third st* repeat from * to * around. (24 sc)
Rnd 5: *1 sc in first 3 st, 2 sc (inc) in fourth st* repeat from * to * around. (30 sc)
Rnd 6 - 8: work even, no inc or dec (30 sc)
Rnd 9: *1 sc in first 3 st, sc2tog (dec) in fourth st* repeat from * to * around. (24 sc)
Rnd 10: *1 sc in first 2 st, sc2tog (dec) in third st* repeat from * to * around. (18 sc)
Rnd 11: *1 sc in first st, sc2tog (dec) in second st* repeat from * to * around. (12 sc)
ss in the next st, and fasten off, leaving a long tail for sewing

Face:

Using black yarn:
Rnd 1: 6 sc in a magic ring
Rnd 2: * 2 sc (inc) in next st* repeat from * to * around. (12 sc)
Rnd 3: *1 sc in first st, 2 sc (inc) in second st* repeat from * to * around. (18 sc)
Rnd 4: *1 sc in first  2 st, 2 sc (inc) in third st* repeat from * to * around. (24 sc)
Rnd 5: *1 sc in first 3 st, 2 sc (inc) in fourth st* repeat from * to * around. (30 sc)
ss in the next st, and fasten off, leaving a long tail for sewing

Body

Using body color yarn:
Rnd 1: 6 sc in a magic ring
Rnd 2: * 2 sc (inc) in next st* repeat from * to * around. (12 sc)
Rnd 3: *1 sc in first st, 2 sc (inc) in second st* repeat from * to * around. (18 sc)
Rnd 4-8:  work even, no inc or dec (18 sc)
Rnd 9: *1 sc in first st, sc2tog (dec) in second st* repeat from * to * around. (12 sc)
ss in the next st, and fasten off, leaving a long tail for sewing


Arms: (make 2)

Using black yarn:
Rnd 1: 6 sc in a magic ring
Rnd 2: sc in each st around (6 sc) FO Join white yarn
Rnd 3 - 7: sc in each st around (6 sc)
Fasten off, leaving a long tail for sewing


Legs: (make 2)

Using black yarn:
Rnd 1: 6 sc in a magic ring
Rnd 2:  sc in first st, 2 sc (inc) in next, around (9 sc)
Rnd 3: sc even (9 sc) ss in next sc and FO. Join white yarn
Rnd 4: sc even (9 sc)
Rnd 5: sc in first 3 sc, sc dec three times (6 sc)
Rnd 6 - 9: sc even (6 sc)
ss in next sc and FO leaving a long tail for sewing.

Ears: (make 2)

With black yarn:
Rnd 1: 6 sc in a magic ring (6 sc)
Rnd 2 - 3: sc even (6 sc)
Rnd 4: *sc in first sc, 2 sc (inc) in the next sc* repeat around (9 sc)
Rnd 5 - 7: sc even (9 sc)
Rnd 8: *sc in first sc, sc dec in next sc* repeat around (6 sc)
ss in next sc, and fasten off leaving a long tail for sewing.


Tail:

With white yarn:
Rnd 1: 6 sc in a magic ring (6 sc)
Rnd 2: *sc in first two sc, 2 sc (inc) in next sc* repeat around (8 sc)
Rnd 3 -6: sc even (8 sc)
ss in next sc, and FO, leaving a long tail for sewing.

Assembly Directions:

I find it easiest to pin my pieces into place before sewing them to ensure proper placement.

Position and sew face onto head. (I sewed it on one row up from the bottom row of stitches.)
Gather ears closed by weaving yarn through last row of stitches. Flatten head with face panel in front. Sew ears to the sides of the head between rounds 6 and 9.
Attach eyes and nose. Stuff head and set aside.
Stuff body, and sew body to head.
Stuff legs and sew to front of body between rounds 3 and 5.
Stuff tail, and weave yarn through the last row of stitches to gather closed. Sew to back bottom of body, in rounds 3 and 4, or where it will balance lamb in a sitting position.
Do not stuff arms. Sew to body between rounds 6 and 8. Use extra long tail to sew arms into position if desired. Weave in all your ends.


Posted by pa/ChloesCorner at 10:06 AM CDT
Post Comment | Permalink | Share This Post
Saturday, 13 October 2007
Bimbette Bunny
Mood:  hug me
Topic: Crochet Patterns

   I offered this pattern for sale last year before Easter through a LYS, and it did fairly well. It's one of my favorite, huggable patterns, and I hope you enjoy it, too!


Bimbette Bunny


Materials needed:

small amount of ww yarn
E or F hook, depending on how tight you crochet
2 eyes and a nose, or for small children, embroidery floss to make the eyes and nose
stuffing material
darning or tapestry needle to assemble parts

Abbreviations used:
sc = single crochet
st = stitch
ss = slip stitch
inc = increase (do 2 single crochets in one stitch)
dec = decrease ( insert hook into first stitch, yarn over, pull up a loop, insert hook into the next stitch, yarn over, pull up a loop, yarn over and pull through the two loops on your hook)

NOTE: As amigurumi is made in spirals, do not join rounds. Use a stitch marker or a piece of thread or yarn to mark the end of your rounds.


Head:

Rnd 1: 6 sc in a magic ring
Rnd 2: * 2 sc (inc) in next st* repeat from * to * around. (12 sc)
Rnd 3: *1 sc in first st, 2 sc (inc) in second st* repeat from * to * around. (18 sc)
Rnd 4: *1 sc in first  2 st, 2 sc (inc) in third st* repeat from * to * around. (24 sc)
Rnd 5: *1 sc in first 3 st, 2 sc (inc) in fourth st* repeat from * to * around. (30 sc)
Rnd 6 - 8: work even, no inc or dec (30 sc)
Rnd 9: *1 sc in first 3 st, sc2tog (dec) in fourth st* repeat from * to * around. (24 sc)
Rnd 10: *1 sc in first 2 st, sc2tog (dec) in third st* repeat from * to * around. (18 sc)
Rnd 11: *1 sc in first st, sc2tog (dec) in second st* repeat from * to * around. (12 sc)
ss in the next st, and fasten off, leaving a long tail for sewing

Body

Rnd 1: 6 sc in a magic ring
Rnd 2: * 2 sc (inc) in next st* repeat from * to * around. (12 sc)
Rnd 3: *1 sc in first st, 2 sc (inc) in second st* repeat from * to * around. (18 sc)
Rnd 4-8:  work even, no inc or dec (18 sc)
Rnd 9: *1 sc in first st, sc2tog (dec) in second st* repeat from * to * around. (12 sc)
ss in the next st, and fasten off, leaving a long tail for sewing


Arms: (make 2)

Rnd 1: 6 sc in a magic ring
Rnd 2 - 6: sc in each st around (6 sc)
ss into next st, fasten off, leaving a long tail for sewing

Feet: (make 2)

Start 4 sc in a magic ring. (4 sc)
Rnd 2: 2 sc (inc) in each st around (8 sc)
Rnd 3: *1 sc in first st, 2 sc (inc) in second st* repeat from * to * around. (12 sc)
Rnd 4 -5: work even, no inc or dec  (12 sc) 
Rnd 6: *sc first 2 st together (dec), sc in the next st* repeat from * to * around (8 sc)
Rnd 7: work even, no inc or dec. (8 sc) ss in next st, and fasten off, leaving a long tail for closing and sewing.


Tail:

Rnd 1: 6 sc in a magic ring
Rnd 2: * 2 sc (inc) in next st* repeat from * to * around. (12 sc)
Rnd 3 - 4: work even, no inc or dec (12 sc) At the end of round 4, ss in next st, and fasten off, leaving a long tail for closing and sewing.


Ears: (make 2)

Rnd 1: 4 sc in a magic ring.
Rnds 2 and 3: work even, no inc or dec (4 sc)
Rnd 4: *2 sc (inc) in next sc, sc in next sc; repeat from * around  (6 sc).
Rnds 5 and 6: work even, no inc or dec (6 sc).
Rnd 7: *2 sc (inc) in next sc, sc in each of next 2 sc; repeat from * around (8 sc)
Rnds 8 and 9: work even, no inc or dec (8 sc)
Rnd 10: *2 sc (inc)in next sc, sc in each of next 3 sc; repeat from * around  (10 sc)
Rnds 11-12: work even, no inc or dec (10 sc)
Rnd 13: *2 sc (inc) in next sc, sc in each of next 4 sc; repeat from * around (12 sc)
Rnd 14 - 23: work even, no inc or dec (12 sc) At the end of round 23, ss in next st, and fasten off, leaving a long tail for closing and sewing. 14 15 16 17 18 19 20 21


Assembling Directions:

I find it easiest to pin my parts in place before sewing them to assure proper placement.

Beginning with the head, place or sew nose in the center of the 5th or sixth round. Place or sew the eyes in the round above the nose, one or two spaces away from the nose. Stuff.

Stuff body firmly, and attach to the head.

Stuff feet, and weave yarn tail through the last row of stitches, pull to gather closed. Sew to the bottom of the body in the second or third round.

Weave yarn through the last row of stitches, but do NOT pull to gather closed. Stuff the tail, and holding the stuffing in the tail with a finger, pull the yarn tail to gather the opening closed. Put a stitch or two into plac to hold the tail closed, then sew to the back of the bunny, approximately in the third round, where ever it will balance the bunny correctly.

Do not stuff arms.Sew arms to the sides of the body, in rounds 5 - 8. Run one tail through the center of one arm and out of the other to draw them together. sew a few stritches to the back to anchor.

Do not stuff ears. Weave yarn tail through the last row of stitches, and gather slightly, then sew to the top of the head in round 2 or three.

Don't forget to weave in all your ends!

Enjoy your baby bunny!


Posted by pa/ChloesCorner at 4:07 AM CDT
Post Comment | View Comments (1) | Permalink | Share This Post
Friday, 12 October 2007
Big Mouth Fish
Mood:  don't ask
Topic: Crochet Patterns

Yes, I admit, I have a thing for fish. All things aquatic, as a matter of fact. Here's a little pattern I worked up one day, just for fun. My big mouth fish!


Big Mouth Fish

Materials needed:
WW yarn; I used Caron Simply Soft
polyester fiberfil for stuffing
google eyes
"F" hook
tapestry needle for weaving in loose ends and for sewing the mouth closed

With F hook
Starting at fish mouth with color A,
Chain 2
1) 5 sc in 2nd chain from hook.
2) ch 1, 2 sc in each sc around (10 sc)
3) ch 1, (2 sc in first sc, sc in next sc) repeat around (15sc)
4) ch 1, (2 sc in first sc, sc in next 2 sc) repeat around
(20 sc)
5) (Variation #1 work in back loops only - as in the purple and red fish) Sc in each sc around
6) ch 1, sc in each sc around
7) ch 1, (sc in two sc, dec) around
8-9) ch 1, sc in each sc around
10) ch 1, 2 sc in each sc around (30 sc)
FO Attach color B
11-17) ch 1, sc in each sc around
18) ch 1, (sc dec, sc in next 3 sc) repeat around (24 sc)
19) ch 1, (sc dec, sc in next 2 sc) repeat around (18 sc)
Stuff
20) ch 1, (sc dec, sc in next sc) repeat around (12 sc)
Stuff a bit more
21) ch 1, sc dec around (6 sc) FO
Attach color A
22) ch 1 sc in each sc around
23) ch 1 (2 sc in first sc, sc in next sc) around (9 sc)
24) ch 2 (hdc in each sc around) (9 hdc)
25) ch 2 (2 hdc in first hdc, hdc in next hdc) around
26) ch 2 (2 hdc in each hdc) around
27) ch 2 (hdc in first hdc, 2 hdc in next hdc) around
28) Fold tail in half and slip stitch through both thicknesses in each stitch across. FO Weave in ends.

For Variation #1 join color A in any remaining loop of row 5, ch 1 sc in each loop around. Join with a slip stitch in beginning sc, ch 1, sc in each sc around, join FO Weave in ends.

Top Fin

Attach color A at top of fish.  Chain 1, sc  and hdc in same place.  2 hdc in next row,  2 dc in next row,  3 trc in next row, 2 dc in next row, 2 hdc in next row, hdc and sc in next row, slip stitsh in next row. Turn and sl st in each st.  Join.  FO Weave in ends.

Side Fins (Make 2)

Row 1:  With color A Chain 5, dc in 4th st from hook and in last dc.  Ch 3, turn  (3 dc)

Row 2:  1 dc in same place and 1 dc in next dc, 1 dc in next dc and 1 dc in turning chain.  Finish off.  Sew to side of fish as shown.

Finishing - Making sure that top and side fins are lined up correctly, fold mouth in half, and lightly stitch closed between the 6th and 7th rows. I pushed in the center of the mouth as I did this to shape it. It only takes a couple of stitches to do this. Weave in ends.

Glue on wiggle eyes.


Posted by pa/ChloesCorner at 3:01 AM CDT
Post Comment | Permalink | Share This Post
Thursday, 11 October 2007
Miniature Christmas Stocking
Mood:  not sure
Topic: Crochet Patterns

  It's getting to be that time of year! I have been searching for a simple, small Christmas stocking pattern. Something small enough that I could attach it to the front of a Christmas card, yet big enough that I could put s couple of teabags, or maybe some small pieces of candy. I couldn't find one that I liked so I developed one of my own.


   I've tried it in yarn, also, and while it is 'okay'. I think I like it better made in thread!


Materials:
For Thread Stocking
two colors of size 10 thread, one for the toe, heel wedge and cuff, referred to as Color A, and one color for the main body of the stocking, referred to as Color B. You may also like to add a small amount of metallic thread as an accent for the finishing round/hanging cord.
Size 1 steel hook (2.75 mm) ~OR~ Size 2 steel hook (2.25 mm)

For Yarn Stocking
two colors of ww yarn, one for toe, heel wedge, and cuff,  referred to as Color A, and one color for the main body of the stocking, referred to as Color B.
Size E (3.5 mm) crochet hook

**Do not join rounds unless directed to by pattern.**

Rnd 1: With color A, ch 2, 8 sc in 2nd ch from hook (8 sc)
Rnd 2: 2 sc in ea st around  (16 sc)
Rnd 3: *1 sc in next st, 2 sc in next*, repeat from * to * around  (24 sc)
Rnd 4: *1 sc in next 2 st, 2 sc in next*, repeat from * to *  around (32 sc) fasten off color A.
Rnd 5: Join color B with a slip stitch in the next stitch, chain 2 (counts as the first hdc, hdc in ea st around (32 hdc)
Rnd 6 through 13: hdc in ea st around. (32 hdc)
use a stitch marker to hold last stitch, then in next stitch, join color A (working the heel now) with a slip stitch, chain 1

Heel wedge

Row 1: Work sc, sc, hdc, hdc, dc, dc, dc, dc, hdc, hdc, sc, sc. Ch 1, turn.
Row 2: Work sc, hdc, hdc, dc, dc, trc, trc, dc, dc, hdc, hdc, sc. Ch 1, turn.
Row 3: Work sc, sc, hdc, hdc, dc, dc, dc, dc, hdc, hdc, sc, sc, fasten off color A.

Body of stocking

Rnd 14: Pick up the loop you saved with the stitch marker, and hdc around placing a hdc in each row of heel for a total of 38 hdc.
Rnd 15 through 28: hdc in each st around. (38 hdc) 
Rnd 29: Sc in next st and in each st around.(38 sc) sl st in next st.
Fasten off color B.


Cuff:

Row 30: Working in the front loops only for this round only, join color A with a sl st, ch 1, sc in same st as joining and in each st around. (38 sc) Join with a sl st, ch 2. Turn. (You will be working in both loops from now on)
Row 31: Hdc in each st around  (38 hdc) Join with a sl st, ch 2, turn.
Row 32: Hdc in each st around, (38 hdc) Join with a sl st, ch 1, turn
Row 33: sc in first st, *sk one hdc, work 5 dc in next hdc, sk one hdc, sc in next hdc,* repeat from * to * around.Join with a sl st in first sc. (10 sc, 50 dc) Fasten off, leaving a long end to tack cuff down if desired. Tack cuff down.

Finishing Edge with Hanging Loop

Row 34: Fold the stocking flat to locate the back of the stocking. Join color of your choice (I used a small amount of gold metallic thread or a fancy metallic yarn as an accent for this round, but you may want to use color A or even color B) in the blo of the last round of the stocking with a sl st, ch 1, sc in same st, sc in each blo st around (38 sc) Ch 15, join with a sl st to first st, ch 1, DO NOT TURN.
Row 35: sc in each st around. (38 sc) Sc 25  st in the chain, then join with a sl st in the first st. Fasten off. Weave in all ends.


Same Pattern, Made With Red Heart Yarns and a size E Hook


All three stockings I have made using this pattern:


Posted by pa/ChloesCorner at 10:22 AM CDT
Post Comment | Permalink | Share This Post
Wednesday, 10 October 2007
Welcome To My New Blog!
Mood:  celebratory
Topic: Crochet Patterns

   I know, I know, just what I need, another blog! But this one will be different for me. You see, I have my free crochet patterns scattered all over the internet, and even I have trouble keeping track of which one is where. I've had the brilliant idea of stashing them all in one central place, hence this new blog. 

      I'm not feeling particularly brilliant today, so I'm going to start of with one of my tried and true patterns: OldBagLadys Fish Bag Pattern. This was and is, originally published on the crochetville.org forum.


OldBagLady's Fish Bag

Materials Used:
Worsted Weight Yarn in red, black and white.
(I used: Caron Simply Soft in Rubine Red, Black, and White for mine.)
F Hook (3.75mm)
Tapestry needle for sewing parts together

Bag - Body of the fish:

With red yarn: Chain 2, 6 sc in second chain from the hook. Join with a slip stitch, chain one. Do not turn.

(Note, you will join each row in the same way.)

Row 1.) sc in each st (6)
Row 2.) 2 sc in each st(12)
Row 3.) sc in each st (12)
Row 4.) *sc in first st, inc; repeat from * around (18)
Row 5.) sc in each st (18)
Row 6.) * sc in next 2 sc, inc; repeat from * around (24)
Row 7.) sc in each st (24)
Row 8.) * sc in next 3 sc, inc; repeat from * around
Row 9.) sc in each st
Row 10.) * sc in next 4 sc, inc; repeat from * around
Row 11.) sc in each st
Row 12.) * sc in next 5 sc, inc; repeat from * around
Row 13.) sc in each st
Row 14.) * sc in next 6 sc, inc; repeat from * around
Row 15.) sc in each st
Row 16.) * sc in next 5 sc, inc; repeat from * around
Row 17.) sc in each st
Row 18.) * sc in next 6 sc, inc; repeat from * around. Fasten off.
Row 19.) Join black in beginning st, sc in each st. FO
Row 20.) Join white in beginning st, * sc in next 5 sc, inc; repeat from * around
Row 21.) sc in each st
Row 22.) * sc in next 6 sc, inc; repeat from * around
Row 23.) sc in each st. FO
Row 24.) Join black in beginning st, * sc in next 5 sc, inc; repeat from * around. FO
Row 25.)Join red in beginning st, sc in each st
Row 26.) * sc in next 6 sc, inc; repeat from * around
Row 27.) sc in each st. FO
Row 28.) Join black in beginning st, sc in each st. FO
Row 29.) Join white in beginning st, sc in each st
Row 30 - 34.) sc in each st
Row 35.) sc in each st FO
Row 36.) Join black in beginning st, sc in each st. FO
Row 37.) Join red in beginning st, sc in each st.
Row 38 - 43.) sc in each st
Row 44.) sc in each st. At the end of this row, after joining, chain 3.
Row 45.) double crochet (dc) in first st, chain one, skip the next st, *dc in next, chain one, skip the next st; repeat from * around. Join, chain 1.
Row 46.) sc in each st and chain 1 space around. FO Weave in ends.
This completes the body of the bag.

Tail

Row 1) With white, ch 7, join to form a ring, chain 3. In ring work 2 dc, ch
3, (3 dc, ch 3) 7 times, join. (8-3 dc groups)
Row 2: Slip st to next ch-3 sp, ch 3, (2 dc, ch 2, 3 dc) in same sp, (3 dc,
ch 2, 3 dc) in each ch-3 sp around, join; FO
Row 3: Join black with slip st in any ch-2 sp, ch 3, (2 dc, ch 2, 3 dc) in same
sp, *ch 2, skip next 3 dc, sc in sp before next dc, ch 2, (3 dc, ch 2, 3 dc)
in next ch-2 sp (shell made); rep from * around ending with slip st to beg
ch-3; FO
Rnd 4: Join red with slip st in ch-2 sp of any shell, ch 3, in same sp
work (3 dc, picot, 4 dc); * ch 5, sc in next sc, ch 5, (4 dc, picot, 4 dc)
all in ch-2 sp of next shell; rep from * around ending with slip st in beg
ch-3; FO Weave in ends.

Fold bag flat with joining seam running along the bottom edge of bag. (I hope this makes sense)

Now comes the tricky part, fold tail in half, and sew it to the bottom of the fish bag with white yarn. It will form around the bottom of the fish. You might want to pin in it place before sewing to make sure.

Bottom Fins (Make 2)

With red yarn, ch 5. sc in second chain from hook and each chain across. Chain 3, turn. (4)
Row 2.) dc inc, dc in each stitch. (5)
Row 3.) dc inc, dc in next 3 stitches, dc inc. Chain 4, turn. (7)
Row 4.) Treble crochet in first 2 st, dc in the next 2 st, half double crochet in next st, sc in next, and slip st in last. Fasten off.

Eyes (Make 2)

With black, chain 2. Make 8 sc in the second chain from hook, join with slip st, FO leaving a long tail for sewing. Set aside.

With white, chain 2. Make 8 sc in second chain from hook.
Row 1.) 2 sc in each stitch around.
Row 2) *sc in first st, inc; repeat from * around. FO. Center the black ring you made and sew into place.
Row 3.) Join red yarn, and sc in each st around.
Row 4.) *Dec 1 st, sc; repeat from * around
Row 5) *Dec 1 st; repeat from * around Fasten off leaving long tail for sewing.

Top Fin

Working along the top edge of the bag, attatch red yarn with a slip stitch in the 15th row from the open edge or mouth of the bag. Do 21 sc along top of the bag. Chain 1, turn.
Row 2.) Skip the first stitch, sc in next st, sc across. Chain 1 turn
Row 3.) Skip the first stitch, sc in next 3, hdc in next 2, dd in next 3 st, hdc in next 2, sc in next 2, hdc in next 2 st, dc in next 2 st, hdc in next, sc in next and slip st in last st. Chain one, turn.
Row 4.) skip first stitch, sc in 2 st, hdc, dc in next st, 3 tdc in next st, hdc, sc, sl st, hdc in next, sk next, dc in next st, 3 tdc in next st, tdc in next 2 st, dc in next, hdc, sc, slip, slip, FO. Weave in ends.

Position Bottom fins and eyes and sew into place on bag.

Drawstring

Chain 125, slip st in second chain from hook and in each chain across. FO. Weave drawstring in and out of the dc row along top of fish. Tie ends together in a knot, or sew together as I did.


Posted by pa/ChloesCorner at 12:26 PM CDT
Updated: Wednesday, 10 October 2007 12:39 PM CDT
Post Comment | View Comments (8) | Permalink | Share This Post

Newer | Latest | Older