HOW TO MAKE A GLITTER NAME
*I am using Ulead PhotoImpact for this tutorial. But you can accomplish this in PhotoShop as well, with nearly the same instructions* You will however HAVE to have a GIF animator to finish this.
This tutorial will seem long as there are so many different things you can do! I will try to keep it as simple as possible and use as many illustrations as I can to aid you.
1A. Open the image you wish to use for your name. A transparent background is best. So if the image is a jpg or bmp you may need to erase the background. PhotoImpacts eraser is not as easy as photoshops in my opinion so I still use my PS for that.

I already have erased the background for the spiderman image I will use so I will show you the eraser(s) using another image.
Regardless of which program you use you will need to make sure your image is in RGB mode.
HOW TO CHANGE MODE IN PHOTOSHOP

HOW TO CHANGE MODE IN PHOTOIMPACT

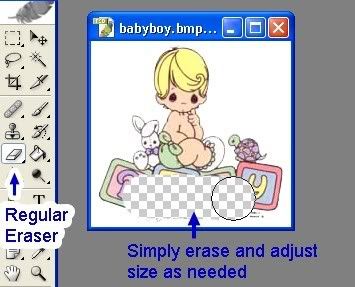
1B. Erase your background, my fave way (an easiest way) is to use the magic eraser, though if you have white in your image or a light color that blends in the background you may have to use the regular eraser and slowly work your way around the image resizing your brush as needed until the background is gone.
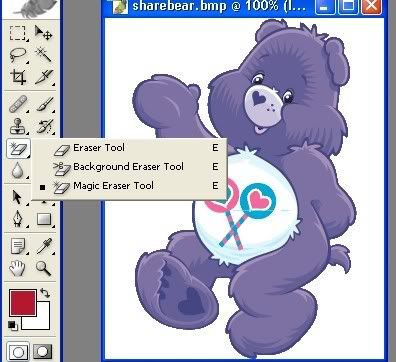
2A. If using magic eraser, simply click once in an open area of your background.
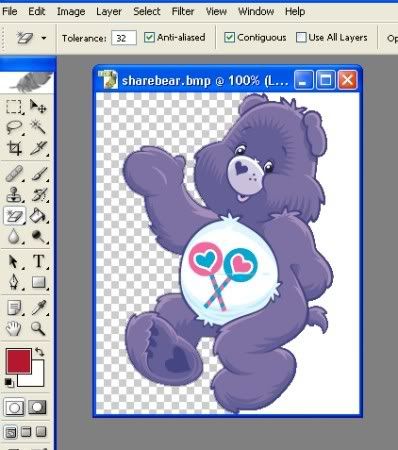
You will notice not all the background went away, this happens if part of your image is "blocking" the way, simply click in another open area where your background still is and it will go away. When you are done click SAVE AS and save it as a GIF image. This is important as if you save in any other mode the background will REappear! (you may save as psd if you wish as this will keep the background transparent as well).

2B. If the magic eraser is taking away part of your image, click undo and use the regular eraser.
3. Go back and open your newly transparent image, if it wasn't already transparent. (you may use color backgrounds and leave them alone and skip that step, however transparent are a lot funner to have! :) ).
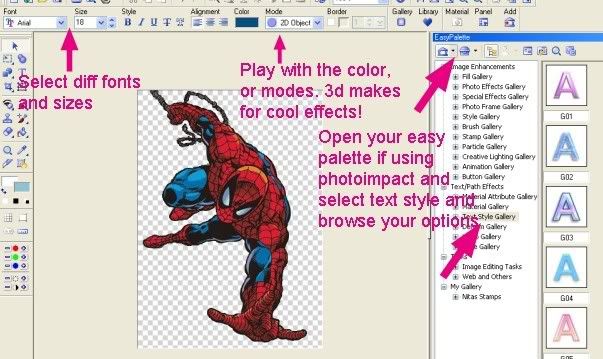
4. Now comes the fun! Using your text tool add your name and mess with it as you want! Have fun with it! PhotoImpact has some neat text presets that you can adjust as you wish that can create some cool effects! I also use http://www.fontfreak.com for different fun/funky fonts! Its totally free and super easy to use!
This is where the variety comes in! I will show you different techniques to do your names in.
5. Next you will need to duplicate your wording 2 times (so that you have 3 of it).
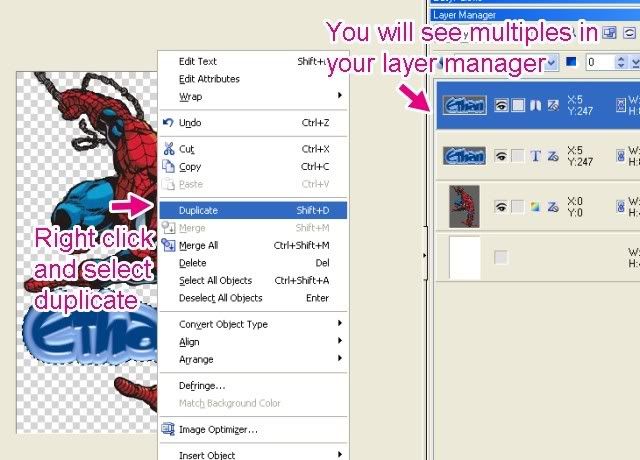
ALL WORDING IS GLITTERIZED: I will show you the main way to glitterize your text. At the end I will show you the variations you can do.
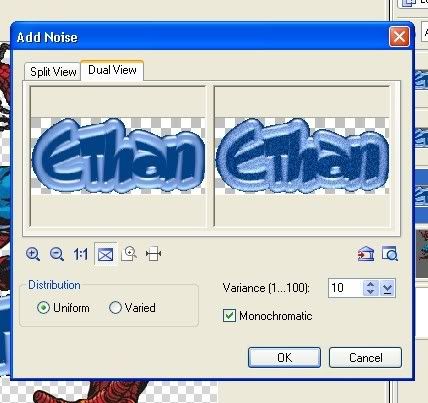
* With first layer selected, go to ADD NOISE. Select a noise level of 10 and make sure the monochromatic box is checked!(you can experiment if you like, I personally like starting at 10 and doing incriments of 5)
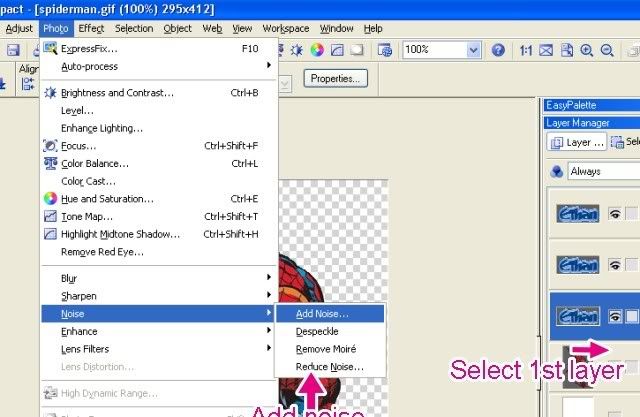
You will not see a change as your other 2 layers are visible, don't panic, it DID change!
* Now select your 2nd layer, and repeat steps, only this time increase your noise by 5 (or 10 if you prefer), so if I were doing this I'd do 15.
Repeat for layer 3 and choose 20 (increase by 5 or 10 again).
* Deselect your text by hitting return (or you can right click and go down to deselect).
* Save your picture as PSD
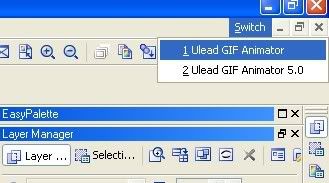
6. Now you will need to open your GIF animator, you can do it manually or click your SWITCH button on the top right of your photoimpact.
7. Click the "Open an existing image file" button on the pop up box that displays when Animator is started, or just go to file and select open.
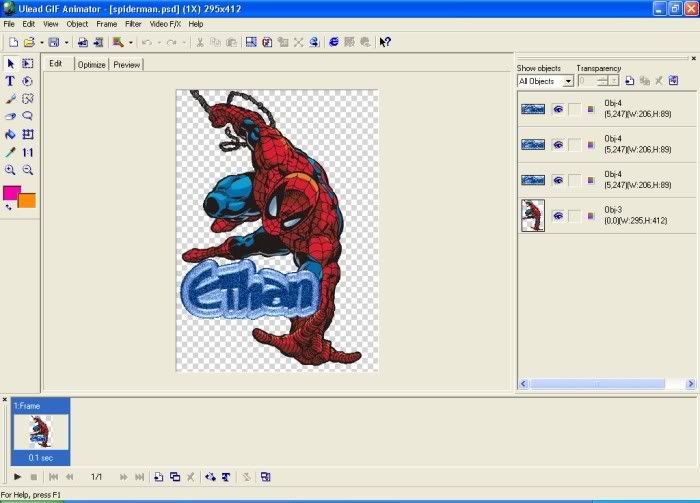
8. Locate your PSD image you just created and open it. Your screen will now look like this:
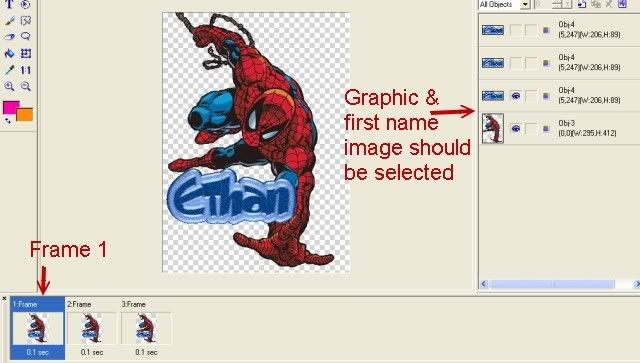
9. Duplicate your frame two times.

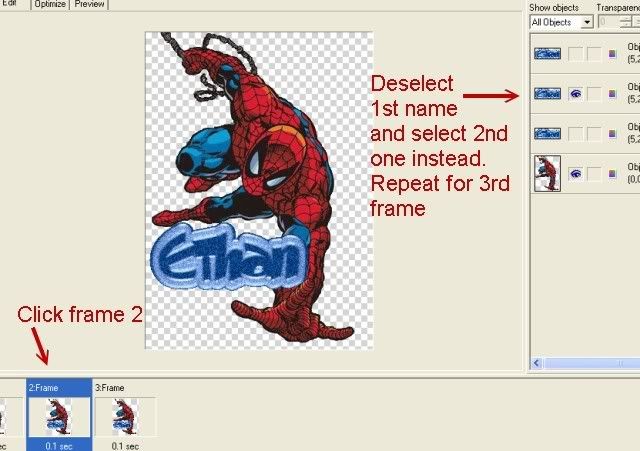
10. Now you will adjust each frame. Your first frame should show the first name image and your spiderman selected. Click on your second frame and deselect the first name image and select the second one. Repeat for third frame.
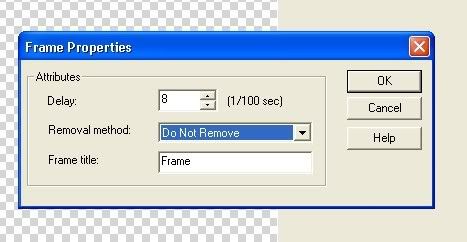
11. Select all frames, click one frame- hold down ctrl- and select other frames with holding ctrl. Right click and select Properties.
12. Change you delay and removal method. For just glittery names I choose delay of ZERO and removal method: do not remove.
13. Click PREVIEW tab to see if you like how your image is animated. Fine tune till you are happy with it.
14. Finally click back to your EDIT tab and go to FILE > Optimization Wizard. Click the "Optimize using a preset" button. I usually will then click the drop down arrow and select "Current optimization settings".
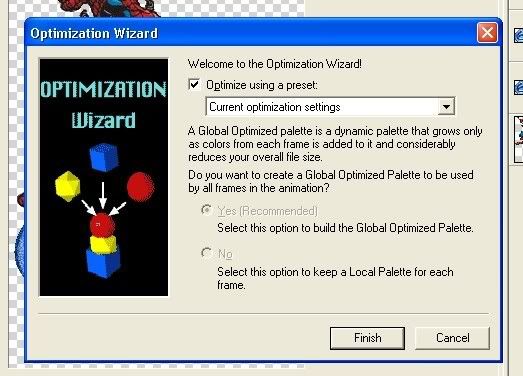
15. Click the finish button. You will see the importance of this step in the next screen that pops up!
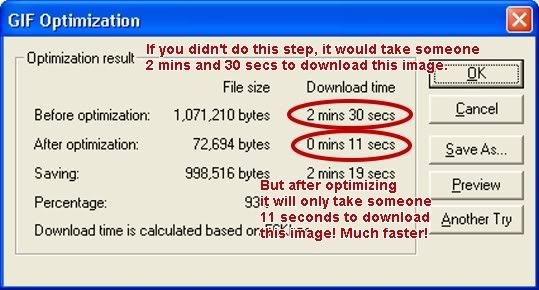
16. You may click the preview button in the above screen to make sure it will not alter the quality of your image. When done click ok. Now click the preview tab one more time.
17. Right click on your animated image and select SAVE AS. Save this where ever you want on your computer. You MUST make sure you are saving your image as a GIF image or it will not stay animated!!
Your image should look like this:
It seems like a TON to do, but once you get the hang of it it flies right by! I can usually create a name in a matter of 1 to 2 minutes!
Now that you have seen the basics, I will show you a couple variations you can do!
Let's say you want it to just sparkle around the name and have the name solid...
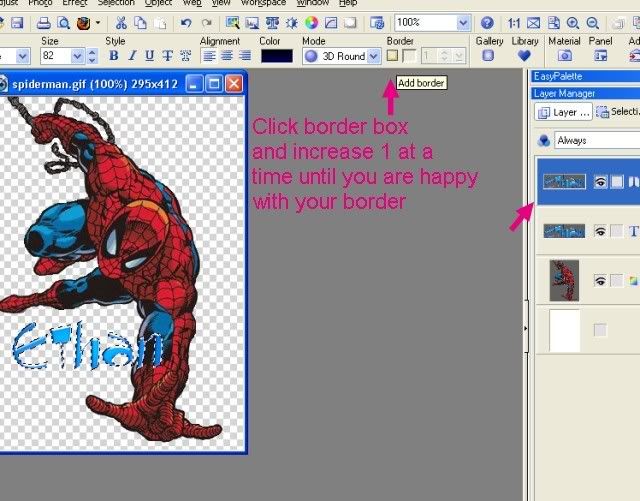
1. After you have created your first name, instead of just going right ahead and duplicating twice, just duplicate it once. Click on this 2nd layer and add a border to this text only!
2. Now duplicate this bordered text 2 times so that you have 3.
3. Click each layer of bordered text and add your noise.
4. When done, click your text only (no border) and drag it to the very top layer.
5. When selecting layers in GIF animator be sure to click no border text for each frame. That is the only difference between all glitter and border glittered.
Your image should look like this:
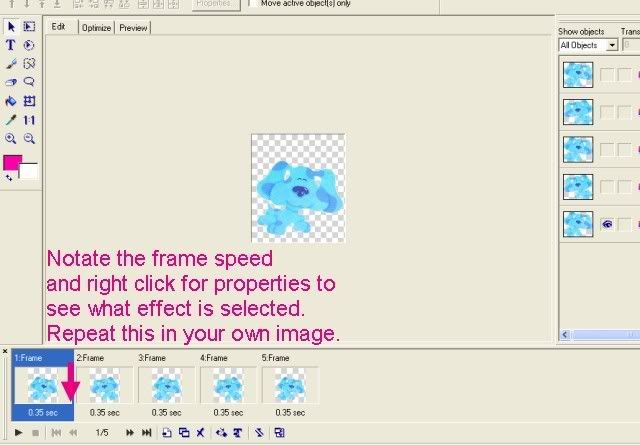
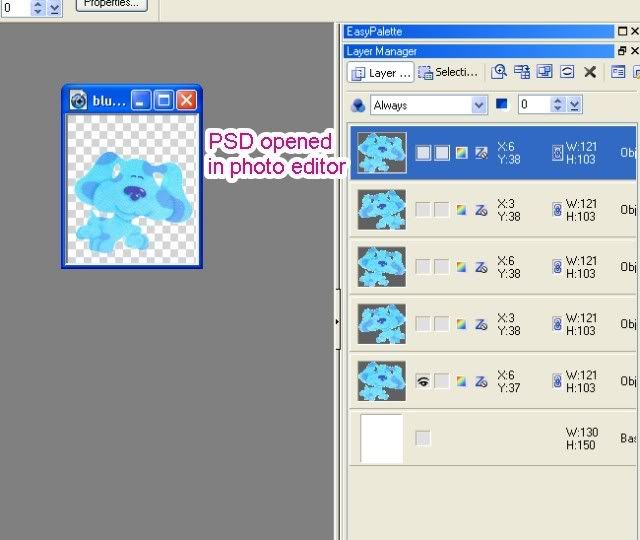
You can animate objects by gradually changing your image slightly and then opening as many frames as you graduated your image and then selecting and deselecting as needed. An easy way to get use to that is to find images you like animated and open them in gif animator, it will show you all the steps it took to create it. Go to FILE and SAVE AS and select as PSD format. Open this image in your photo editing software and add your text and then save it as a psd of its own and open that psd in your animator. I usually notate what effects they had it set for. IE frame speed and if it is TO BACKGROUND, DO NOT REMOVE, SMART etc.
For example: animated BLUE
Click your text tool and add your text.
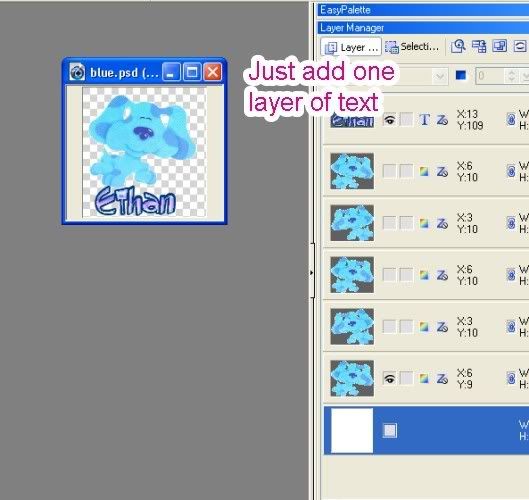
Save this image as your own psd and open it in the gif animator. Repeat the previous steps but ensure to select the text layer for each frame. Click preview and you should have an image like this:
I hope this tutorial helped you. If you have any questions please feel free to ask.
I would like to note that you can delete your background for your pics by using the mask mode, but that is more complex. It is nice though because it helps create a pic with no jagged edges and won't have slight white around it on a dark background.
For example, look at the animated blue image as it is finished. You see a faint white line around blue? Whoever created this image did so with the eraser. But look at this clean edge of a pic I did yesterday using the mask modes.
To learn about mask modes, I wish I could share the link to the tutorial I used to learn masks but I can't, it is apart of a workshop I am doing and we are not allowed to share links with public. If you wish to learn more about your PHOTOIMPACT you may join the workshop for free and learn all the neat things I have using this program. Beginners Workshop for PhotoImpact
:) Here is a tutorial on using masks mode to erase your background and keep only the image desired
Using Mask Mode to Erase
Email
Home

