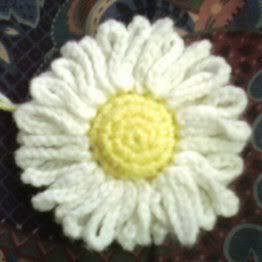
~Ooopsie Daisy Beer Cap Fridgie~
You will need:
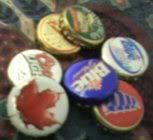
Beer Caps (beer flavour doesn’t really matter, lol)
Small amount of Yellow and Black Worsted Weight Yarn
G crochet hook
Large needle for weaving ends in.
Instructions:
Note: Work in rounds, do not join, mark first stitch in each row with a stitch marker, safety pin or wrong colour yarn.
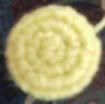
Row 1. Starting in the front of the piece, ch 2, 5 sc in second ch from hook. (5)
Row 2. 2 sc in each stitch. (10)
Row 3. 2 sc in first stitch, sc in next stitch, continue around. (15)
Row 4. 2 sc in first stitch, sc in next 2 stitches, continue around. (20)
Row 5. Working in the back loop only, sc in each stitch around. (20)
Row 6. Sc dec over the next 2 stitches, 10 times. (10) NOTE: A little more than halfway thru this row, place bottle cap into piece, with the flat side facing the front, and continue working with it in place.
Row 7. Sc decrease over next 2 stitches around, 3 more times, slip stitch to next stitch, pull yarn thru to finish off, sew to close and secure and weave in end.
Petals:
With white, attach anywhere in a remaining unworked front loop from row 4. Chain 1, sc in same stitch to secure. Chain 15, sl st in same stitch as joining, chain 15. Sl st in next loop stitch, chain 15, sl st in same loop stitch. Chain 15, sl st in next loop stitch, chain 15, sl st in same loop stitch. Continue in the same fashion all the way around, join to first sc. Finish off, weave in end.
Glue a strong magnet on the back.
Don't forget to check out my other FREE Beer Cap Patterns Below!!
hugss to all!!
~ MORE Beer Cap Patterns! ~
Other FREE Crochet Patterns!
FREE Plastic Canvas Patterns!
My HomePage

Email: prpl_smok@yahoo.com

