
Rebuild Summary
Home Links Email us Gallery Bikes For Sale
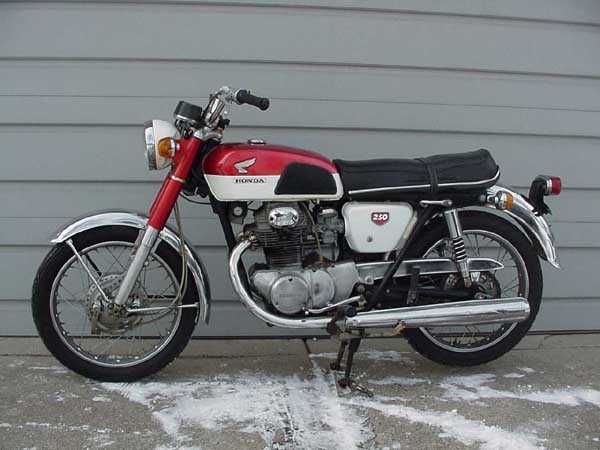
1968
Honda CB250KO Supersport
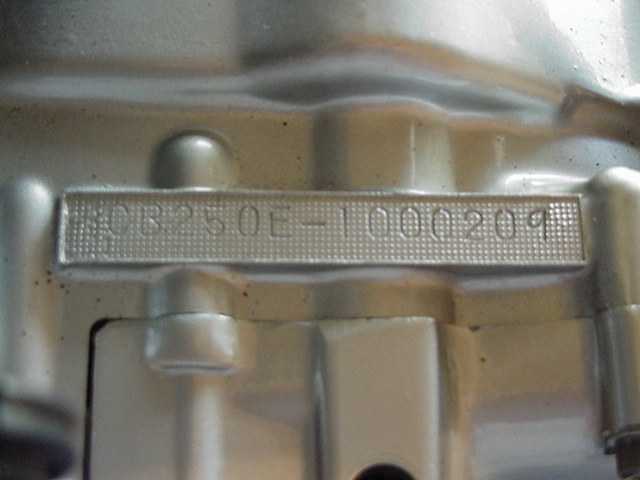
Frame #1000068 Engine #1000209
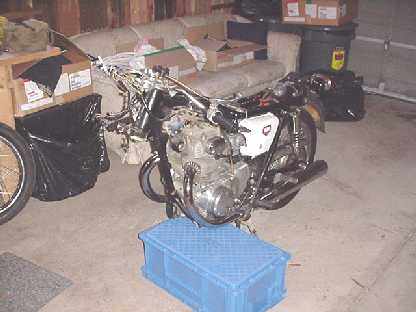
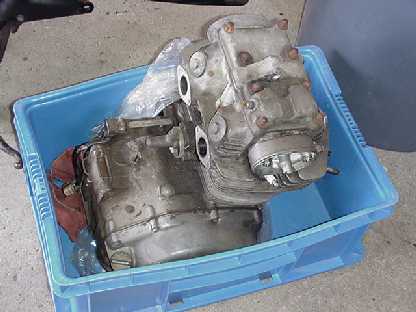
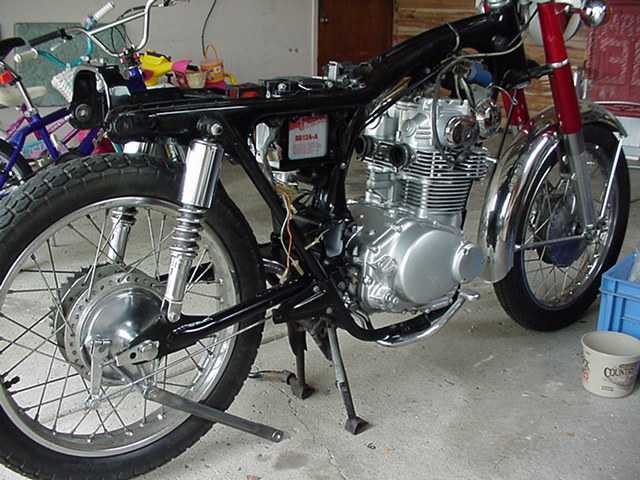
This is the bike as it was when I received it.
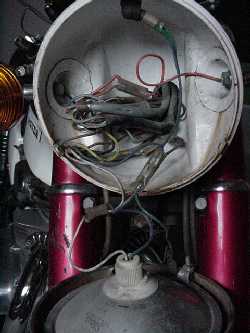
Upon initial teardown many observations were made. The inside of the headlight bucket indicated that rust would not be as big an issue as anticipated. Other items that are normally affected by rust such as the exhaust system, fuel tank, turn signal indicators and various other chrome bits and pieces also exhibited the same condition.
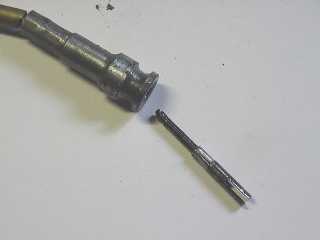
 Rust
isn’t the only influence to necessitate a complete teardown of a motorcycle. A
few other items on the bike showed abuse or excessive wear indicating neglect,
which is one of the worst enemies of a motorcycle. This tachometer cable snapped
in the sheath and the previous owner probably thought it was a faulty tachometer
and kept driving it that way. No telling how many miles were put on it in this
condition.
Rust
isn’t the only influence to necessitate a complete teardown of a motorcycle. A
few other items on the bike showed abuse or excessive wear indicating neglect,
which is one of the worst enemies of a motorcycle. This tachometer cable snapped
in the sheath and the previous owner probably thought it was a faulty tachometer
and kept driving it that way. No telling how many miles were put on it in this
condition.
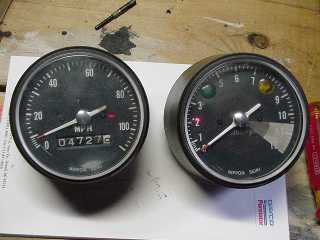
The Speedo/Tach set indicated signs of long term neglect and fading from the sun. The tach did in fact work, albeit not very well, as the needle had a tendency to bounce around every now and then. The speedo did in fact work and as illustrated below, the last recorded “actual” mileage was 4727.9 “miles per hour”. Note; the original correct speedometer for this bike would indicate kilometers per hour and not miles. The correct speedo was found (NOS) in the U.K. at David Silver Spares for a reasonable cost replacing the unit below as well as a NOS tach.
 Old
Old
New
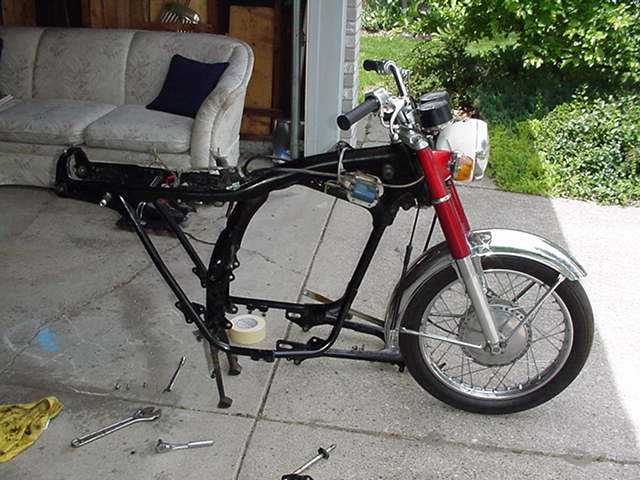
Once the list of replaceable parts was started, the process of really taking the bike apart began. At first, I used to trust a sturdy plastic box to place the bike on once the front wheel and forks were removed. Now I hang the front end of the motorcycle from the ceiling enabling me to maneuver myself around the bike.
 After
the bike is secured most all the remaining parts can be removed except the rear
end. Be sure to label each generic part as to where it came from and also try to
keep all parts in a container so the smaller assemblies can all stay together. I
use large old plastic butter bowls because they have lids and they’re free. I
write on the bowl what’s inside and put it on the shelf until I’m ready to
use it again. You may want to only do one bike at a time or you’ll find
there’s a lot of butter bowls on the shelf and you’ll need a small library
to keep track of them.
After
the bike is secured most all the remaining parts can be removed except the rear
end. Be sure to label each generic part as to where it came from and also try to
keep all parts in a container so the smaller assemblies can all stay together. I
use large old plastic butter bowls because they have lids and they’re free. I
write on the bowl what’s inside and put it on the shelf until I’m ready to
use it again. You may want to only do one bike at a time or you’ll find
there’s a lot of butter bowls on the shelf and you’ll need a small library
to keep track of them.
Once
the fork tubes were removed, further inspection revealed that they needed
replacing and once again, David Silver Spares in the U.K. came through for me.
Rust and a minor incident with an immovable object were the culprits of the
damage this time. The dents although they were small, allowed the rust to form
under the cracked paint and eat through the metal. Long rides also warmed the
fork tubes inviting condensation, which feeds rust.
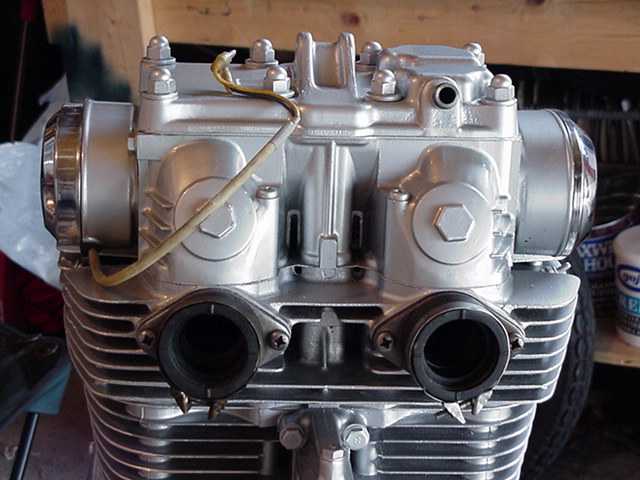
 Once
the bike was stripped, I removed the engine and scrubbed and scrubbed and
scrubbed for days and at one point I almost decided to polish the engine instead
of paint it. Sometimes I wonder if I did the right thing. The good thing is I
can always take the engine back out and polish it if I want to. But if I decide
to go that route, I will have to cover the engine with a paint stripper or paint
remover of some kind and I don’t want to do that again. You see, I learned a
lot about painting Honda engines during this process.
First of all – make sure you have a clean dry surface to paint.
Secondly, you must determine if what you want is a “show only” paint or a
paint job you can drive the bike around with and still look cool. I chose the
latter for several reasons. I like to ride. And I’m not interested in placing
this bike in a glass case. And the paint job came out so awesome that I can't
tell the difference between original and ...my paint job!
Once
the bike was stripped, I removed the engine and scrubbed and scrubbed and
scrubbed for days and at one point I almost decided to polish the engine instead
of paint it. Sometimes I wonder if I did the right thing. The good thing is I
can always take the engine back out and polish it if I want to. But if I decide
to go that route, I will have to cover the engine with a paint stripper or paint
remover of some kind and I don’t want to do that again. You see, I learned a
lot about painting Honda engines during this process.
First of all – make sure you have a clean dry surface to paint.
Secondly, you must determine if what you want is a “show only” paint or a
paint job you can drive the bike around with and still look cool. I chose the
latter for several reasons. I like to ride. And I’m not interested in placing
this bike in a glass case. And the paint job came out so awesome that I can't
tell the difference between original and ...my paint job!
 Before
After
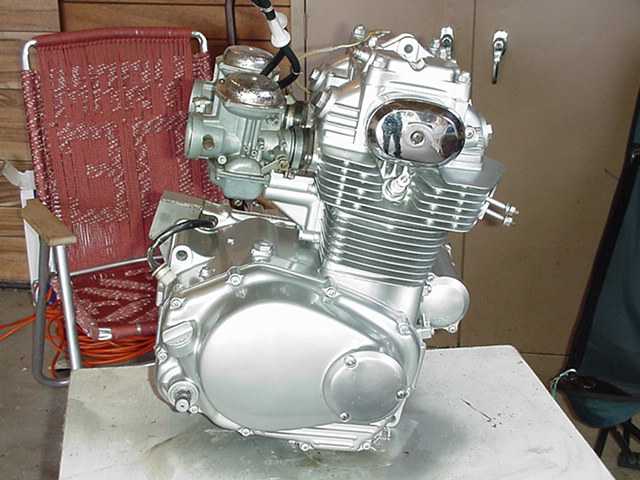
The really great thing about painting your engine is that it doesn’t have to be expensive. I used off-the-shelf paints from my local grocery store. I made sure that I was using the correct paints in the correct order. The closest color matched paint you can get without getting real expensive is Dupli-color Laquer T178 Grey – NOT SILVER. First after the engine was cleaned real well, I primered it and then I painted – remembering many thin coats are much better than one or two thick coats so the process took several days. Light 2000 grit sanding in between and finishing off with a clear coat.
 Another
important note when painting engine parts is you can paint cover enamel with
lacquer but you can’t cover lacquer with enamel. (Or is it the other way
around?) I started using a lacquer-based primer, then a lacquer paint and then
the lacquer clear coat over it. Yes. I clear-coated the entire engine less carbs
and exhaust. Lacquer stands up to gas better anyway
Another
important note when painting engine parts is you can paint cover enamel with
lacquer but you can’t cover lacquer with enamel. (Or is it the other way
around?) I started using a lacquer-based primer, then a lacquer paint and then
the lacquer clear coat over it. Yes. I clear-coated the entire engine less carbs
and exhaust. Lacquer stands up to gas better anyway
With
the engine painted and drying, I moved on to the rear end and complete
disassembly of the bike. Once everything is totally stripped from the frame, the
frame is powder coated. I won’t go into an explanation of that process.
But while that was being done, I took everything that was on the bike,
organized everything and started with my list again. Making sure there was a
replace list and a repair list. Most everything was on the repair list and could
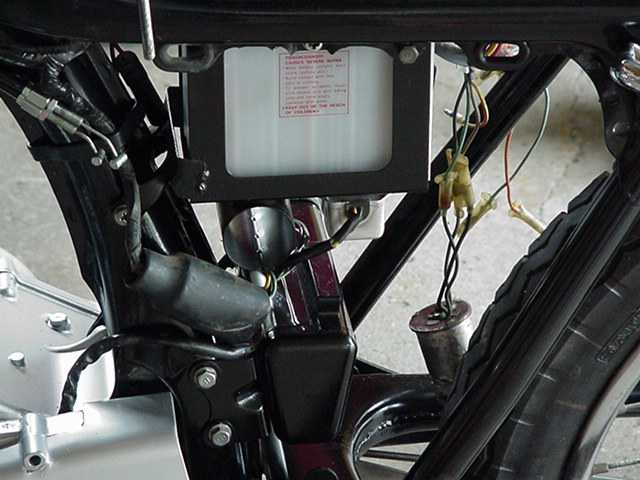
be buffed out or painted. I repainted the battery box, which was in excellent
condition and replaced all the electrical components attached to the battery
box. The hard parts to replace were the little rubber parts used to hold the
components to the box. MSC (Michigan Cycle Salvage) in Yale Mi was my first spot
to locate the much needed rubber pieces. You see, most of his inventory is
indoors so the rubber parts won’t disintegrate as fast over time!
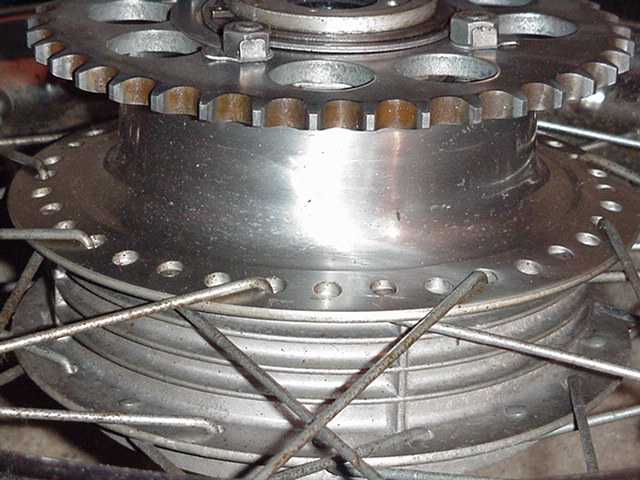
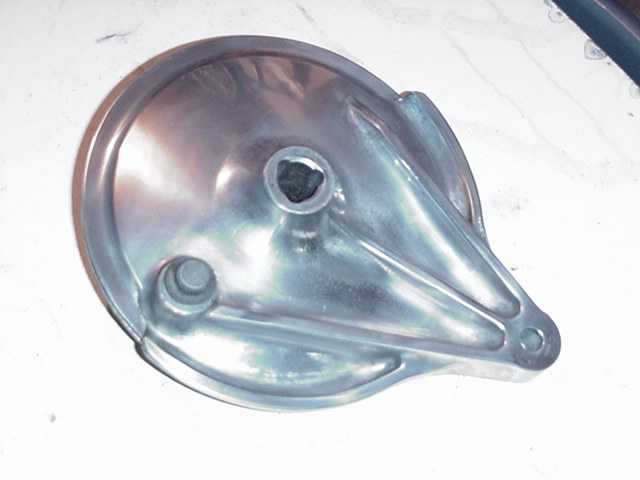
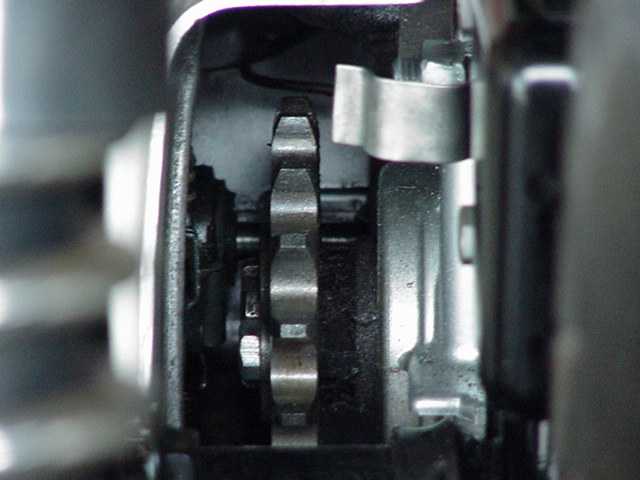
These
are some of the many items on the bike that were disassembled and polished or
rebuilt or repainted to the way it was originally or better.
My attempt to restore this bike isn’t to get it to exactly OE specs, as
it was when it left the factory, which would be virtually impossible. But my
intent is to get it as close to original again and functional with respect to
durability, reliability, and above all – the cool way it looked when it was
new.


 Once all of the necessary pieces
were polished or painted I bought hardware kits from fellow VJMC/VJMW member
Carl Askew in Australia and began to reassemble the bike. The hardest parts to
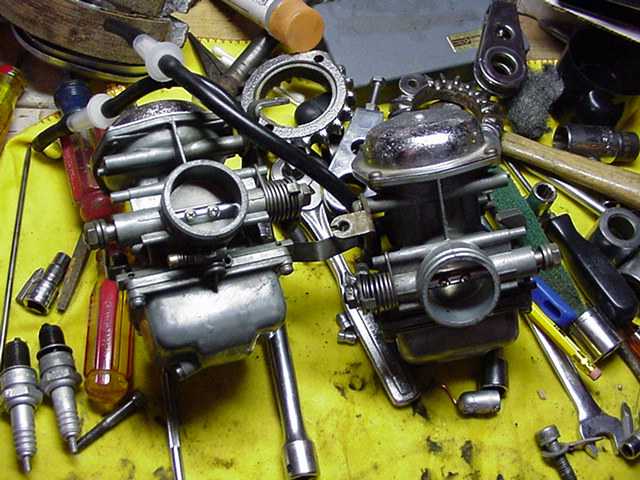
find/repair were the carburetor floats and the required rebuild kits for this
specific model. Honda first
released this bike in two models, the 250 and the infamous 350. The 350 model
was released basically all over the world but the 250 didn’t make it to the
western hemisphere because for only a few dollars more, westerners could have
the 350 which was already winning races and had a popular following. Most parts
were interchangeable except for the carb parts, front and rear fenders and a few
electrical components. The carbs on this specific model were also Keihin’s but
these two in particular, being on an early production model were basically
prototypes and had one of a kind parts inside. The floats themselves weren’t
exactly in the best condition as I found out later. They looked shiny but had
very small cracks in the floats so they would repeatedly fill with fuel and shut
the bike down.
Once all of the necessary pieces
were polished or painted I bought hardware kits from fellow VJMC/VJMW member
Carl Askew in Australia and began to reassemble the bike. The hardest parts to
find/repair were the carburetor floats and the required rebuild kits for this
specific model. Honda first
released this bike in two models, the 250 and the infamous 350. The 350 model
was released basically all over the world but the 250 didn’t make it to the
western hemisphere because for only a few dollars more, westerners could have
the 350 which was already winning races and had a popular following. Most parts
were interchangeable except for the carb parts, front and rear fenders and a few
electrical components. The carbs on this specific model were also Keihin’s but
these two in particular, being on an early production model were basically
prototypes and had one of a kind parts inside. The floats themselves weren’t
exactly in the best condition as I found out later. They looked shiny but had
very small cracks in the floats so they would repeatedly fill with fuel and shut
the bike down.
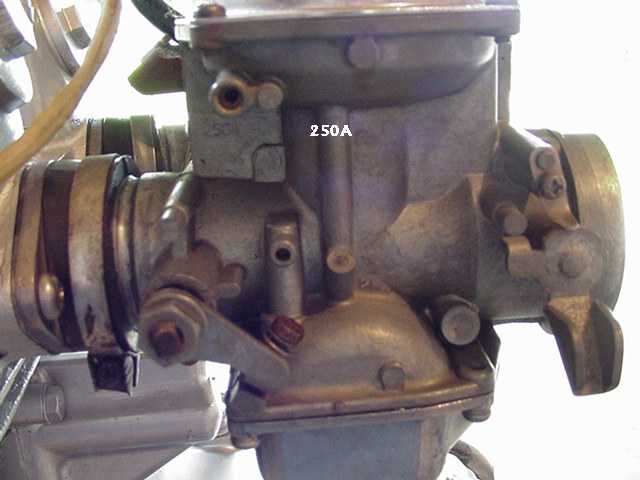
I had purchased several “sets” of carbs for their parts but later found that were not compatible or interchangeable with the model carbs I had. The model carbs used on the CB250, this one in particular state “250A” on the side of the carb body. Assuming from the early production number and the basic design and internal fabrication of the carbs themselves lead me to believe that these are indeed prototypes. Compared to the other carbs I have, which are production models, these carbs have what seem to be hand drilled channels or ports, the floats are hand soldered together, the inside top of the diaphragm covers have a machined brass guide for the springs that riveted to the cap by hand. Grind marks from a small grinder are evident throughout the inside of the carb bodies as well.

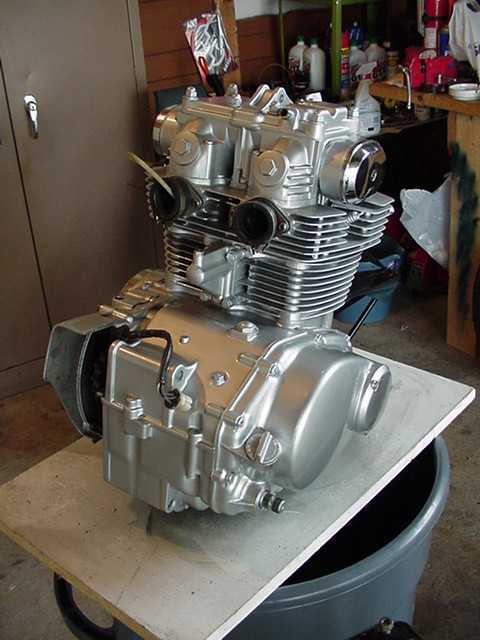
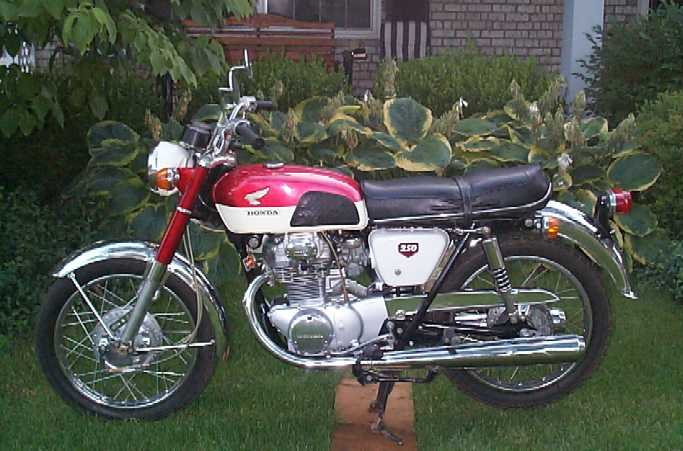
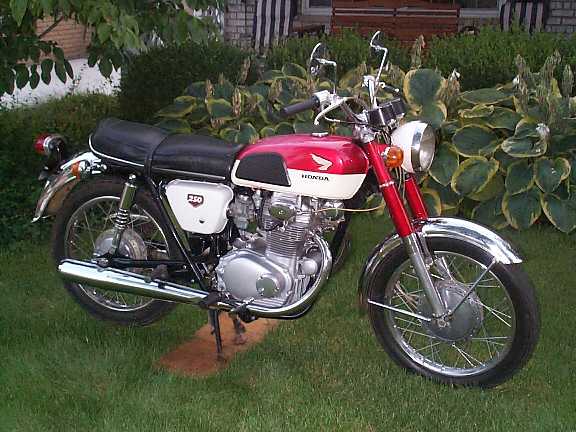
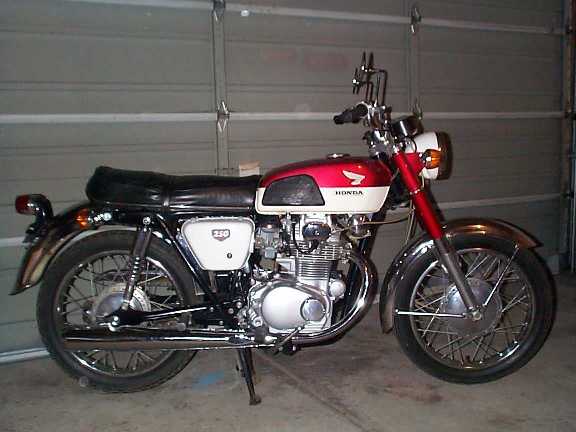
 Once
all the parts came together and the bike was completely assembled, it looked as
beautiful as I thought it would. It still needs work, like the tank could be
repainted or the seat recovered but the seat and tank are in great condition
considering that they are both original and there are no dents or scratches in
the tank and no tears in the seat.
Once
all the parts came together and the bike was completely assembled, it looked as
beautiful as I thought it would. It still needs work, like the tank could be
repainted or the seat recovered but the seat and tank are in great condition
considering that they are both original and there are no dents or scratches in
the tank and no tears in the seat.
The
tires will also be replaced, as they are original as well. I took the bike to
Mid-Ohio Vintage Motorcycle Days in July of ’00 to meet up with a bunch of my
friends in the Vintage Japanese Motorcycle Club and I had a great time. Many
people visited the bike and asked a lot of questions. The most frequent comment
I receive is “I used to have one just like it...except mine was a 350!”.
Apparently it brings back a lot of good memories for a lot of people. I
was too young to remember them when they first came out
 And
it cruises sooooo sweet too...
And
it cruises sooooo sweet too...
I would like to thank those who helped me, put up with my bs when I was frustrated (Dad, Jim, Ellis!), and laughed at me when I discovered the solutions to problems I thought were only solvable by rocket scientists.
Thanks to;
My Dad - for your endless wisdom and wit, Bill Silver (rare parts and rare info!), Ellis Holman, Sanford (Sandy) Walke IV, Larry Shultz (Awesome Grey cables!), David Silver Spares in the U.K. for really cool NOS parts at reasonable prices - w/VJMC discounts!, Michigan Cycle Salvage in Yale Mi, Macomb Power Sports for going the extra mile locating hard to find odds and ends, and all the listers on the VJMC list for putting up with my numerous posts on floats, pipes or electricals - THANK YOU! ! ! ! ! ! !
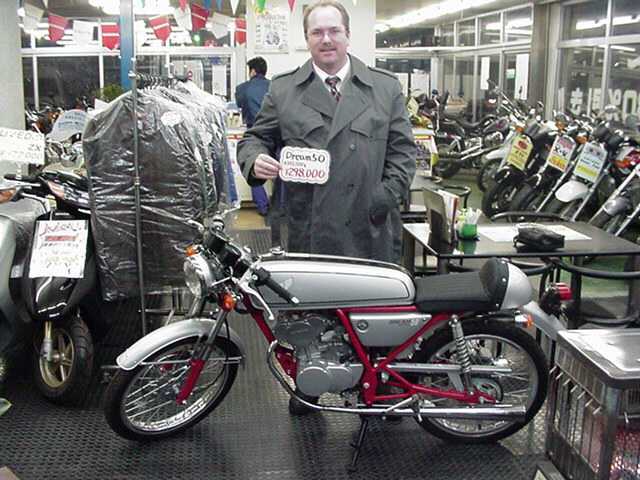
Me in Japan at a motorcycle dealer checkin' out the lil' Dream 50
Geoffrey Beach VJMC#3054 Michigan Rep '68 Honda CB250KO Supersport #68 '68 Honda CL350KO Canadian Scrambler - For Sale! '00 BMW R1200C Stiletto - For Sale! '72 Honda SL125 Project
Home Links Email us Gallery Bikes For Sale
