|
|
![]() |
|
|
|
|
|
|
Installation Instructions

To properly install your dispenser, you must use both the double-faced
tape and the entire tube of silicone adhesive. This insallation
method is perfect for ceramic tile, fiberglass, plastic tile, mirrors
or any shower wall surfaces.
Before you begin, please
read all the instructions. Test (before you apply adhesive) to determine
the best postioning for your dispenser. Units are usually on the
wall opposite the showerhead or positioned on the side wall above
the soap dish about chest height.
If you ever want to remove
the unit, slice hehind it with a knife to cute the bead of silicone:
|
|
 |
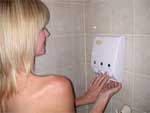
Step 1: dry surface |
|
|
Make
certain that the wall area provides a clean, dry mounting surface.
Clean with rubbing alcohol, if necessary, to remove soap file and
allow to dry before beginning installation. If mounting on molded
fiberglass, surface should be cleaned with nail polish remover to
elimiate any wax residue from the fiberglass molding process.
Installation
kit may be inside the lid. Push button at bottom, to raise the cover.
Remove all chambers from the unit.
back to top
|
|
|
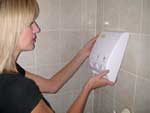
Apply
tape tabs |
|
|
Apply double-faced
tape tabs to the raised, square mounting pads on the back of the
unit and to the top of raised mounts on each side.
Run a wavy bead
of slicone down all vertical raised mounting surfaces. Please use
entire contents of tube.
back to top
|
|
|
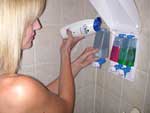
Ensure
a strong bond |
|
|
Firmly press
the unit onto the wall in desired position. Hold it for one minute,
ensuring a strong bond with tape and silicone. DO NOT FILL THE DISPENSER
FOR 24 HOURS!
back to top
|
|
|
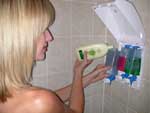
Fill
chamber |
|
|
Only after the
silicone has cured in 24 hours, can the unit support the weight
of the liquids. Fill each chamber with your choice of liquids by
rmoving the top cap.
back to top
|
|
|
Important
Tips: |
|
|
IMPORTANT: the
pumps must be primed before the liquids will flow! If the chambers
be come empty, you must re-prime the pumps.
To prime the
pumps:
- push the
pump button in
- while holding
the pump button in
- place your
finger over the spout of the pump to block the airflow up into
the pump.
- keep your
finger over the spout and release the pump button
- remove your
finger from the spout and release those steps until you have a
continous flow of liquid
The despenser
is now ready to use, to order please contact
us or check our contact details,
if you have any problem install our despenser, please check FAQ.
If you want to know more about product, please check product
section.
back to top
|
|


.jpg)
.jpg)

-01.jpg)
.jpg)
.jpg)
.jpg)
-01.jpg)
.jpg)
.jpg)
.jpg)
-01.jpg)
.jpg)
.jpg)
.jpg)