
Home
Instructions for a basic water bottle cover or pouch
Getting Started: Basic instructions for beginning crochet
Mittens!
Crocheted and Spranged Shawls for sale!
**NEW** My Crafting Blog **NEW**
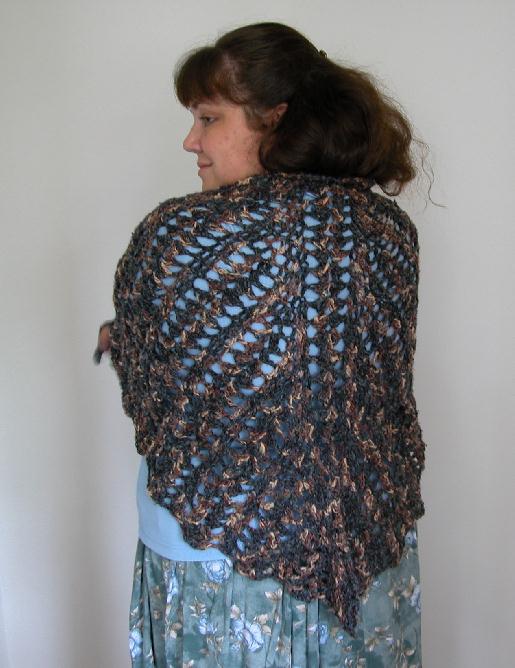
Seraphina’s Shawl
UPDATE: September 28, 2004
I just started a crafting blog. I intend to keep up with it, so that you can keep up with me! :) (More importantly, you'll understand why I've either made changes, or not made changes, as the case may be!)
https://www.angelfire.com/journal2/donisfuff/adcraftd/
And for those who've pointed it out, I've FINALLY fixed row 8, and yes, it should have been a starting V-stitch! Good catch, all of you! Keep me on my toes!
I'll try to keep up with the blog better than I do the webpage... who knows? Maybe since I have to go to the same place to do them, the blog'll keep me on track for the page. :) We can hope, right?
ANyhow, enjoy, and holler at me if you need me!
I'm off to crochet!
****************************
updated 2/12/04
I have been getting a lot of questions lately about selling these particular shawls. I'm very happy to see so many folks interested in the design, and it tickles me pink!
However, I would like to put out a gentle reminder that making this shawl is a good portion of my livelihood. I'm a homemaker, medically unable to keep a full-time job, so my designs are what pay the bills.
The pattern below is for personal or not-for-profit use only, unless you have permission from me. (Ask, I'm pretty easy!)
I really only ask two things: a) that you do not sell the shawl online, either by website or e-bay, and b)please give me credit for the design when you do sell it. I work hard to come up with my designs, even if they're adaptations.
Bottom line, you may, with permission, sell these shawls at your local craft fair, boutique, store, custom order, etc. You may also, without persmission, donate any shawls to worthy causes. You may NOT sell them online or in the Western NC area, as that is where I do most of my selling.
Thank you for your understanding!
Doni
*********************************
How I got started
When I was about 12 or so, I remember starting my collection of crochet magazines. One of them had the most beautiful shawl, but with commercial yarns, it didn’t come out nearly as nice as I wanted. I kept envisioning something totally different than the chunky, stiff fabric I was getting.
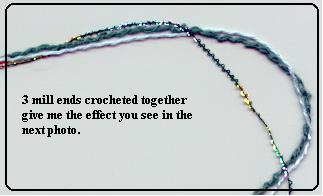
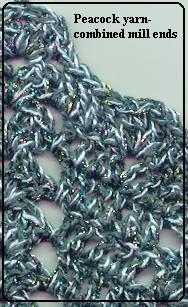
Almost two decades later, I have learned to spin, and a few other little nifty tricks to get cool yarns. I now browse mill-end bins when I can, and use several different mill ends to make truly wonderful yarns.
I also spin my own yarn when the mood hits me (basically whenever there’s a good excuse to pull out the spindle!) but I always end up using that yarn before I can gather enough to make a shawl!
So at any time, I tend to have about 4 of these shawls in various stages of completion. I’m also going to start putting the completed shawls on display online. I’ll be selling them whenever someone gives me a bid I can’t turn down.
Back to the shawl pattern!
Well, since it’s been two decades, I was amazed to be able to recall enough of the pattern to actually make the durn thing. (I have since found that old issue of the magazine, and my design is different enough not to be a copyright infringement)I know for a fact that the beginning I have developed is very different from that one.
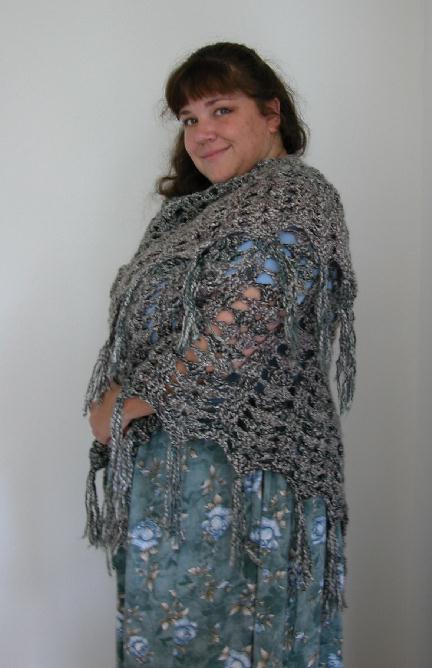
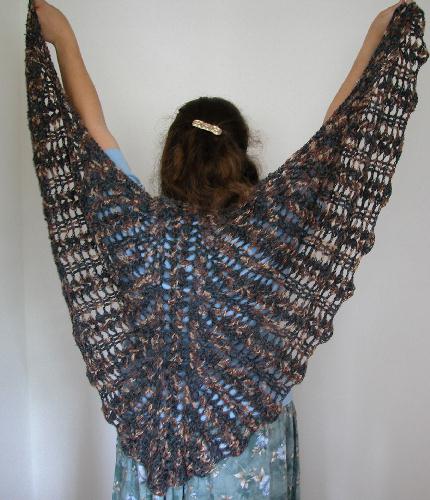
The original pattern made it a perfect triangle, like a lot of shawls. Mine uses the first several rows to increase rapidly, making this more of a ‘batwing’ that drapes so nicely over the shoulders, or over the arms and tied behind your back when working. (I wore mine like that working the Renn Fest last year, and it worked out great.)
NOTE: Once the beginning wedge is made, you will increase in the same places, in the same sequence, until the shawl is as large as you like. That’s what makes this shawl such a great little bit of hand-candy. You will increase at the beginning of each edge, and on either side of the ‘point’ in the middle, and at the end of each row. Between those two increase points on each side, the working is the same, no matter how many repititions you have. A typical shawl, finished, has a long side of about 25 shells, not counting the point.
Once you can get the sequence memorized, this goes VERY quickly.
To begin:
Chain 6, join to form a ring.
Row 1 (below): Chain 4 (counts as first dc and ch-1), dc, ch 1, (3 dc, ch 2, 3 dc)-shell made-, ch 1, dc-ch 1-dc (V-stitch made). Ch 4, turn.

Row 1
Row 2 (below): dc in same stitch as turning. (beg V-stitch made), ch 1. Dc in next ch-1 space, *dc in each of next 3 dc, dc in ch-2 space of previous shell. ch 1*, (3 dc, ch 2, 3 dc) in same ch-2 space (shell in shell at point), ch 1. Dc in same space. Repeat from * to * once, then V-stitch in 3rd chain of beg chain from previous row. 


Row 2
Row 3 (below): ch 4, dc in same stitch as turning. Ch 1, dc in next ch-1 space, dc in each of next 2 dc, (dc, ch 1, dc) in next dc, dc in each of next 2 dc, dc in next ch-1 space, ch 1, shell in shell, ch 1, dc in next ch-1 space, dc in each of next 2 dc, (dc, ch 1, dc) in next dc, dc in each of next 2 dc, dc in next ch 1 space, ch 1, (dc, ch 1, dc) in 3rd chain of starting chain from previous row.

Row 3
Row 4 (below): ch 4, dc in same st as turning,* ch 1, dc in next ch 1 space. Dc in next 3 dc, ch 1, skip next dc, (dc, ch 2, dc)in ch-1 space of v-stitch of previous row, ch 1, dc in next 3 dc, dc in ch-1 space. Ch 1*, shell in shell, repeat from * to * once. V-stitch in 3rd chain of beginning ch from previous row.

Row 4
Row 5 (below): ch 4, dc in same stitch as turning. * ch 1, dc in ch-1 space, dc in next 4 dc, ch-1, skip next st. work (2 dc, ch 1, 2 dc) in ch-2 space of V-stitch of previous row. Ch 1, skip next dc, dc in each of next 4 dc, dc in ch-1 space. Ch1*, shell in shell, repeat from * to * once.

Row 5
Row 6 (below): ch 4, dc in same stitch as joining, *ch 1, dc in ch-1 space, dc in next 5 dc, skip next 2 dc, ch 1, work (2dc, ch 2, 2dc) in ch 1 space of V-stitch of previous row, ch 1, skip next dc, dc in each of next 5 dc, dc in ch-1 space, ch 1 *, shell in shell, repeat from * to * once.

Row 6

Row 7
(sequence row 1) Row 7 (above): ch 4, dc in same stitch as turning, * ch 1, dc in ch-1 space, dc in each of next 2 dc, (dc, ch 1, dc) in next dc {Note: this V-stitch starts a new shell sequence}. Dc in each of next 3 dc (from this point on, you will always dc in these dc, never increasing. This will become the 3-dc rib between shells), skip next 2 dc, ch 1, make (3dc, ch 2, 3 dc)shell in ch-2 space of v-stitch of previous row (NOTE: from this point on, you will make a [3dc, ch 2, 3 dc] shell-in-shell in this shell.) Ch 1, dc in each of next 3 dc (again, from this point on, you will always dc in these dc, never increasing. This will become the 3-dc rib between shells.) (dc, ch 1, dc) in next dc. Dc in each of next 2 dc, dc in ch-1 space.* Shell in shell at point. Repeat from * to * to end of row.

Row 8
(sequence row 2) Row 8: ch 4, dc in same stitch as turning. *ch1, dc inch-1 space, dc in each of next 3 dc, skip next dc, ch 1, (dc, ch 2, dc) in V-stitch. Ch 1, dc in each of next 3 dc (you will dc in each of next 3 dc here from now on), shell in shell, dc in each of next 3 dc, ch 1, (dc, ch 2, dc) in V-stitch, ch 1, dc in each of next 3 dc, dc in ch-1 space.* Shell in shell at point. Repeat from * to * to end of row.

row 9
(sequence row 3) Row 9 (above): ch 4, dc in same stitch as turning. * ch 1, dc in ch-1 space, dc in each of next 4 dc, skip next dc, ch 1, (2dc, ch 1, 2dc) in V-stitch. Ch 1, dc in each of next 3 dc, shell in shell, dc in each of next 3 dc, ch 1, (2dc, ch 1, 2dc) in V-stitch, ch 1, dc in each of next 4 dc, dc in ch-1 space.* Shell in shell at point. Repeat from * to * to end of row.

Row 10
(sequence row 4) Row 10 (above): ch 4, dc in same stitch as turning. * ch 1, dc in ch-1 space, dc in each of next 5 dc, skip next dc, ch 1, (2dc, ch 2, 2dc) in V-stitch. Ch 1, dc in each of next 3 dc, shell in shell, dc in each of next 3 dc, ch 1, (2dc, ch 1, 2dc) in V-stitch, ch 1, dc in each of next 5 dc, dc in ch-1 space.* Shell in shell at point. Repeat from * to * to end of row.

Row 11
(sequence row 1) Row 11 (above): ch 4, dc in same stitch as turning. * ch 1, dc in ch-1 space, dc in each of next 2 dc, (dc, ch 1, dc) in next dc. Dc in each of next 3 dc, skip next 2 dc, ch 1, shell (3dc, ch 2, 3 dc) in next ch-2 space. (from this point on, you will shell-in-shell here). Ch 1, dc in each of next 3 dc. Ch 1, shell in shell, ch 1, dc in each of next 3 dc, (dc, ch 1, dc) in next dc. Dc in each of next 2 dc, dc in ch-1 space.* Shell in shell at point. Repeat from * to * to end of row.
Row 12, repeat sequence row 2, increasing only in the four 'increase' points. (Refer to note below and pictures)
Row 13, repeat sequence row 3.
Row 14, repeat sequence row 4.
Repeat the four sequence rows from this point on, making sure to increase at the beginning of each row, on either side of the point, and at the end. Those are the ONLY places you will increase. Once the shell sequence is completed, shells will ALWAYS have a shell in them, and the 3-dc ribs between shells will ALWAYS be 'dc in each of next 3 dc'. If you remember this, and always keep the increases in the right places, you will be able to make this shawl very easily.
Notice that you are increasing in the ch-1 space at the beginning of the row, right before the point, right after the point, and in the ch-1 space at the end of the row. Between those points, you are making shell sequences and 3dc ribs. Those will not change.
A usual shawl on a size H hook will be about 25 shells on each side.
Once your shawl is the desired length, at the end of the last row, ch 1, then turn and work along the LONG edge. Spaced evenly, work sc across edge to make it look ‘finished’. You can also work along the shelled edges in this way, but I choose not to… most of the time!
I hope that these instructions help you to create beautiful shawls for many years to come.
A side note, I’ve found that for a quick, wonderfully warm and cuddly shawl, a size N hook and 4 skeins of Lion Brand Homespun work very well. There will be yarn left over, which I use to fringe the shawl, and also to crochet a snood to match it.
Enjoy!

By the way, if there is something on any of my instructional pages that is not quite clear, PLEASE bring it to my attention! I'd like for people to be able to use these pages to learn, and if it's not clear, then they can't!
Thanks in advance!


This is one of my favorite shawls. She's Burgundy, and she has a wonderful weight to her. I found the yarn for this one in a mill end bin at Earth Guild, and immediately went to work on her! She's long, soft, and has that batwing design I told you about at the beginning of this page. It makes the drape WONDERFUL, even when you're moving around.

This is that Lion Brand Homespun again, showing the 'batwing' design and fringe.
This one is my 'work shawl'. It's warm and servicable, 100% cotton, and it is a nice length for actually DOING stuff. I can sit at an SCA event on a nice fall day, wrap this around me, tuck the ends into my belt, and still be able to work with my hands and move around and carry things, without worrying about the shawl falling off. It's great to keep the chill away!
Keep coming back! As I have new shawls made, I'll try to get pics up of them!
By the way, if at any time you see something I've made that you'd like to purchase, please let me know! LOL I make too much of this stuff to keep it all to myself!
Also, you can look at my For Sale page to see what I've got on hand at any moment. :)
