
|
Overview of
Installation of the Sigma Cyclocomputer on an FZ1 (follow pics)
A bicycle computer will give accurate speed and distance values.
|
[] IowaZ Sitemap []
Send Email [] FZ1
Owner's Association [] IowaZ
Vmax Sitemap []
IowaZ
V65 Magna Page []
Use the FZ1
Sitemap to navigate all of the FZ
pages.
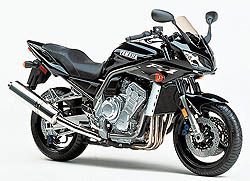
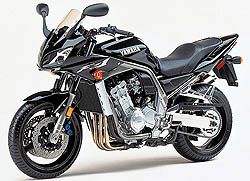
Yamaha FZ1
Speedometer Alternative
Sigma Sport BC 800 Cyclocomputer
Installation, Calibration, Functions
....Overview of
Installation of the Sigma Cyclocomputer on an FZ1 (follow pics)
....Remove the wheel magnet from the stock assembly and use quick- set epoxy to
"glue" the magnet to the wheel.
....Figure out how much extra wire must be spliced into the computer lead wire,
and make the splice.
....Mount the computer base and run the sensor wire down to the of a fork.
....Mount the pick-up sensor in the fork with tie-wraps and adjust.
....Apply another coat of epoxy over the sensor magnet and wrap with copper
wire, let dry overnight.
....Secure the lead wire running down from the bars with tie wraps.
....Figure out the wheel circumference following the directions and set the
computer.
....Put weight on the back seat to elevate the front tire while on the center
stand and spin the front wheel to check sensor pick-up.
....Test on the highway and adjust as necessary.

More General Directions
....Of course the first thing you need
to do is mount the computer on the bike, and then we can make the setting
input to the computer which will allow it to calculate speed, max speed,
distance traveled, etc.
Supplies
....You will need to collect
some basic items and tools: a couple of feet of speaker wire (or
other very thin wire) and very
small couplers, thinner or alcohol, quick setting epoxy, basic
tools you will have in your general tool collection.
....You can see some of the items by scanning down the page, however, I did
not take the time to make a general collection picture of tools and materials.
....You will need fast setting epoxy glue to glue the sensor magnet to the wheel,
several note cards on which to mix the epoxy, toothpicks to mix and apply the
epoxy, very thin copper wire (like speaker wire, multi-strand is nice,
but single will work) to splice into the wire lead from the computer to the sensor
(the original is not long enough), very small crimp style couplers will allow
you to make the wire splice without soldering the spliced wires, however
soldering is better if you have the equipment and experience (I just used
couplers as I was being lazy and wanted to see if they would
work). You can get small couplers at Radio Shack, but I am not sure they are
stocked that small by auto stores, as I did not look around.
....Thinner or
alcohol can be used to clean the gluing surfaces.
A small knife will work to strip the insulation off the wires, needle nosed
pliers will work to crimp the couplers. You will need some black
electrical tape to wrap around the splices. Get an assortment of tie
wraps as it will be easier to work with ten inch ties around the fork
leg. Needle nosed pliers are handy, and side cutters are needed to clip
the tie wraps.
....Before
you start take a good look at the pics above and visualize what you
will be doing. Note the location of the computer module on the
bar. It will easily mount in that spot with the enclosed rubber
"O" ring and be accessible for mode change.
....Note the wire lead will be passed down behind the cowling to the lower
part of the fork tube on either site. I chose the right but the left
would work. You can see the sensor magnet epoxied to the wheel and
wrapped with a couple of loops of thin copper wire. The pick-up sensor
is tie-wrapped to the fork legs using two large wraps. The bottom wrap
will tend to slip down onto the thinner part of the leg, which is of course
not good, so
you have to use a smaller tie to secure the two larger ones together, which
you can see next to the sensor,
....You can find a Sigma 800 BC Sport model in
online bicycle catalogs from places like Performance and Nashbar. I have
not done a total research of what other brands might work, but motorcyclists
do know that the Sigma 800 Sport will work. The Sigma 800 BC Sport
was about $25 in
2001. Some brands do not register speeds high enough.
The Sigma will go up to a bit over 165 mph. Wireless models generally do
not seem to function on motorcycles due apparently to interference of the
signal. The Sigma Sport 800 kit contains the Computer BC 800, bracket for cable and
sensor, magnet plus casing for assembly, small and large black rubber band for mounting bracket on handlebar.
....If you surf into this page and have experience with other brands, models,
or techniques that will work please post the info and I will add it into this
page.
Lets get started by gluing the sensor magnet to the wheel---


....Find the magnetic sender and
pull the sensor magnet out of it. This magnet needs to be glued to the
wheel with epoxy. The rest of the unit will not be used.
....We want to get the magnet glued onto the wheel with a thin coat of epoxy
and let it set up while we finish mounting the computer and sensor pick-up
unit, then we can put a heavier coat over the magnet for added security and
protection.


.... With thinner or alcohol, clean the magnet and the general location where the magnet will be glued. Thinner will be a better cleaning agent, but be careful as it is very flammable and will "corrode/remove" paint.

....Follow the direction on the
epoxy, which basically says to mix thoroughly equal parts on a surface that
can be thrown away.
....Dab a little mixed epoxy on the exact spot you want to mount the magnet
and cover the magnet with a light coating.
....Put the magnet in place and hold it there with your fingers and/or a stick
(I used a bamboo skewer).

....Take you time and be sure the epoxy has set up hard enough to leave. That is why you want quick set epoxy.

....After the Computer lead wire had been run and the sensor mounted, you will go back and wrap a two or more loops of thin copper wire around the magnet and then apply the entire magnet area with a much heavier coat of epoxy, and let it set up over an evening.

It is time to splice a section
of wire into the computer lead---
....The computer wire is not long
enough so you need to find out how much speaker wire to splice into the lead.

....Take a piece of sting and run
it from the mounting point on the handlebar down to place on the fork leg
where the pick-up sensor will be mounted.
....Use this length to figure out how much speaker wire you need to splice
into the computer wire. Be sure to have a few inches extra as you can
simply tie/tuck any excess wire behind the cowling just below the
handlebars.


....Select a spot about 1/3 the distance down
from the computer and separate the wires as above.
....Before making the cut, BE SURE to mark the wires so they can be
matched back up in the splicing process. Tape works well.

....Cut and strip the ends of the all wires including the section of wire which will be spliced into the computer lead.

....Either solder or use
connectors to join the ends of the wires together.
....Either use tape of heat-shrink to protect the coupled area and to add
strength to hold the splice together. If you use couplers, tape will
probably work better, if soldering heat-shrink will be better.

....You are now ready to mount the computer on the bars and run the lead wire and sensor down to the fork leg.
Time to finish up the mounting
of the computer and sensor---
....Mount the computer on the
handlebar.
....Feed the sensor down behind the cowling to the fork leg.
....Attach the sensor with two large tie wraps following the pictures below or
by using something better you have devised.
....After you have the sensor mounted take some small tie wraps and secure the
lead wire in various places behind the cowling.
....I ran the wire up the brake line and behind the cowling. You just
use common sense and your own ideas of the correct route to take the sensor
wire.

....It is important that the
sensor be very secure on the fork leg, especially at the speeds the FZ can
generate.
....The bottom wrap around the fork leg will want to slip down onto the
narrower portion, so you need to put at least one small wrap around both of
the larger wraps.
....NOTE: The fork sensor must be very close to the wheel magnet as it spins
around. You have to adjust that difference and try to keep it generally
between 1-2 mm.
....You can test the computer and sensor by putting some heavier weight on the
back seat to tilt the bike on center stand (or have someone push down on the
back), and then spin the front wheel (I used three 45lb Olympic weight
plates).

....Before closing up, take a good
look at your mounting procedure and make any needed correction.
....Now the very last thing to
do is to wrap a couple of loops of thin copper wire around the magnet and tie
it off, then cover the entire magnet area with a much heavier coat of epoxy to
protect and secure the magnet.
Now to set the computer to calculate speed and distances----
Setting the Wheel Circumference, WS
....Measure the wheel circumference by tying a string around the front tire of
the motorcycle (so that is loops through the spokes or perpendicular to the
line of travel of the wheel). Sit on the bike and roll the string to the straight down
position and mark the sport with a piece of tape on the floor or
concrete. Then roll the bike forward until the string comes around to
the down position again, keeping your weight down as much as possible,
and mark this spot. You might make several runs for
accuracy.
....Measure the distance between the tape marks. This will be the
circumference of the front wheel, the value of which you need in mm. If in the US
you are probably measuring in inches so you will need to convert by taking the
number of inches times 25.4mm/inch. Example: 72 11/16th inches is equal
to 72.7 inches. 72.7 inches time 25.4 equals 1845 mm. The 1845 is
the value you will need to use as the WS value. This is just an
example. You need to do your own measurement and calculation. The
WS value for a stock FZ will probably be 1840 - 1850 mm, depending on the tire
wear, inflation and weight of the rider.
....Another way to find the circumference is to use straight edges to measure the diameter and then take the diameter times 3.14. Follow the direction that come with the computer. I like to use two large carpenter squares held together to make a giant set of calipers.
....IMPORTANT: If you input, for example the 1845 mm value into the computer as the WS value, the computer will give you speed in kilometers per hour and distance in kilometers. If you are using English units you must convert by taking the mm value and divide it by 1.61, which is the number of kilometers in a mile. Thus in our example the value to input into the computer is 1845 divided by 1.61 or about 1145.
Basic Info for the Sigma Sport 800
Sigma Sport 800 kit contains
....Sigma Sport Cycle Computer BC 800
....Bracket for cable and sensor.
....Magnet plus casing for assembly.
....Small and large black rubber band for mounting bracket on handlebar.
Functions
....KMH = speed up to 183 mph or 300 km
....TRP = Trip distance
....AVS = average speed
....+ = Actual speed above AVS
....o = Actual speed = AVS
....- = Actual speed less than AVS
....STP = Stopwatch, starts at the start of the journey. Automatic
start/stop function.
....MAX = Maximum speed since last reset.
....DST = Total distance on cycle since installation.
....CLK = Clock
Battery
....One 1.5 Volt, type SR 44 (D357), 11.6 x 5.4 mm.
....Change batteries after two hears or as soon as the display
fades.
....Battery cover can be open with a screwdriver or coin.
....Before changing the battery take not of the WS and DST.
....Observe plus and minus poles.
....When battery compartment is open, the plus pole is observable.
....Refit the rubber seal for waterproofing if it detaches.
....After changing batteries the DST, WS and CLK
must be re-entered. DST is show as the first value on the display.
Sigma page update
and info----
....I am using 1845 mm/1.61 = 1145 as my WS value.
....With this WS value it would appear when the stock speedo is showing 50 and the
actual speed is 47. The stock speedo from that point to 100 is running
about one mph fast for every ten mph on speedo. Thus at 100 on the
speedo the computer will show about 92-93. Below is an list of relative
comparisons to date, but realize they are just ball park figures on
accuracy. They do however show that the stock speedo it running 4-6 mph
fast at everyday traffic speeds. And if this is a valid trend, then the
150 mph I ran on my speedo without headshake is really about 138 actual.
And another interesting interpolation is that the 165 showing on the speedo
and reported as about the top value for people that have run to the rev
limiter is about 154 actual, which is right on top of what is being stated as
the calculated top speed of the FZ1.
Comparison of speedo reading to computer value:
speedo = computer
40 = 38
50 = 48
60 = 57
70 = 66
80 = 75
90 = 84
100 = 93
Interpolating above 100:
110 =102
120 =111
130 =120
140 =129
150 =138
160 =147
170 =156
Sigma information and impressions:
Post 1----Early July 2001,
immediately after installation and testing for the first time----
....I will keep taking wheel
measurements and see if I can become more and more accurate with the WS
setting on the basis of a series of measurements through time to see if my
initial values above are relatively valid. I am guess they are
close. I have used bicycle computers since they first hit the market in
the mid '80's and feel quit comfortable with their set up, settings and
use.
....I am guessing we are very close with the cycle computer values as the top
speed interpolation from the computer value is right on top of the calculated
top FZ speed.
....Note: This means also that the odometer is incorrect by a value of
about 3%. I will make an accurate test sometime. And of course
this means the gas mileage is not as good as we think, up to about a mile per
gallon lower than out general calculations. Thus on my 1000+ mile trip
to Road America getting 44+mph gas for the trip according to the speeds, was
probably about 43+, which is still good. I am getting over 40 actual on
every tank fill, disregarding the type of riding. My last tank was a
shade over 40 with a great deal of stop and go town riding.
Post 2---July 15, 2001, after a 1200 mile tour to southern ILL, MO, northern
ARK and Bass Pro---
....For me, the instrument cluster is pretty mediocre. I use the Sigma
bicycle computer most of the time, plus it is accurate. I checked my
Sigma readings with two other riders with Sigma's and every time they were
within 1-2 tenths of a mile of each other in every. Bottom line is the
Sigma is accurate and the stock speedo/odometer is off by about 3 miles in
every 100 or 3% and off about 1mph in every ten after about 50mph. Thus
a stock speed reading of 50 is about 48, 60=57, 70=66, 80=75, 90=84, 100=93,
etc. It is very hard to read the stock speed for an exact comparison to the
Sigma while on the move, but the comparison values are very close.
...Regarding gas mileage. Before this trip I had been running the FZ
exceptionally hard. At high speed the mileage has been 40-44.
During normal hard road riding 43-46. Now after some more normal
cruising time of 50-65mph it would appear the mileage at civil speeds is 48-51
on the stock speedo.
....Some actual trip values of which I will state stock speedo, and also Sigma
or actual. For the entire trip the average stock was 49mpg, actual
47.5mpg. There were some fast riding times and times of hard
acceleration, city riding, etc, so the entire trip values are a little less
than the time spent cruising at the rural roads at relatively constant speeds
of 45-65 mph.
....Gas mileage for the cruising mileage was 51mpg stock or 48.6mpg
actual. While on more aggressive days it was 47.8mpg stock or 46.0mpg
actual.
....Personally, I am more than pleased with the gas mileage, tank capacity,
etc. for all types of riding. I ran several tanks 250mpg and had a half gallon
left at fill-up. We ran some roads without stations for 50-80 miles, so
one can get into petro trouble without constant fill-ups on many other
bikes. It is nice to have FZ range.
....I ran high octane gas this trip to see if I noticed any performance
difference or mileage changes. I can detect none at this time. I
have been running 89 octane in the V65, Vmax, FZ this season. I think the 89
may not be letting the Vmax run smoothly. So I
am going back to high octane on the Max to see and will report if I notice
improved smoothness in the Max. It could just be that the FZ runs so
well and I have been riding it so much that I am detecting in the Max a false
sense of rough running.
Post 3---October 2001
....I have not been able to detect any difference in gas octane performance
that I can be sure about. My three bikes at this time seem to run just
fine on 87-93.
....Since the July run to 150 speedo, I have made a couple of runs to 148 and
149 actual as measured by the Sigma, and showing about 160+ on the
speedo. I cannot see the speedo accurately or long enough at that speed
to have a valid speedo reading to report. But at this speed the the
Demon shield in place, there is no indication of headshake or instability on
my FZ.
Use the FZ1 Sitemap to navigate all of the FZ pages.
|
|
[] IowaZ Sitemap []
Send Email [] FZ1
Owner's Association [] IowaZ
Vmax Sitemap [] IowaZ
V65 Magna Page []


Any reproduction of this site or it's contents requires express written consent.
|
To Open a Search or Find-a-Word Window, press "Ctrl" and "F" at the same time. |


