
|
|
[] IowaZ Sitemap []
Send Email [] FZ1
Owner's Association [] IowaZ
Vmax Sitemap []
IowaZ
V65 Magna Page []
Use the FZ1 Sitemap to navigate all of the FZ pages.
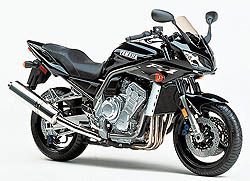
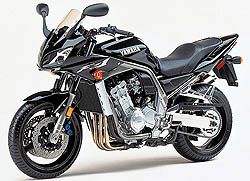
Yamaha FZ1
Exhaust Can and Pipe
Removal
in preparation for the installation of a
FZ1 GYT-R Carbon Slip-on
....Removal of the stock exhaust
and pipe on the FZ is very easy.
....Tools: 8mm Allen socket or wrench, 12 mm six point socket or wrench, are
all that is needed.
....I used the items shown below.

....If you inspect the attachment
points of the can and pipe it is obvious there are two. The top
attachment just behind the passenger foot peg and the front near the center
stand.
....Take an 8 mm Allen socket or wrench and loosen the back mount. You
will not need a wrench to hold the nut on the back of the bolt as it is held
by the hanger. In an older bike when the bolt/nut bond together, a
wrench/socket may be needed. You can take the bolt all the way out just to get
a feel of the pipe without this "hanger" in place. Do support
the can with your hand to keep from stressing the front attachment, but you
will note the can/pipe are still quite solidly held in place by the front
attachment.
....Replace or keep the back bolt in place but ready to be removed by
hand. Now move down to the front attachment.

....Find the 12 mm head of the
bold on the bottom clamp, which is under the pipe by the center stand.

....Take a 12 mm socket or wrench
and remove the bolt on this clamp all the way out.
....You will not need a wrench on the back side, as the nut is held in
place. Again, as the bike gets older, one may have to put a socket on
the nut.

....Lets review. You have
loosened the back hanger bolt and have it ready to come out by hand.
....The bottom clamp bolt is completely out and the clamp is loose.
....I do not have pics of the actual removal of the can/pipe but here is what
you will do.
....The pipe will come loose at the joint in the pic above.
....Support the can with one hand and remove the upper bolt.

....Take both hands and slightly rotate the can a little back and forth to
loosen the joint at the front.

....Be patient and rotate carefully. You will start to feel this joint
loosen. There is a round gasket between the exhaust pipe and the header
collector pipe that will hole the joint fairly tight. Be careful and
make little moves as for two reasons. You want to attempt to save and
reuse this gasket if possible, and you do not want to bend or stress the
header collector pipe.
....Use common sense and remove the can/pipe, then set it aside on some
cardboard or something to protect from scratches.

....Note: If the gasket is on the inside of the exhaust pipe and in good
shape, it is a good idea, just to leave it for storage with the stock system
and buy an new gasket with the new system. I tend to just put new
gaskets on.
....Check where the gasket was left.
Generally the gasket will stay inside the pipe that you removed.
Sometimes it will stay on the outside of the header collector pipe (top left)
, which is good, because then the new exhaust pipe can be carefully worked
over the gasket.
....If, as usually is the case, the gasket is inside the exhaust pipe,
you will have to attempt to carefully lift it up at the inside edge and work
under and around it in hopes of removal in one piece to be reused. It
will be easier to just put on a new gasket.

....Store the stock exhaust for
reuse. Be careful not to store metal items, even stainless, in an area
where household chemical are kept or that is moist. Chemical are
constantly "evaporating" into the air along with moisture.
Even a stainless exhaust will react, so monitor items you have in storage.
....Installation and notes on the Yamaha Carbon Fiber Slip-on will be posted
on another page.


....Yamaha
says: After
3 years experience in performance exhaust system development, Yamaha Parts
& Accessories Division came up with our next generation round systems.
These pipes use even more lightweight materials than before to rival the best
race systems on the market. Special high-volume design helps improve exhaust
flow performance. Slip-On Exhaust installs easily without removal of the stock
header or EXUP Valve, and adds 4.5 horsepower in the midrange, plus 1 or more
peak horsepower. All GYT-R Slip-on exhausts install easily. For
closed-course competition only.
....Carbon Saves 7 pounds compared to the OE system; adds 4.5 HP throughout
the mid-range and 1 peak HP. Aluminum
Saves 5-3/4 pounds compared to the OE system; adds 4.5 HP throughout the
mid-range and 1 peak HP.
Use the FZ1 Sitemap to navigate all of the FZ pages.
|
|
[] IowaZ Sitemap []
Send Email [] FZ1
Owner's Association [] IowaZ
Vmax Sitemap [] IowaZ
V65 Magna Page []


Any reproduction of this site or it's contents requires express written consent.
|
To Open a Search or Find-a-Word Window, press "Ctrl" and "F" at the same time. |

