![]()
![]()
Mix And Mold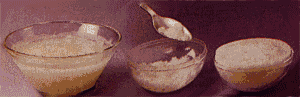 Pour the sugar into a large bowl. (Shown here white.) In a smaller bowl, mix several drops of food coloring and one egg white and mix well. Add the colored egg white to the sugar and knead it in till the color is thoroughly blended with no lumps. Next, dust both mold halves with corn starch to prevent sticking. With your hands press the sugar into it, packing tightly and pressing down with the palm of your hand. When it's full, use the back of a knife or spatula to smooth the top. Immediately unmold. To unmold: very carefully place a flat piece of cardboard or a plate over the top of the mold. Keeping one hand on top of the plate, and the other under the mold, turn the mold over. Tap the mold with the back of the spatula. The egg should easily slide out of the mold to the plate. Unmold the other egg half in the same manner. Then you will need to carve out a small opening at the end of each half to make the peep hole to peer through when the egg is put back together. Tip: To cut a nice even section off the end to look through, take a piece of floss about 8" wider than the opening and wrap it around a finger on each hand and "saw" through the sugar. This will give you a perfect cut. Repeat with the other half, keeping the eggs lined up side-by-side so that you make them identical. Leave the cut sections in place. DO NOT try to remove it yet ! Allow it to harden for exactly 2 hours. 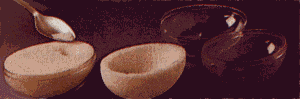 Hold one mold in the palm of your hand and with a spoon, gently begin to scrape the sugar out of the center. Be VERY careful to leave a 1/2" shell all the way around. If you scrape it out any thinner, it will break when you work on it. When you're finished scooping them out, turn them back on the flat sides on the plate and let them dry overnight. They need to be hard before you can work on them further. |
Decorate The Inside
Royal Icing Recipe:
Ingredients:
Directions: |
![]()
![]()
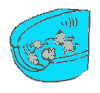
Finished Eggs In A Rainbow Of Colors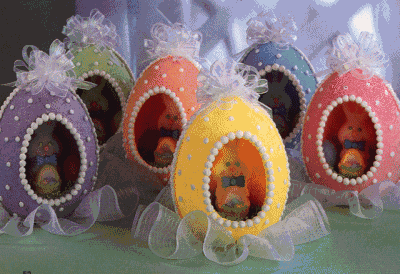
|
| To make this variation of "stand up" egg, you'll need to flatten the bottom of the egg when you unmold it. Using floss, slice a small section off of each rounded end making sure the egg halves are side by side and even. Just take enough off to flatten the bottom. You don't want to cut too much off the bottom of the egg and weaken it. Then, instead of cutting off an end with the floss, you will need to slice off the "front" section. With the front egg half unmolded, flat side down on the plate, hold the floss horizontally and slice off the front section. Again, you'll need to leave this section here for two hours before you can attempt to remove it and carve out your egg. After 2 hours, remove the top section and carefully carve out the center leaving this section flat while working. your egg half will look like a ring with a large opening where you will glue it to the other half and the opening on top to look through. You can make a ribbon bow for the top of your egg and attach it with a little icing. |
![]()
![]()
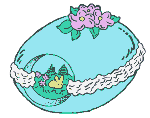
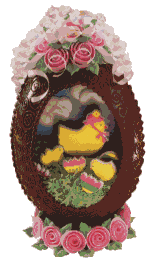
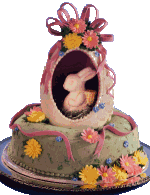
More Variations Of Panoramic eggs...
|